
Welcome to our Diablo 4 Upheaval Walking Arsenal Barbarian Build for Endgame. This is a high actions per minute (APM) build that is fun, engaging, and is fast paced. It truly is the antithesis of all other Barbarian builds. You will be taking on large packs of enemies as it is primarily an AOE build, swapping between multiple weapon types, and have almost 100% Berserk uptime while spreading incredible amounts of the Vulnerable debuff. While this is a fun build, it does fall off in the endgame as it is mainly focused on speed clearing easy content and pushing to higher paragon levels. With that being said, it certainly can be played in the late Endgame with success. In this article we will cover the Skill Tree, Aspects, Paragon Board, Glyphs and everything you need to run the Upheaval Walking Arsenal Barbarian build!
Pros
- Fantastic AOE damage.
- Perfect for speed clearing easy content.
- Fast leveling build.
- Fun and rewarding when played correctly.
Cons
- Very punishing if you do not play perfectly.
- Has many cooldowns/buffs to be aware off.
- Requires you to aim abilities.
- Difficult to play in late endgame.
Skill Tree and Paragon Board
Board Order and Glyphs
- 1.) Starting Board – Might: This build’s damage functions solely on the output of our Two-Handed Weapons. This Rune will allow for increased damage while wielding this weapon type.
- 2.) Warbringer – Exploit: Due to our high uptime on Vulnerable this is a very potent damage increase.
- 3.) Carnage – Wrath: After the Season 1 Patch this now increases all damage and not just core abilities. As such, it is an even more powerful way to get damage from this build.
- 4.) Blood Rage – Ire: High Berserk uptime from this build will allow this Rune to properly shine and provide a large damage increase.
- 5.) Decimator – Undaunted: Since we will have a great deal of Fortify, this will be a rather consistent source of increased damage.
- 6.) Bone Breaker – Mortal Draw: This synergizes perfectly with Walking Arsenal. Frequent weapon swapping will drastically increase our damage output because of the flat damage increase this Rune provides on Skills that swap weapons.
Glyph Leveling Priority
Below you will find the important Rare Glyphs for the HotA Barbarian. Make note, you should upgrade each Glyph to level 15 first, and then push them to max.
- 1.) Mortal Draw
- 2.) Wrath
- 3.) Might
- 4.) Exploit
- 5.) Undaunted
- 6.) Ire
Weapon Technique
Expertise: Weapon Swapping – This build requires weapon swapping of 3 weapons to function. There is no true “Primary Weapon”. Use the list below to know which weapons to assign to your abilities.
Ability Assignments
- Lunging Strike: Dual-Wield – We need a third weapon for swapping, so it becomes a filler slot. As such, Dual-Wield is the best option since our other abilities benefit far more.
- Upheaval: Two-Handed Slashing (Sword) – Will apply an additional Bleed debuff to large packs for more damage.
- Death Blow: Two-Handed Bludgeoning (Mace) – Helps with Fury generation. We mainly just need a high damage weapon for max DPS.
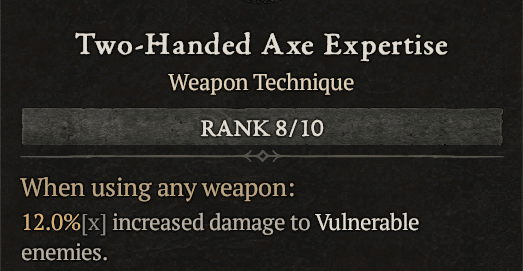
Technique: Two-Handed Axe Technique – This will provide a significant damage boost to Vulnerable enemies. This will be a large damage increase because of our high uptime on the Vulnerable debuff.
Season One: Malignant Hearts
The Seasonal Affix tied to Season One will add a huge boost to all builds in Diablo 4. This will provide you essentially bonus gem slots that will add unique effects which may provide massive damage, defensive, or utility boosts. For more information on this, please refer to our Season 1 Malignant Hearts Guide
Below you will find the suggested Malignant Hearts for this build:
Recommended
- Malignant Pack (Wrathful, Super): Cycle through a Malignant bonus every 20 kills:
- Gain 20% Attack Speed
- Core and Basic Skills have a 15% chance to fully restore your Primary Resource
- Every 21 seconds, gain a Barrier absorbing 85 – 102 damage
- Revenge (Brutal, Defensive): 10-20% of incoming damage is instead suppressed. When you use a Defensive, Subterfuge or a Macabre skill, all suppressed damage is amplified by 250% and explodes, dealing up to 1360 – 2040 Fire damage to Nearby enemies.
- The Barber (Wrathful, Super): Critical Strikes and all subsequent damage within 2.0 – 4.0 seconds is absorbed by your target. Then, the absorbed damage erupts onto surrounding enemies. Stored damage is increased by 10% per second.
Optional
- Ignoring Pain (Wrathful, Super): Incoming damage has a 5-15% chance of being ignored and instead Healing your for 17 – 68.
- Focused Rage (Vicious, Offensive): After spending 100-60 Fury within 2 seconds, your next Non-Basic Skill’s Critical Strike Chance is increased by 20-30%.ant Pack (Wrathful, Super): Cycle through a Malignant bonus every 20 kills:
- Picana (Vicious, Offensive): Critical Strikes electrically charge the enemy for 0.75 – 2.50 seconds, causing lighting to arc between them and any other charged enemies dealing 68 – 136 lightning damage.
- Dark Dance (Vicious, Offensive): Every 5 seconds while above 60% Life, Core Skills cost 51 – 68 Life instead of your Primary Resource. Skills that consume Life deal 10% – 20% increased damage.
- The Lionheart (Brutal, Defensive): You gain 10% Barrier Generation. You Heal 3 – 7 Life per second while you have an active Barrier.
- Resurgent Life (Brutal, Defensive): While below 40% – 60% Life, you receive 50% – 60% more Healing from all sources.
Legendary Aspects & Gearing
Below is a list of Aspects we use and recommend for this build. The Aspects are in order starting from the most to least important.
Required
These Aspects act as the core of the build and allow it to function. These will ALWAYS be needed.
- Aspect of Encroaching Wrath (Offensive)
- Aspect of Berserk Fury (Resource)
Recommended
These Aspects are suggested for improving damage output or overall defensiveness. Some of these may be interchanged with other preferences or in the case of obtaining a Unique drop.
- Conceited Aspect (Offensive)
- Edgemaster’s Aspect (Offensive)
- Smiting Aspect (Offensive)
- Aspect of Accelerating (Offensive)
- Aspect of Berserk Fury (Resource)
- Aspect of Disobedience (Defensive)
- Steadfast Berserker’s Aspect (Defensive)
- Aspect of the Iron Warrior (Defensive)
- Aspect of Might (Defensive)
- Weapon Master’s Aspect (Utility)
- Ghostwalker Aspect (Mobility)
Optional
- Death Wish Aspect (Offensive)
- Aspect of Berserk Ripping (Offensive)
- Aspect of Limitless Rage (Offensive)
- Earthstriker’s Aspect (Offensive)
- Aspect of the Protector (Defensive)
- Aspect of Numbing Wrath (Defensive)
- Iron Blood Aspect (Defensive)
- Relentless Armsmaster (Resource)
- Bold Chieftain’s Aspect (Resource)
- Weapon Master’s Aspect (Utility)
- Wind Striker Aspect (Mobility)
Aspect Slots
Note that Aspects are limited to specific gear slots. Use the list below to decide where to put your aspects. This build does not restrict you, but note some unique items may require you to adjust accordingly:
- Offensive – Amulets, Gloves, Ring, Weapons
- Defensive – Amulets, Chest, Helm, Legs
- Mobility – Amulets, Boots
- Resource – Rings
- Utility – Amulets, Boots, Chest, Gloves, Helm
Suggested Aspect Slots
| Item Slot | Aspect |
| Helm | Might |
| Chest | Iron Warrior |
| Gloves | Weapon Master’s |
| Pants | Disobedience |
| Boots | Ghostwalker |
| 2H Bludgeoning | Edgemaster’s |
| 1H Dual Wield | Accelerating |
| 1H Dual Wield | Encroaching Wrath |
| 2H Slashing | Conceited |
| Amulet | Steadfast Berserker’s |
| Ring #1 | Smiting |
| Ring #2 | Berserk Fury |
Unique Items
This build has a few Unique items it can take advantage of them. Some are mandatory to maximize the damage of the build, others are potential defensive options depending on preference.
- Overkill (Required): Death Blow creates a shockwave, dealing [24% – 38%] of its Base damage to enemies. Enemies who die to this effect also reset Death Blow’s Cooldown.
- Temerity (Recommended BIS): Effects that Heal you beyond 100% Life grant you a Barrier up to [50% – 100%] of your Maximum Life that lasts for 30 seconds. NOTE: If you use this Unique, make sure to focus on passives/abilities that provide additional healing.
- Harlequin Crest (Recommended BIS): Gain [5% – 8%] Damage Reduction. In addition, gain +2 Ranks to all Skills.
Best in Slot
| Item Slot | Aspect |
| Helm | Harlequin Crest* |
| Chest | Iron Warrior |
| Gloves | Weapon Master’s |
| Pants | Temerity* |
| Boots | Ghost Walker |
| 2H Bludgeoning | Overkill* |
| 1H Dual Wield | Edgemaster’s |
| 1H Dual Wield | Encroaching Wrath |
| 2H Slashing | Encroaching Wrath Conceited |
| Amulet | Steadfast Berserker’s |
| Ring #1 | Smiting, Berserk Fury or Accelerating |
| Ring #2 | Smiting, Berserk Fury or Accelerating |
Stat Priority and Gems
| Item | 1 | 2 | 3 | 4 | 5 | Gem |
| Helm | Cooldown Reduction | Damage While Berserking | + Max Life | Strength | Armor | Royal Sapphire |
| Chest | Damage Reduction while Fortified | Damage Reduction from Close enemies | + Ranks to Rallying Cry | Damage Reduction from Distant enemies | + Max Life | Royal Sapphire |
| Gloves | + Ranks to Upheaval | Critical Strike Chance | Critical Strike Chance against Injured enemies | Attack Speed | Strength | |
| Pants | Damage Reduction while Fortified | Damage Reduction from Close enemies | +Max Life | Damage Reduction from Bleeding enemies | Armor | Royal Sapphire |
| Boots | Movement Speed | Berserk Duration | Fortify Generation | Movement Speed from Killing Elites | Strength | |
| Amulet | + Ranks to Heavy Handed Passive | + Ranks to All Weaponmaster Skills | Cooldown Reduction | Damage Reduction while Fortified | Damage Reduction | Royal Skull |
| Ring x 2 | Vulnerable Damage | Critical Strike Chance | Critical Strike Damage | Fortify Generation | + Max Life | Royal Skull |
| Weapon 1H | Weapon Damage | Vulnerable Damage | Critical Strike Damage | +Damage while Berserking | Strength | Royal Emerald |
| Weapon 2H (Slashing and Bludgeoning) | Weapon Damage | Vulnerable Damage | Critical Strike Damage | +Damage while Berserking | Strength | Royal Emerald |
Rotation
The Upheaval Walking Arsenal Barbarian Build is one of the more complex options you can play. It will speed through low tier content and take on large packs of enemies. It will lack some single target damage, and it will struggle on higher tier Nightmare Dungeons, but it can be played in most content still.
This build will require focus, high APM, and monitoring many timers. But, when played properly, it is one of the most fun builds the Barbarian has to offer.
General
- Use Lunging Strike to engage enemies, and begin the timer for the Walking Arsenal passive.
- Use Upheaval on as many enemies as possible.
- Use Death Blow to proc the maximum Walking Arsenal bonus. This will deal high damage and generate Fury. As long as it kills something it will reset.
- IMPORTANT: You need to use each of the three abilities listed above at least once every 6 seconds to maintain each individual Walking Arsenal buff. Goal: Maintain all 3 buffs to receive additional 15% damage increase.
- Never follow-up using the same ability back to back. Always use something different to maximize weapon swapping potential.
- Defensive abilities such as Iron Skin, or Rallying Cry, can be used when you are overwhelmed and need an escape.
- Rallying Cry will provide movement speed and resource generation as well if you trying to speed clear.
- When you have large trash packs clumped together, use Iron Maelstrom for high AOE damage. NOTE: Do not be afraid to use this cooldown, you have great cooldown reduction and will have it often.
Bosses
- Activate Rallying Cry for Fortify and resource generation.
- Use Iron Skin as a DPS cooldown. The Barrier it provides will synergize with Conceited.
- Use Lunging Strike
- Use Upheaval
- Use Death Blow
- Proceed to use this combo as it is available.
- Iron Maelstrom can also be used if the target persists.
- Maintain Walking Arsenal passive for longer duration fights.
Conclusion
This concludes our Diablo 4 Upheaval Walking Arsenal Barbarian build! For more information on Diablo 4, including Class Builds and Guides, be sure to check out our Diablo 4 home page!