
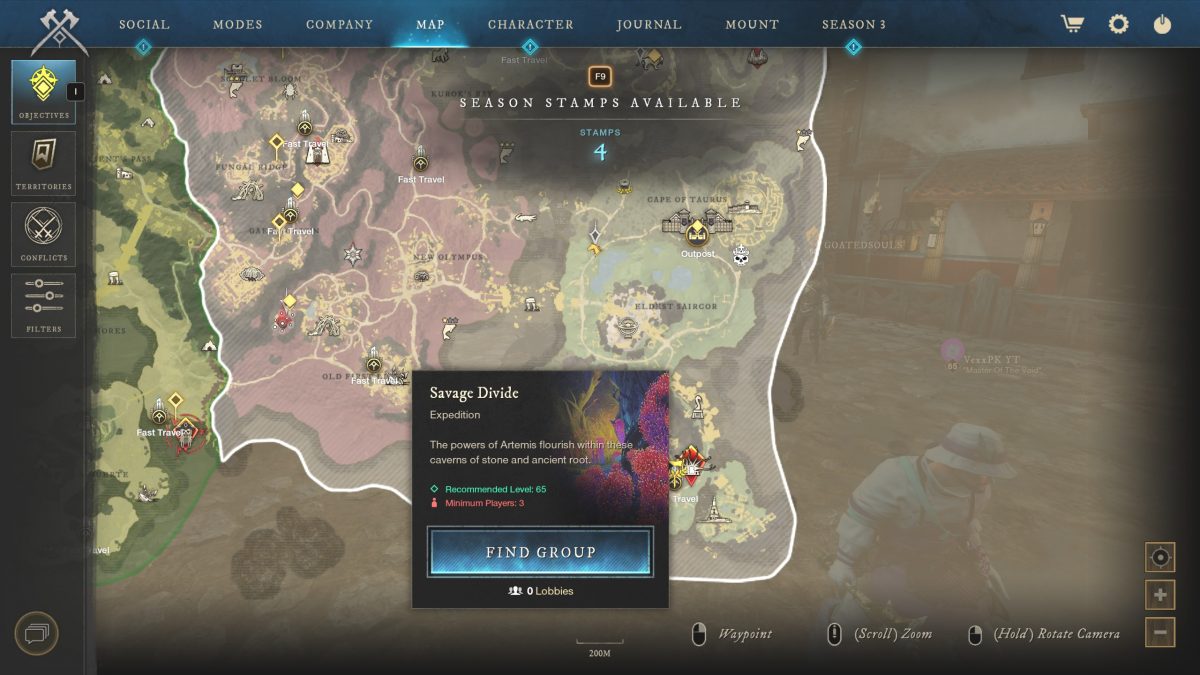
Introduction
The Savage Divide expedition is an expedition intended for players level 65. The powers of Artemis flourish within these caverns of stone and ancient roots. Embark on a dangerous expedition to track down the primordial Beast Lords before pandemonium emerges from the depths of Aeternum.
In order to access this expedition you must own the expansion, Rise of the Angry Earth.
Savage Divide Drops
Listed below are all of the named items you can acquire from this expedition and its mutated versions.
Weapons
| Weapon | Where it Drops | Difficulty |
|---|---|---|
| Footfall | Mahantaram | Normal+ |
| Fist of Kurok | Kurok | Normal+ |
| Not a Monkey | Truk | Normal+ |
| A Mad House | Madhu | Normal+ |
| Touch of the Icicle | Mbita | Normal+ |
| Incendior | Hodari | Normal+ |
| Evolutionary Response | Otesha | Normal+ |
| Toothpick | Lockjaw | Normal+ |
| Charon | Styx | Normal+ |
| Pot Shot | Expedition Wide | Normal+ |
| Orchard | Expedition Wide | Normal+ |
| Nathan’s Hammer | Expedition Wide | Normal+ |
| Primal Straightsword of the Ranger | Silverback Smasher | Mutation 3 |
| Primal Hatchet of the Soldier | Silverback Smasher | Mutation 3 |
| Primal Warhammer of the Ranger | Silverback Smasher | Mutation 3 |
| Primal Greataxe of the Soldier | Silverback Smasher | Mutation 3 |
| Primal Bow of the Ranger | Silverback Smasher | Mutation 3 |
| Primal Musket of the Ranger | Silverback Smasher | Mutation 3 |
| Primal Fire Staff of the Soldier | Silverback Smasher | Mutation 3 |
| Primal Life Staff of the Sage | Silverback Smasher | Mutation 3 |
| Primal Rapier of the Scholar | Silverback Smasher | Mutation 3 |
| Primal Spear of the Soldier | Silverback Smasher | Mutation 3 |
| Primal Ice Gauntlet of the Scholar | Silverback Smasher | Mutation 3 |
| Primal Void Gauntlet of the Sage | Silverback Smasher | Mutation 3 |
| Primal Blunderbuss of the Soldier | Silverback Smasher | Mutation 3 |
| Primal Greatsword of the Ranger | Silverback Smasher | Mutation 3 |
| Primal Flail of the Soldier | Silverback Smasher | Mutation 3 |
Armor
The armor drops from the savage divide can be obtained from mutation level 1+. The armor consists of the “Primal” armor sets. This set is available in light, medium, and heavy.
The heavy set comes locked with strength, the medium set is locked with dexterity, and the light set is locked with intelligence. Each set comes locked with 2 perks with a 3rd perk randomly rolled. The perks are as follows for each set:
| Armor | Perk 1 | Perk 2 |
|---|---|---|
| Helmet | Elemental Aversion | Sturdy Energy |
| Chest | Elemental Aversion | Critical Retribution |
| Gloves | Elemental Aversion | Shirking Fortification |
| Pants | Elemental Aversion | Shirking Fortification |
| Boots | Elemental Aversion | Empowering Breaker |
Shields
| Shield | Where it Drops | Difficulty |
|---|---|---|
| Dragon’s Scale | Zyggot | Expedition Wide |
| Primal Round Shield | Silverback Smasher | Mutation 3 |
| Primal Kite Shield | Silverback Smasher | Mutation 3 |
| Primal Tower Shield | Silverback Smasher | Mutation 3 |
Jewelry
| Jewelry | Where it Drops | Difficulty |
|---|---|---|
| Endless Thirst (Artifact) | Mahantaram | Mutation 1+ |
| Gorilla’s Strength | Expedition Wide | Normal+ |
| Mammoth’s Revenge | Expedition Wide | Normal+ |
| Wolf at the Door | Expedition Wide | Normal+ |
| Primal Amulet | Silverback Smasher | Mutation 2+ |
| Primal Earring | Silverback Smasher | Mutation 2+ |
| Primal Ring | Silverback Smasher | Mutation 2+ |
Mount Item
| Mount Item | Where it Drops | Difficulty |
|---|---|---|
| Powerful Cavalier Crest | Expedition Wide | Mutation 1+ |
| Minor Heartrune of Primal Fury | Expedition Wide | Normal+ |
| Crystalline Fur | Mahantaram | Normal+ |
| Dense Savage Divide Materia | Mahantaram / Kurok | Normal+ |
Location & General Information
The Savage Divide is a level 65 Expedition located in the southern part of Elysian Wilds. This is an end-game expedition that will be in the weekly mutation rotation of expeditions. You can enter via the expedition entrance or by using the group finder function.
Once inside the expedition you will encounter mostly beast enemy types. This means you will want to have beast coatings and beast ward potions on hand.
Savage Divide Walkthrough & Boss Mechanics
Upon entering the expedition there will be pedestal to your right. One player will need to head to pedestal and grab the orb. They must then go down the ledge and place the orb into the empty pedestal beside the door. This will open the door so you can progress.
However, there are are also several Silverback Smashers guarding the way. You will need to take them out first and then progress through the dungeon.
Vast Chasm
The Vast Chasm is a very large, open room. Clear the lions to the right and head to the door immediately to your right past the lions. Utilize your azoth staff to open the door. This will lead you into the Sunken Shrine.
Sunken Shrine
Here you will encounter a couple chameleon’s and one named chameleon, Styx. Styx does not have any additional mechanics other than a normal chameleon but be aware that hits much harder, and has quite lot more health.
Once Styx is defeated you will encounter another named mob, Hodari, a gorilla. He is coupled with another mob called a Thunder Charger. There’s not really any mechanics to speak of, but both of these gorillas can do quite a lot of damage so be aware of the charges and slams they perform.
Once killed there is a path to right with another named mob, Death Razor, a large flower. Take out the named and continue down the path to the door guarded by an armored drake. Once killed you can progress through the door back into the Vast Chasm.
Vast Chasm
Makes sure a party member picks up the sphere as you run up the stairs. You’ll take the sphere and place it on the pillar at the door to your right. The door is guarded by a razor lotus, gorilla, and some other trash mobs. So make sure the path is clear before taking the sphere to the door. Once complete make your way down the ramp to the East to the gate to Rockfall.
Rockfall
Here you will encounter a large named Drake, Zyggot. Once killed, progress past him through the gate and grab the orb. This will take you back into the Vast Chasm. Here you will carry the orb to the ancient gate in order to progress. There are several trash mobs within the Vast Chasm, so be aware of those as you transport the orb. There’s also some Rock Hurler gorillas on the ledge beside the gate, so be aware of those.
When you open the gate you will be met with Madhu, a named Mammoth.
The Secret Chest
You can kite Madhu down into the center of the Vast Chasm and have him run into the rock. This will crush the rock and reveal a secret chest. This is optional. Once Madhu is defeated progress into the Ancient Crossing
Ancient Crossing
There’s several trash mobs here that you will need to clear. Then, you’ll encounter the first boss of the dungeon, Kurok.
Den of Kurok – 1st Boss Mechanics
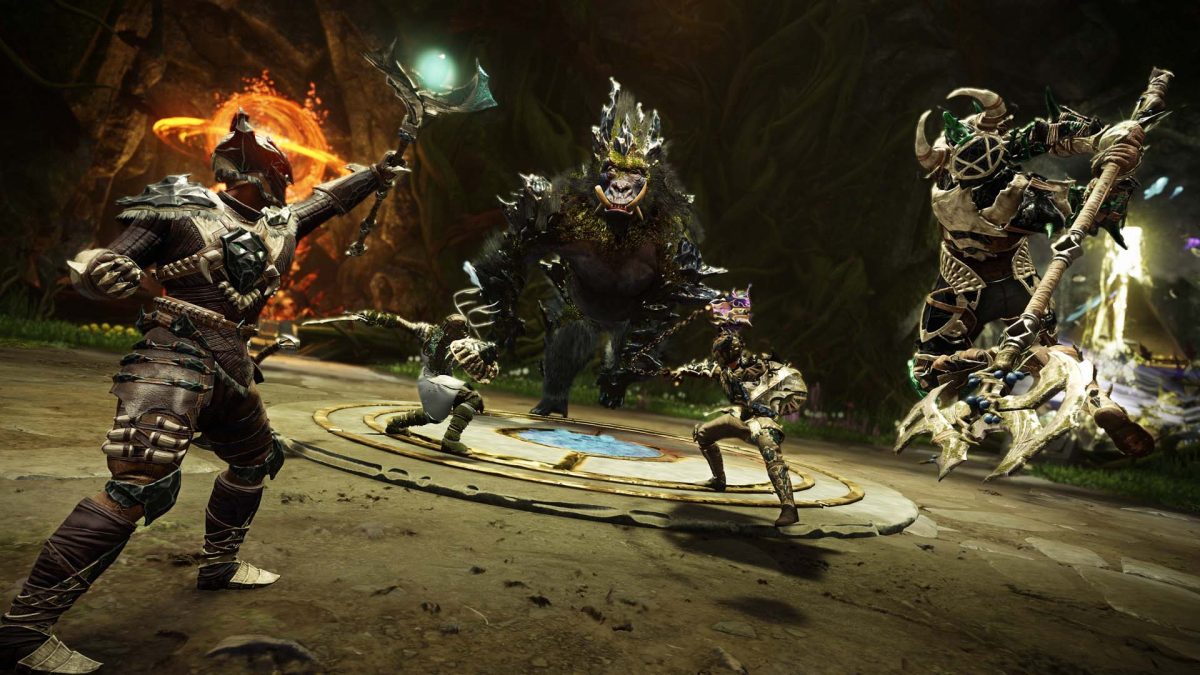
Upon entering the Den of Kurok you will notice several different elemental constructions around the room. These are a pivotal component to defeating Kurok. The boss will head over to one of the elemental locations and empower himself with an element. After a short duration one player from the group can go activate that same element. There’s a total of 4 different elements:
- Nature (Green)
- Ice (White)
- Fire (Red)
- Lightning (Yellow)
Whichever player activates that particular element will be responsible for dispelling that element during the fight. For example, if Kurok activates ice and you grab the ice element, you will have to dispel the ice mechanic for the duration of the fight. You can see which player has activated which element by the glowing circle underneath them. Each element has a different color.
After Kurok has activated an element you will periodically see large circles on the ground. When you see the circle that corresponds with your element you will need to run into that circle to dispel it. If you don’t then after a short duration a large a large AoE will go off (depending on the element) damaging any player caught inside. This can get quite hectic once all the elements are active. So, make sure each party member is responsible for an element. This is good discuss prior to the fight so there’s no confusion.
Elemental Attacks
When Kurok activates a particular element he will a variation of attacks.
- Fire
- Kurok will periodically send out large waves of lava. There are gaps between the waves that you can maneuver through. There’s usually 3 sets of 2 waves that occur. These waves will traverse from one end of the arena to the other.
- Kurok will dash from one end of the arena to the other leaving behind a large trail of fire. The fire will split into and disperse outward into 2 sections. The fire does quite a lot of DoT damage to make sure to avoid the trail.
- Nature
- When empowered with nature, the boss will throw large boulders into the air in a line. Make sure you move out of the way of the boulders when they are thrown.
- He will also periodically spawn eruption circles on the ground. These are indicated by the small glowing green circles. Make sure you move out of the circles to avoid damage.
- Lightning
- Kurok will summon a lighting ball and throw it at a player.
- He will leap into the air and smash down on the ground causing an AoE of lightning damage around him.
- Ice
- When empowered with ice he will dash from one end of the arena to the other leaving a trail of AoE ice in a straight line behind him. The ice does quite a lot of DoT damage.
- He performs and Ice Spike ability in front of him, much like the ice gauntlet’s ice spike ability. Getting caught with this deals significant amounts of damage.
Phase 2
After all of the elements have been activated Kurok will them become empowered with void energy. He will throw balls of void energy at members of the group. Be aware of these. They explode and deal quite a lot of damage.
He stays empowered with void energy for the remainder of the fight. During this phase you will also have all of the element circles floating around the arena. Make sure you and your group is aware of the circles so they can be dispelled.
Once defeated you’ll then progress into the Ancient Crossing.
Ancient Crossing
Once here you’ll leap up the ledge to the left and clear some trash mobs along the path. Once cleared jump off the ledge and into the Fractured Hollow. You will encounter several trash mobs here that include some mammoths and gorillas. Once cleared open the door to the Southwest that will take you into the Lost Temple. Clear the trash mobs along the way and progress past the locked button on the ground up the stairs.
Once up the stairs you encounter a couple named mobs. You’ll have to clear them in order to activate the buttons to open the door. One player will need to stand on the button down the stairs and one on the button beside the named mobs that were just killed.
This will lead you back into the fractured Hallow where you’ll fight Lockjaw, a named lion. Once dead, activate the orb beside the bridge and kill the named gorilla, Truk. From here, head Northeast into the Silent Grotto. Progress through the Grotto, killing the trash mobs. At the end of the Grotto you’ll find the orb you need to pick up. Grab the orb and take it back to the gate in the Fractured Hallow to open to open the door.
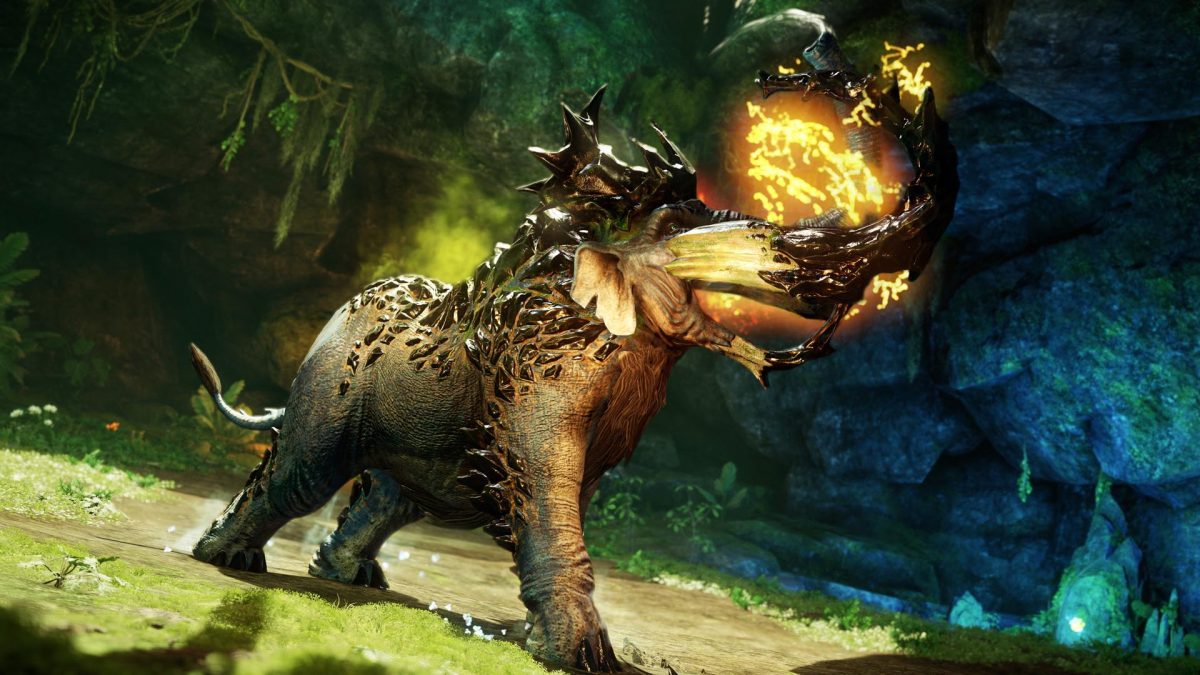
Clear the trash mobs and head into the final boss fight, Mahantaram.
Mahantaram – Final Boss
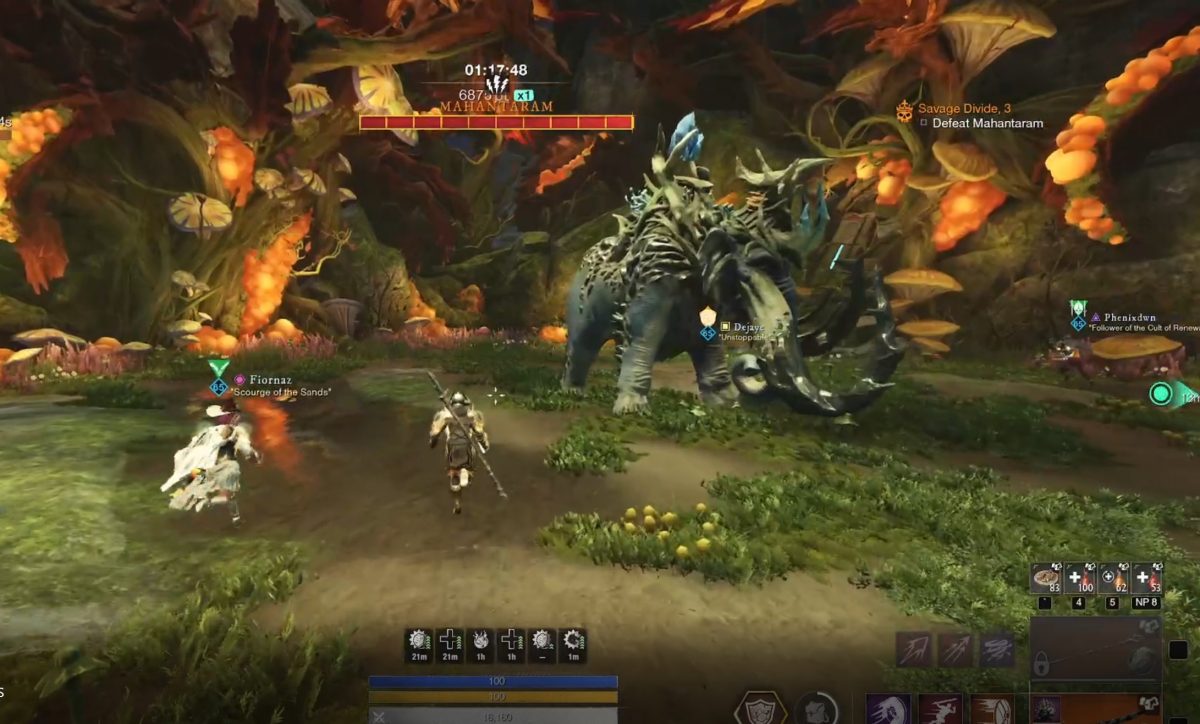
Once inside the boss room you will encounter the final boss, Mahantaram, a giant mammoth. The boss has a spinning crytal hovering above him. Paying attention the crystal’s animations is key for this fight. The crystal will glow a specific color which will tell you which attack is about to take place.
There are several different attacks that the mammoth will perform with the crystal as follows:
- Arcane Laser – The crystal will light up with a blueish hue. The boss will then send out a laser that will target a player. When targeted you must keep moving sideways to avoid damage. If you stop you will take damage. The laser can be on you, but you must be moving sideways.
- Fireballs – The crystal will catch on fire and then 2 fireballs will launch out. Getting hit by a fireball will deal quite a lot of damage to you.
- Lightning Bolt – The crystal will spark and a lightning bolt will strike a player.
- Ice Storm – The crystal will light up whit and the boss will cast an AoE ice storm in the arena. You will take quite a lot of DoT damage while being inside of the storm.
- Void Balls – The crystal will light up purple and several void balls will shoot out damaging anyone that is hit.
Conduits & Amplified Abilities
You will also notice that there will be some conduits that periodically spawn into the arena. Once you see one it’s important that the DPS focus down the conduit. However, make sure you are still paying attention the boss and the crystals while DPSing the conduit to avoid getting hit by the attacks.
If the boss casts one of the abilities that matches a conduit that is currently alive in the arena then that ability is amplified. For example, if there is a Blazing conduit in the arena and the boss casts fireball then 6 fireballs will shoot out versus 2. Or, if the Frigid conduit is in play then the ice storm will cover a MUCH larger area than the normal version. So, it’s imperative that you DPS the conduits down as soon as possible or the fight will get out of control.
Outside of the elemental attacks and managing the conduits, just be aware of the stomps and the tusk swings. The stomps are AoE, so make sure you’re away from the boss when this occurs. The tusk swings are performed as a frontal attack.
For more New World Aeternum guides be sure to check our comprehensive guide library!