
Introduction
The Empyrean Forge Expedition is a 5-man expedition in New World Aeternum that’s located in Great Cleave. This Empyrean Forge Expedition guide will walk you through everything you need to know about the Expedition Location, Drops, map, and a complete walkthrough.
Empyrean Forge Expedition Drops
Weapon Drops
The following drops require the Rise of the Angry Earth Expansion
| Weapon | Where it Drops | Difficulty |
|---|---|---|
| Inferno (Artifact) | Commander Marius | Mutation 1+ |
| Strikeback | Expedition Wide | Normal+ |
| Rending Flail | Expedition Wide | Normal+ |
| Fire of Life | Ifrit | Normal+ |
| Snowmelt | Ifrit | Normal+ |
| Brightdark | Ifrit | Normal+ |
| Volcanic Staff | The Heel | Normal+ |
| Firepoker | Ser Newlon | Normal+ |
| Knightslayer | Lady Bridget | Normal+ |
| Firefight | Ser Skarin | Normal+ |
| Trickshot | Ser Ducas | Normal+ |
| Old Longbow | Ser Ducas | Normal+ |
| Shredder | Ser Ducas | Normal+ |
| Flamespout | Executioner Freyr | Normal+ |
| Enduring Will | Commander Marius | Normal+ |
| Commanding Strike | Ser Eld | Normal+ |
| Blast Shield | Ser Skarin | Normal+ |
| Molten Flail of the Barbarian | Expedition Wide | Mutation 3 |
| Molten Sword of the Barbarian | Expedition Wide | Mutation 3 |
| Molten Rapier of the Brigand | Expedition Wide | Mutation 3 |
| Molten Hatchet of the Barbarian | Expedition Wide | Mutation 3 |
| Molten War Hammer of the Barbarian | Expedition Wide | Mutation 3 |
| Molten Spear of the Brigand | Expedition Wide | Mutation 3 |
| Molten Bow of the Brigand | Expedition Wide | Mutation 3 |
| Molten Musket of the Brigand | Expedition Wide | Mutation 3 |
| Molten Great Axe of the Barbarian | Expedition Wide | Mutation 3 |
| Molten Fire Staff of the Occultist | Expedition Wide | Mutation 3 |
| Molten Life Staff of the Cleric | Expedition Wide | Mutation 3 |
| Molten Ice Gauntlet of the Occultist | Expedition Wide | Mutation 3 |
| Molten Void Gauntlet of the Occultist | Expedition Wide | Mutation 3 |
| Molten Blunderbuss of the Barbarian | Expedition Wide | Mutation 3 |
| Molten Greatsword of the Brigand | Expedition Wide | Mutation 3 |
| Molten Buckler | Expedition Wide | Mutation 3 |
| Molten Kite Shield | Expedition Wide | Mutation 3 |
| Molten Tower Shield | Expedition Wide | Mutation 3 |
The following drops DO NOT require the Rise of the Angry Earth Expansion
| Weapon | Where it Drops | Difficulty |
|---|---|---|
| Firestarter | Expedition Wide | Normal |
| Mauler’s Axe | Expedition Wide | Normal |
| Brash Opener | Commander Marius | Normal |
| Firelash | Commander Marius | Normal |
| Allegro | Commander Marius | Normal |
| Sparkpowder | Commander Marius | Normal |
| Sulfurous Shrapnel | Ifrit | Normal |
| Fire of Battle | Ifrit | Normal |
| Daemongrasp | Ifrit | Normal |
| Cleric’s Walking Staff | Lady Bridget | Normal |
| Heatshot | Ser Skarin | Normal |
| Handwarmer | Ser Bishop | Normal |
| Heavy Knocker | Executioner Freyr | Normal |
| Hunting Blade | Ser Eld | Normal |
| Penitent Flame | Lady Bridget | Normal |
| Broad Buckler | Ser Ducas | Normal |
Armor Drops
The following drops require the Rise of the Angry Earth Expansion
| Armor | Where it Drops | Difficulty |
|---|---|---|
| Dragonsteel | Expedition Wide | Normal+ |
| Insulating Helm | Expedition Wide | Normal+ |
| Darkshroud Leggings | Expedition Wide | Normal+ |
| Counterbalancing Boots | Expedition Wide | Normal+ |
| Scaled Gauntlets | Expedition Wide | Normal+ |
| Padded Molten Set (Light) | Expedition Wide | Mutation 1+ |
| Wrapped Molten Set (Medium) | Expedition Wide | Mutation 1+ |
| Insulated Molten Set (Heavy) | Expedition Wide | Mutation 1+ |
| Fire Lord’s Set (Heavy) | Commander Marius | Mutation 3 |
The following drops DO NOT require the Rise of the Angry Earth Expansion
| Armor | Where it Drops | Difficulty |
|---|---|---|
| Well-trodden Shoes | Expedition Wide | Normal |
| Withering Gloves | Expedition Wide | Normal |
| Ranger’s Focus | Expedition Wide | Normal |
| Scholar’s Wear | Ser Skarin | Normal |
| Warrior’s Respite | Ser Ducas | Normal |
| Fire Lord’s Set (Heavy) | Commander Marius | Normal |
Jewelry Drops
The following drops require the Rise of the Angry Earth Expansion
| Jewelry | Where it Drops | Difficulty |
|---|---|---|
| Empty Hearth | Commander Marius | Normal+ |
| Red Hot Slag | Commander Marius | Normal+ |
| Charcoal | Commander Marius | Normal+ |
| Molten Amulet | Expedition Wide | Mutation 2+ |
| Molten Earring | Expedition Wide | Mutation 2+ |
| Molten Ring | Expedition Wide | Mutation 2+ |
The following drops DO NOT require the Rise of the Angry Earth Expansion
| Jewelry | Where it Drops | Difficulty |
|---|---|---|
| Wandering Expedience | Expedition Wide | Normal |
| Heart of Fire | The Heel | Normal |
| Embers of Change | Ser Newlon | Normal |
Other Resources
| Item | Where it Drops | Difficulty |
|---|---|---|
| Flame Core | Expedition Wide | Normal+ |
| Minor Heartrune of Fire Storm | Commander Marius | Normal+ |
| Empyrean Forge Materia | Commander Marius | Normal |
| Dense Empyrean Materia | Commander Marius | Normal+ |
| Fiery Sludge | Expedition Wide | Normal+ |
| Force of Will | Commander Marius | Normal+ |
| Powerful Beasts of Burden Bangle | Expedition Wide | Mutation +1 |
Empyrean Forge Expedition Location and General Information
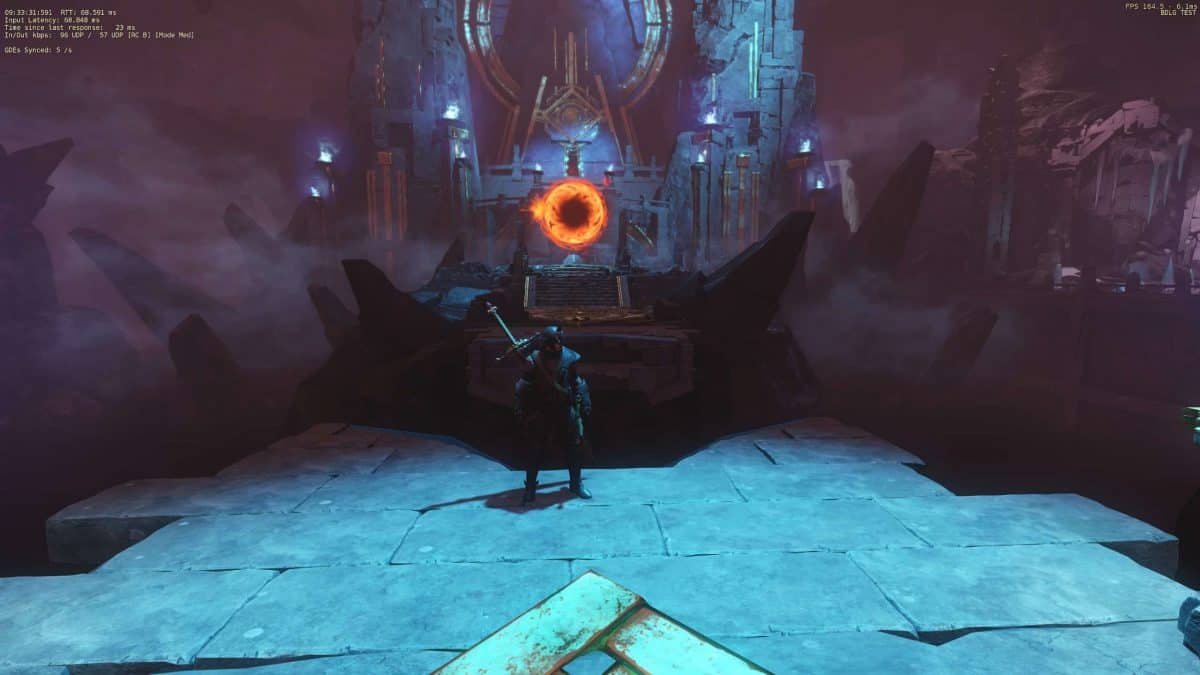
The Empyrean Forge is a level 60 Expedition located in the northern part of Great Cleave. This is an end-game expedition that will be in the weekly mutation rotation of expeditions. You can enter via the expedition entrance or by using the group finder function.
The Empyrean Forge is a legendary foundry where the ancients forged their devastating engines of war. Those who hunger for power yearn for the eldritch magics unleashed in the colossal ruins.
Once inside the expedition you will encounter mostly human enemy types. This means you’ll want to have human ward potions and human coatings on hand. There are a few lost enemies throughout the expedition as well, but not enough to merit switching consumables.

Map
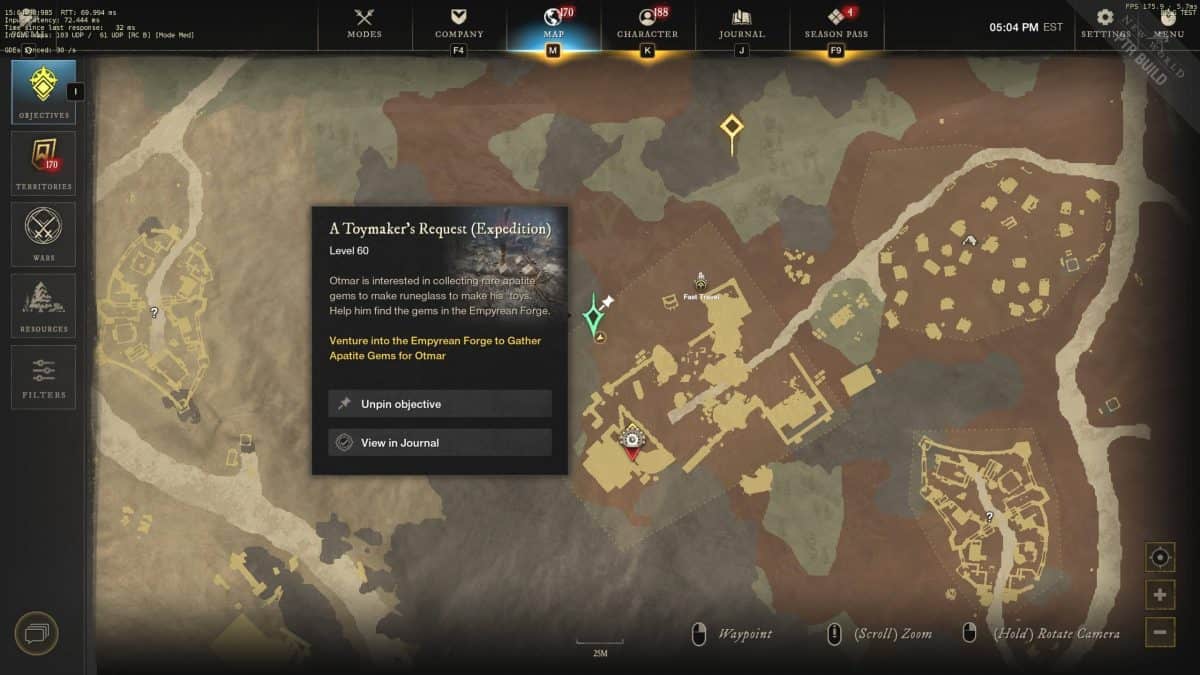
Repeatable Quests
Currently, the Empyrean Forge Expedition has one repeatable quest that you can pick up each time you run the expedition. The quest giver, Otmar Winkler, can be found just north of the entrance to the expedition.
Upon accepting the quest you will need to head into the expedition and collect the Apatite gems found throughout. They are all marked and can be fairly easily obtained during your run. Upon completing the quest you will receive a gypsum orb, experience, and a few coins.
Walkthrough and Boss Mechanics
Upon entering the expedition you enter into the Lost Entrance. Here you will be met with a few trash mobs. Simply progress through the trash mobs down the stairs and through the corridors into the next room called the Vestibule.
Vestibule
Once inside the Vestibule you will encounter a couple of lost mobs. These are fire mobs called Primordial Spawns. It’s not necessary to change into lost gear here. These enemies are not very difficult. Once defeated you can continue until you reach the Forge Gate. There’s a few trash mobs guarding the gate. They can be easily taken out and then you can utilize your azoth staff to progress into the next room called the Forge.
Forge
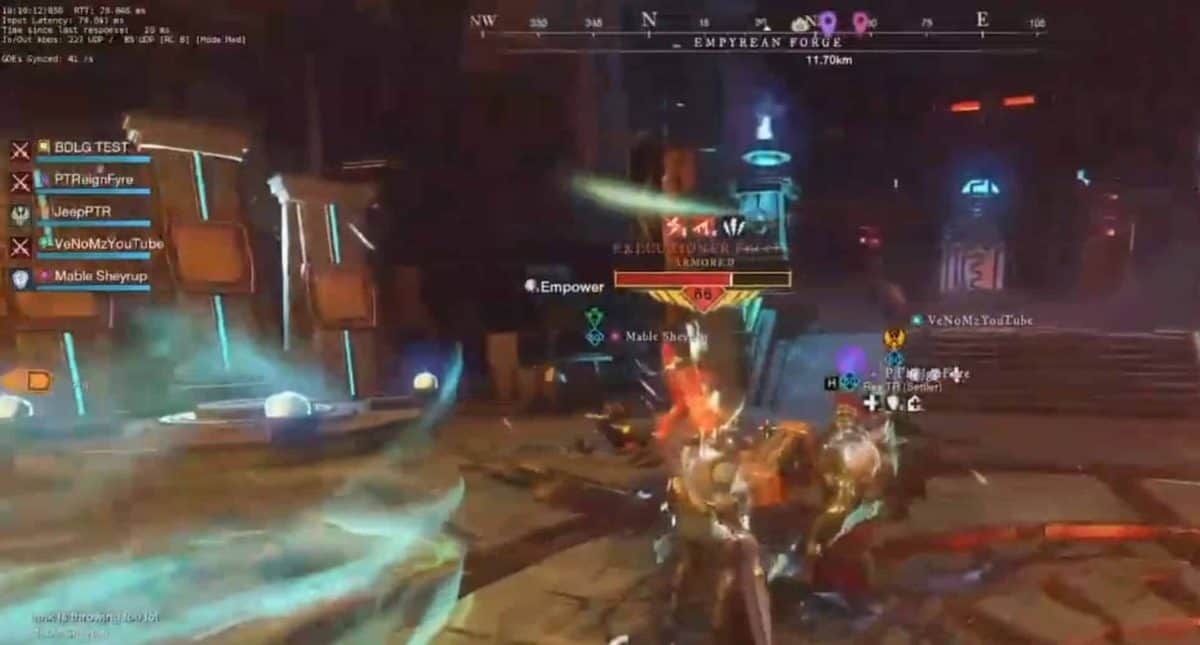
Upon entering the forge you will encounter several trash mobs and your first named, Executioner Freyr. This named wields a warhammer and can utilize warhammer abilities like shockwave. Look out for the stuns and the big swings to avoid damage. There are no real mechanics to this named and you should be able to taken him down fairly easily.
You will also notice a platform to your west and some large dials to the east. Do not worry about activating these yet. You will need to restore the power to the mechanisms and return to the Forge room later to activate the puzzle mechanic.
After you clear out all the enemies in the Forge you will need to proceed up the stairs and head right, or South East. You will need to clear all the trash mobs until you make it to the Shrine. Use your Azoth Staff to activate the seal and then head back down and go to the Northwest. Do not go back into the forge room just yet.
Here you will face another named, Ser Eld. He wields a greatsword and hits fairly hard but no mechanics to speak of. After he is dead, continue killing all the trash mobs until you make it to the platform. Step on the platform and make your way back to the forge.
Once at the forge you will need to have one group member stand on the platform to reveal 3 symbols. Do not leave the platform or the symbols will be reset. Have another group member turn the wheel mechanisms to match the symbols. This will open the gate up the stairs.
Reliquary
Be careful not to fall into the lava in this room. Here you will be met with another named, a lost mob named The Heel. This mob has similar mechanics to the others you have already encountered. Once defeated you can then easily progress into the foundry.
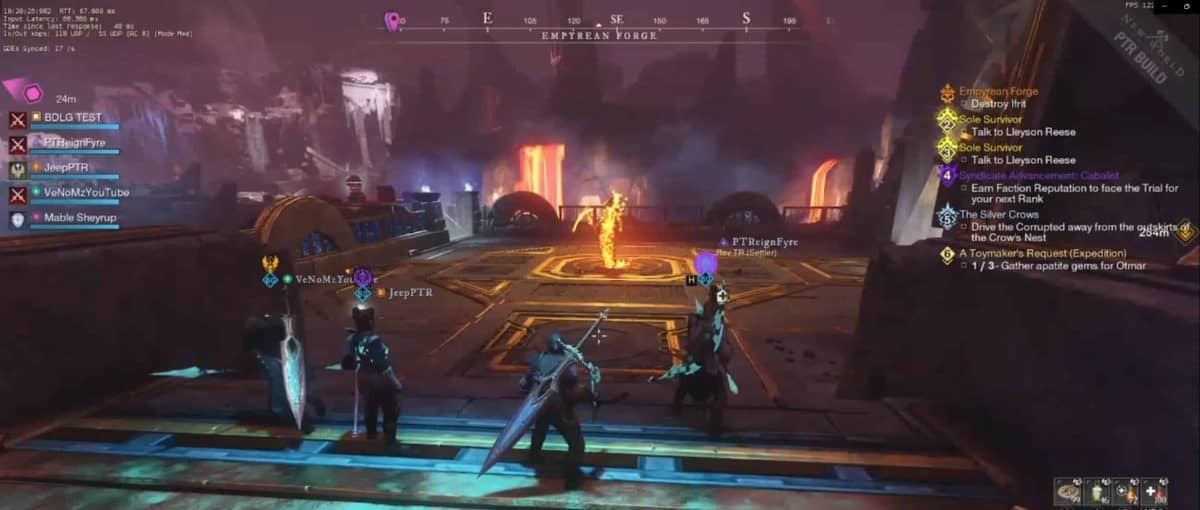
Foundry
Make sure you watch out for the lava and the dropping pistons here. Once you cross the lava you will see two circle platforms. Be careful not to get smashed when crossing over these platforms. Once past the pistons you will need to climb up the wall, run along the path and jump down to your left where there’s an opening in the guard rail.
Here you will fight another named Lost mob again called the Heel. This time he also had 2 smaller trash mobs of the same type with him. Avoid the fire AoE’s he drops on the ground. There are no real mechanics here.
Continue through the turning gears into the Berths.
Berths
Here is where you will fight the first boss of the expedition, Ifrit.
Ifrit Mechanics
Ifrit is a fire elemental wielding a scythe. This fight is incredibly mechanic heavy and you will need to do quite a lot of dodging, and going prone can help your survivability significantly. The boss will perform sweeping AoE attacks with the scythe dealing damage to players hit. Make sure to avoid these attacks.

Ifrit also has several mechanics you need to be aware of:
Major Mechanics
Fireballs Phase One: There are several fireballs that will shoot out from the South East wall. They will be staggered so you can dodge them. These can also be avoided by going prone.
Lava Balls: Ifrit will drop balls of lava onto the ground, leaving a fire circle that will damage players in it. If you’re hit with a lava ball you will take a large amount of damage. Players are also marked with a red circle on their head and a lava ball will fall onto their location.
Fire X: Ifrit will make an X shape on the ground dealing AoE damage in a cross or X shape. You can avoid the damage by getting out of range or standing in the spaces between.
Flamethrower Phase One: The boss will shoot flamethrowers out in a straight line in on either side of it’s body, and rotate those 360 degrees. To avoid this you need to be close to the boss and rotate around with the motion of the flamethrower.
Fireball Phase Two: This is the same mechanic as fireball phase one but there are more of them.
Flamethrower Phase Two: In this phase the Flamethrower is now in an X shape versus on straight line. This happens after the boss has been dropped below half health.
Fire Cleave: Ifrit will periodically shoot out a fire cleave. This looks similar to the fireballs coming from the wall, but will do in any direction and you can not go prone to avoid the damage.
How to Beat Ifrit
This fight can be incredibly chaotic. However, if you know the mechanics it’s not overly difficult. There are damage opportunities and then moments where you will need to “dance” around the arena to avoid death.
During the beginning of the fight make sure you are positioned so that you can see the southeast wall. This way you will be prepared for the fireballs when they come. DPS the boss until you see the fireballs. Typically with the fireballs Ifrit also drops the lava balls.
If you have a red circle on your head you want to make sure you move away from the boss. If you don’t a lava ball will be dropped at your location, and this will then prevent your melee DPS from being able to get close to deal damage.
When the fireballs come at you, you have two options. You can dodge between the gaps, or you can simply go prone in a safe spot. If you have a red dot above your head you can run towards the opposite wall, wait for the lava ball to drop, dodge away from it, and go prone to avoid the fireballs. You can then head back in to DPS the boss and then repeat this.
At roughly 50% health the boss will then activate a flamethrower. In order to avoid death to the flamethrower you will need to be near the boss and rotate with the flamethrower. Don’t try to dodge through it, or get out of range. It will make one full turn and then disappear. Be aware that during this phase you can get lava balls and fireballs as well, so make sure you’re ready to dodge and rotate around the boss at the same time.
Phase 2
This phase occurs once the boss is less than 50% health. The mechanics are basically the same just more chaotic. There are more fireballs, more lava balls, and the flamethrower now goes in 4 directions versus 2.
The same rules apply to all the mechanics just be aware of the ramped up nature of the fight during the second phase.
Once the boss is defeated go up the stairs and activate the seal.
Reliquary
Be careful for the falling pistons here. Work you way through the trash mobs to the next named, Ser Bishop. He’s much like the other named vangarian mobs you have encountered. He wields a greatsword and has some heavy hitting attacks but no mechanics. Once he’s dead progress to the door and use the Azoth staff.
Bellows
There are some more falling pistons here and more trash mobs. When you cross the bridge you will fall down the gap onto the platform in the lava to fight 2 named varangian’s, Ser Newlon and Lady Bridget. No mechanics here. Just kill them and move up the ramp. At the top of the ramp you will encounter another named varangian, Ser Skarin. Once killed, take out all the trash mobs until you reach the Control Room.
Control Room
This is a puzzle room very similar to that in the Forge room. There is named Varangian, Ser Ducas, wielding a blunderbuss near the platform on the bottom. Be very careful here. He can burst you down quickly with the blunderbuss if you stay in range and get hit by the abilities.
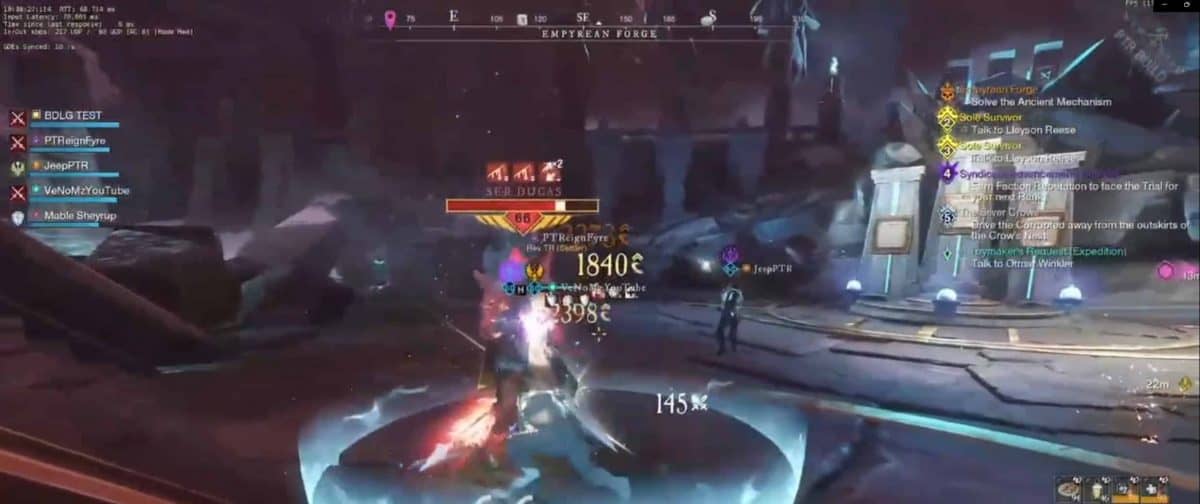
Do not stand on the platform when you walk into the room. Make sure your group kills the named and the ads. Once you stand on the platform a couple lost mobs will spawn in. If you move from the platform the symbols will reset just as they did in the forge room, and more lost mobs will spawn. So, be careful not to hit the platform button while fighting the named.
You will need to send one player back up to the top section to spin the wheels to match the platform signs. This will open the door.
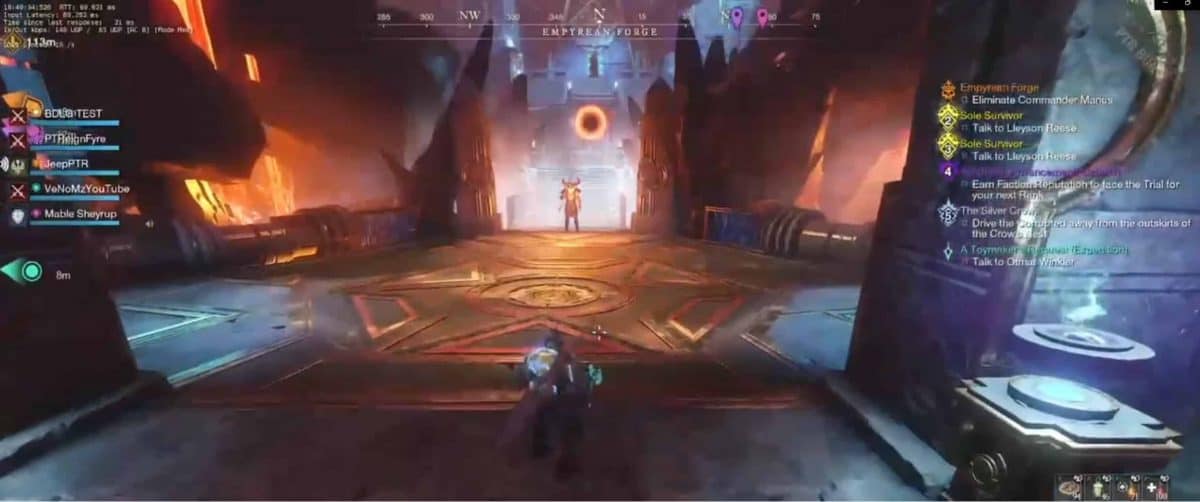
Forge South
This is the final boss fight in the Empyrean Forge Expedition.
Commander Marius Mechanics
Commander Marius is a boss wielding a huge 2 handed great axe. He will perform a whirlwind attack sending fireballs out in all directions, slam his axe down causing massive AoE damage, and periodically thrust downward on anyone caught in front of him. Make sure you’re aware of these and avoid them.
Major Mechanics
Volcanoes: Periodically there will be small volcanoes that spawn in the arena, and on each player. When this happens you will need to rotate to a different platform to avoid the spewing lava damage.
Floor is Lava: The boss will run to the center of the arena and spawn a lava pool that fills up the entire center of the arena. You will need to stay on the platforms to avoid taking damage.
Lava Balls: Huge lava balls will drop down from one of the 3 platforms. There will be a red ring on the platform prior to the ball falling. Move out of that ring to avoid taking damage from the fall. Once the ball drops it will roll in a straight line damaging anything in it’s path.
Ground Slam: The boss will leap in the air and then slam his axe down when he lands. This causes the ground to rupture around him dealing a lot of AoE damage.
How to Beat Commander Marius
This fight is less mechanic heavy than the previous fight. It revolves around good positioning on a tight space on each of the platforms.
You will want to pull the boss to one of the platforms. Try to have the tank position his attacks towards the wall and not towards the DPS. When the volcanoes spawn the group simply needs to rotate to a different platform. While on the platforms be aware of the balls dropping down. There will be a red circle as a tell that will spawn in seconds before the ball drops, giving you time to get out of the way. The balls will drop in a counterclockwise manner. Therefore, you can rotate the platforms counterclockwise to avoid the balls all together.
When the Commander makes his way to the middle of the arena make sure everyone is on a platform to avoid the lava damage that fills the arena.
Once you defeat the command you will have completed the Empyrean Forge Expedition.
For more New World Aeternum guides be sure to check our comprehensive guide library!