
Introduction
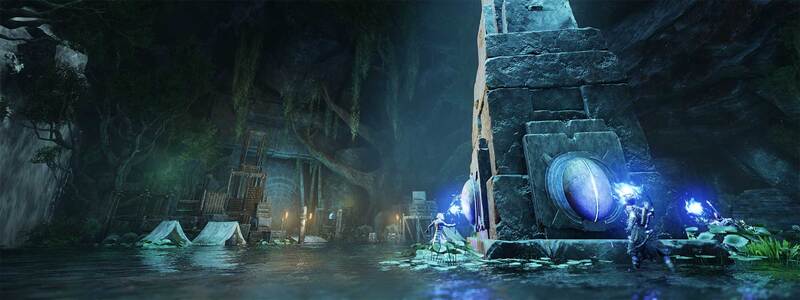
The Depths Expedition is located North East of the Restless Shore Settlement. The recommended level to run the dungeon is level 45, however, you can receive the repeatable quest for the expedition and enter the dungeon at level 43. The entrance to the expedition is located behind a waterfall. Continue reading for the complete The Depths Expedition Guide.
** Before you enter the dungeon** It’s a good idea to have corruption tinctures on hand when running The Depths. Make sure to talk to the baby alligator outside named Nekumanesh. He will give you a quest to collect meat to help him grow. Also, make sure three people in your group have an Azoth Staff. It will be required to complete some of the objectives inside!
For a map of all of the nodes and objectives of The Depths Expedition, click here.
The Depths Loot
There are many unique drops to obtain in the Depths Expedition. The following are the named drops in the expedition.
Please note that running the normal expedition will yield tier IV items. The mutated version will yield tier V, up to 700 gear score.
The Depths Weapons
The following drops require the Rise of the Angry Earth Expansion
The following drops DO NOT require the Rise of the Angry Earth Expansion
| Weapon | Where it Drops | Difficulty |
|---|---|---|
| Desecrated Maul | Expedition Wide | Normal |
| Dark Pyromancer’s Spellstaff | Expedition Wide | Normal |
| Abyssal Strike | Expedition Wide | Normal |
| Frostwall | Expedition Wide | Normal |
| Tundra Warden’s Rifle | Expedition Wide | Normal |
| Cave Crawler | Expedition Wide | Normal |
| Duplicitous Intent | Archdeacon Azamela | Normal |
| Rejected Sacrifice | Archdeacon Azamela | Normal |
| Willing Sacrifice | Commander Thorpe | Normal |
| Corruption’s Resurgence | Commander Thorpe | Normal |
| Voidsong | Commander Thorpe | Normal |
| Corruption Infused Longbow | Commander Thorpe | Normal |
| Bloodblade | Archdeacon Azamela | Normal |
| Corrupted Faith | Commander Thorpe | Normal |
The Depths Armor
The following drops require the Rise of the Angry Earth Expansion
| Armor | Where it Drops | Difficulty |
|---|---|---|
| Imbued Waxen Set (Light) | Expedition Wide | Mutation 1+ |
| Imbued Waxen Set (Medium) | Expedition Wide | Mutation 1+ |
| Imbued Waxen Set (Heavy) | Expedition Wide | Mutation 1+ |
| Expedition Captain’s Set (Heavy) | Commander Thorpe | Mutation 3 |
The following drops DO NOT require the Rise of the Angry Earth Expansion
| Armor | Where it Drops | Difficulty |
|---|---|---|
| Ethereal Visage | Archdeacon Azamela | Normal |
| Thorpe’s Helmet | Commander Thorpe | Normal |
The Depths Jewelry
The following drops require the Rise of the Angry Earth Expansion
| Jewelry | Where it Drops | Difficulty |
|---|---|---|
| Lost Stopwatch (Artifact) | Commander Thorpe | Mutation 1+ |
| Deep Ring | Expedition Wide | Mutation 2+ |
| Deep Earring | Expedition Wide | Mutation 2+ |
| Deep Amulet | Expedition Wide | Mutation 2+ |
The following drops DO NOT require the Rise of the Angry Earth Expansion
| Jewelry | Where it Drops | Difficulty |
|---|---|---|
| Heart’s Tendril Trinket | Expedition Wide | Normal |
| Blessing of Forefathers | Archdeacon Azamela | Normal |
| Holy Pledger’s Band | Commander Thorpe | Normal |
Other Resources
| Mount | Where it Drops | Difficulty |
|---|---|---|
| Depths Materia | Commander Thorpe | Normal |
| Corrupted Talisman | Expedition Wide | Normal+ |
| Corrupted Treatise | Expedition Wide | Normal+ |
| Godfrey | Expedition Wide | Mutation 3 |
The Depths Map
Types of Enemies in The Depths and Optimal Damage Types
Once inside you will encounter the Corrupted enemy type. The most effective damage types against the Corrupted are thrust, nature, and arcane damage. You can check our Damage Type vs Mob Type quick chart for a full list of weaknesses for all enemy types.
You can also use Corrupted Coatings, Corrupted Ward Potions, and Corrupted Combat Trophy to dish out more damage and mitigate additional damage from the Corrupted enemies.
How to Enter the Depths
There is a limit on the number of expeditions you can run.
- 15 Normal Expedition runs per player per day or 105 per week, per player.
- 35 Mutated Expedition runs per week.
In order to enter the expedition someone will need to be at the entrance of the dungeon. You can also utilize the dungeon expedition group finder to find a group and enter the expedition. The group finder can be accessed through the expedition entrance UI or from the map by clicking on the Expedition map icons.
You can browse listings created by other players, or post your own request to join other players on your server. This tool allows you to declare your preferred team role, such as DPS, tank, or healer. You can recruit based on those roles. You can also set recruiting requirements like minimum gear score and level, then inspect members to learn their average gear score, weapons, and mastery levels.
You also have the option of queuing with a random group by utilizing the “Activities” tab in your main menu.
The Depths Repeatable Quest
At Level 43, you can obtain the Meat For Nekumanesh (Expedition) repeatable quest. During the Depths Expedition, you will encounter 3 mini-bosses that will drop meat. You will need to pick up the meat and return them to Nekumanesh to complete the quest. The repeatable quest is located directly outside the door of the Expedition. You will both accept the quest and return the quest to the alligator, Nekumanesh, located there. You can also begin receiving Expedition quests from your faction representative in Restless Shore once you reach level 43.
Walkthrough
Once inside, run to the first room “Corrupted Retreat” where you will find a column with multiple Ancient Artifacts on it. Clear the adds in the room and run into the hallway to the south. To enter the door you will just complete the simple task of having a member of the party stand on each platform.
Head down the short hallway and activate the azoth staff pedestal and then run back to the corrupted retreat and clear the new mobs that just Spawned. Once cleared three people from the team with Azoth staff will have to activate the three spheres on the middle column in the room. This will open up the door to the west.
Immediately inside the door is a mini-boss named Renat. He has minimal mechanics and is easy to clear. Clear the rest of the adds In the hallway and head up the stairs to the left. They should automatically open the door in front of you and allow you to take a ride and head up the forked stairway. Clear the adds and open the ancient Azoth seal, and head through the door. the first respawn point will be up ahead.
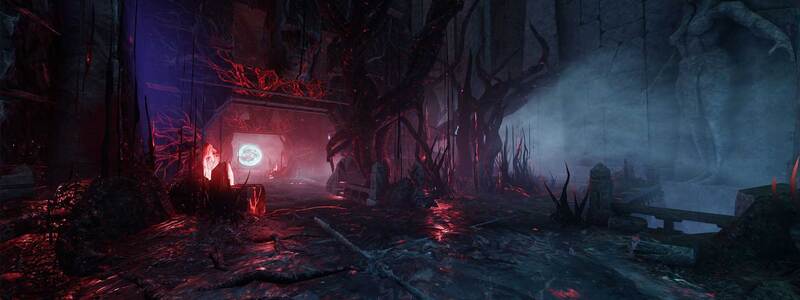
At the top of the next staircase, there will be a corrupted tendril with a few adds. Killing this will open up the door which will lead into a room named the Nadil Bridge and reveal an Epic scene with another mini-boss, Boor. He is a corrupted brute with minimal mechanics. Down him and head to the right (east) to a hallway named “the conveyance. You’ll run into two more corrupted tendrils and a few adds. At the end of this hallway you’ll find a teleport that will lead you to a separate area on the map named “the core”.
The Core
Once inside the core head to your left and around the corner to the opposite side of the cube. Once there you will find another teleporter. Use this and it will take you to another extension of the Nadir Bridge area, named the Ring of Rot. Once here, you will find a clock-like area on the ground with glyphs surrounding it. Your group will need to hold the pressure plate in the middle of the glyph while several waves of mobs spawn. Once the waves are finished and the plate is activated, Head down the hallways to Unseal the Gate and enter back into the Nadir Bridge.
Head to the right, clear adds, and break the Ancient Azoth seal ahead. This will restore the bridge in the middle of the room. There is an optional mini-boss room to your right where you will find a corrupted heavy boss named Despar, surrounded by two corrupted tendrils and a few adds. Clear the room and down Despar to open two chest rooms. Then go back to The nadir bridge and head to where you first can into the room where you will find the newly formed bridge. Cross the bridge to find a respawn point and the first Boss encounter, Archdeacon Azamela.
The Depths Boss Fights
Archdeacon Azamela (the Unholy Pit)
Phase 1
Once the fight starts, Azamela will spawn two Hounds. Clear them and watch out for Azamela’s attacks.
- Shockwave – makes him the epicenter of a shockwave effect.
- Corrupted cleave – cleave that sends a corrupted spirit out in a cone
- Staff Slam – Knockdown AOE around Azamela
- Summon Hounds – Azamela summons two more hounds
Phase 2 (Apocalypse)
Azamela will lift her staff in the air and connect a red beam to one of the monoliths on the ledges above. At least one party member (two is recommended) will need to go to the teleporter below the beam to teleport up to the Monolith. The Tank should stay down with Azamela to tank the Apocalypse mines by holding block. Clear the adds, then shut down the Azoth Staff objective at the base of the Monolith. Once the objective is closed, all party members on the ledge will be teleported back to the Boss for a repeat of Phase 1.
Phase 3
Similar to Phase 2, Azamela will lift her staff into the air, but this time the staff will connect to both Obelisks in the room. Two Party member’s will need to go to each teleporter while the tank stays with Azamela and tanks the Apocalypse mines. Clear the adds and Activate each Azoth staff objective on the monolith to stop the Apocalypse and be teleported back to the boss.
Note – If you are the first group back – be careful for the Mines in the middle.
From here you should have no problem finishing off Azamela and collecting Thorpe’s Key to enter Thorpe’s chamber!
Once you head up the stairs to the north, you will find a teleporter that will put you back into “the Core ” Clear the adds and activate the Corrupted shrine with Thorpe’s Key. This will open the room ahead that is filled with a large corrupted carapace. Destroy it to reveal the teleporter that leads to your final destination, “The Crucible of Corruption.”
Once in the Crucible of Corruption, you will encounter a corrupted bear mini-boss Archbald. Down him, open the door ahead. From here you will clear a few adds, another corrupted tentacle, and your final corrupted Monolith. Destroying the Monolith will unlock the hallway to the final boss – Captain Thorpe.
Captain Thorpe
Phase 1
Captain Thorpe will Charge around the Map with his flaming sword. The tank can face him towards the outer walls of the zone to reduce group damage. Once at 20% health, he will move to phase 2.
Phase 2
When you get Captain Thorpe down to under 20% health, he will reset his health bar and spawn in two corrupted Behemoths to fight by his side. Clear the adds and focus on evading Captain Thorpe mechanics that deal massive amounts of damage.
- Corrupted pull – Thorpe pulls the target to him, dealing damage
- Charge – Capt Thorpe closes the gap with a charge that deals large amounts of damage and knocks down the target
- Corrupted Steel – Captain Thorpe kneels down and clams his sword to the ground causing an AOE knockdown
- Soul-Crushing Beam – Corrupted beam that causes MASSIVE amounts of damage. Captain Thorpe will move it in a counter-clockwise motion around the area.
- Spawn Behemoths – Captain Thorpe will spawn two more Behemoths to fight by his side
- Heel Crush – AOE explosion that deals MASSIVE amounts of corruption damage if a player is inside.
Live through Phase 2 and DPS Captain Thorpe and you’ll complete the Depths!
The Depths Expedition Guide Conclusion
That does it for The Depths Expedition Guide. For more on how to complete the mutated version of The Depths, check out our Expedition Mutation Guide. For more New World Aeternum guides be sure to check our comprehensive guide library!