
Support Mage PVP – Void Gauntlet and Ice Gauntlet
Introduction
The New World Support Mage Build combines the Void Gauntlet and Ice Gauntlet to debuff enemies and lock them down for kills. In this guide, we will cover everything you need to know to use the Support Mage in New World’s PVP.
PROS
- Elite Group Support
- Elite Crowd Control
CONS
- Lacks Burst Damage
- Moderate Mobility
Mastery Points
Void Gauntlet Mastery Points
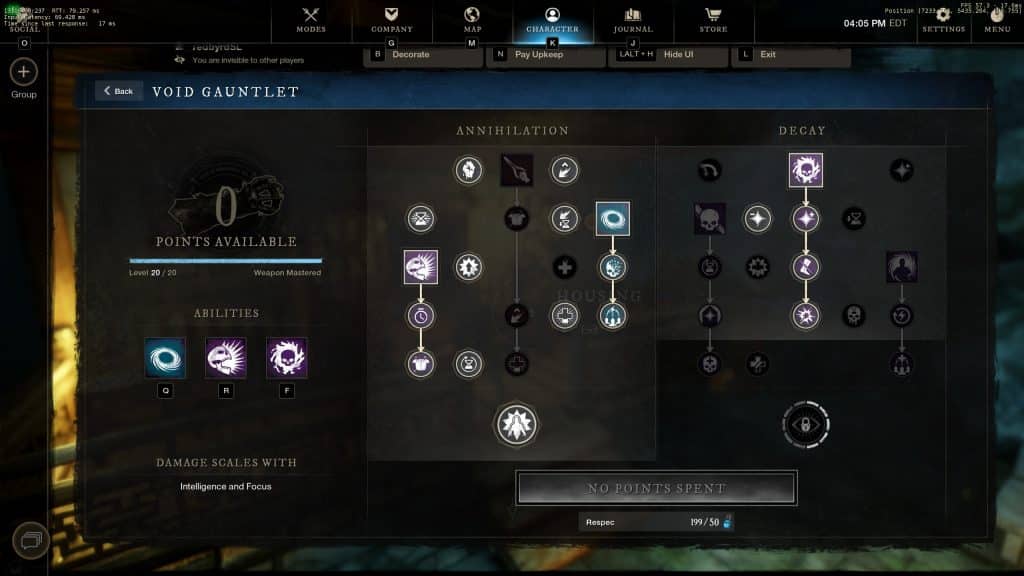
Void Gauntlet Active Abilities – Petrifying Scream, Orb of Decay, Baleful Tether or Oblivion
The Void Gauntlet has two of the strongest Utility Spells in the game: Petrifying Scream and Oblivion. Oblivion and Orb of Decay will be used to debuff targets to set up kills for your group. Petrifying Scream is used to root enemies in place. Baleful Tether is an incredible meta option too for wars and other PVP content. The Tether provides free weaken and empower while returning large amounts of mana, health and cooldowns. You’ll want to upgrade the 3 abilities you choose.
The Rest of the passives you’ll choose involve crit chance and cooldown reductions.
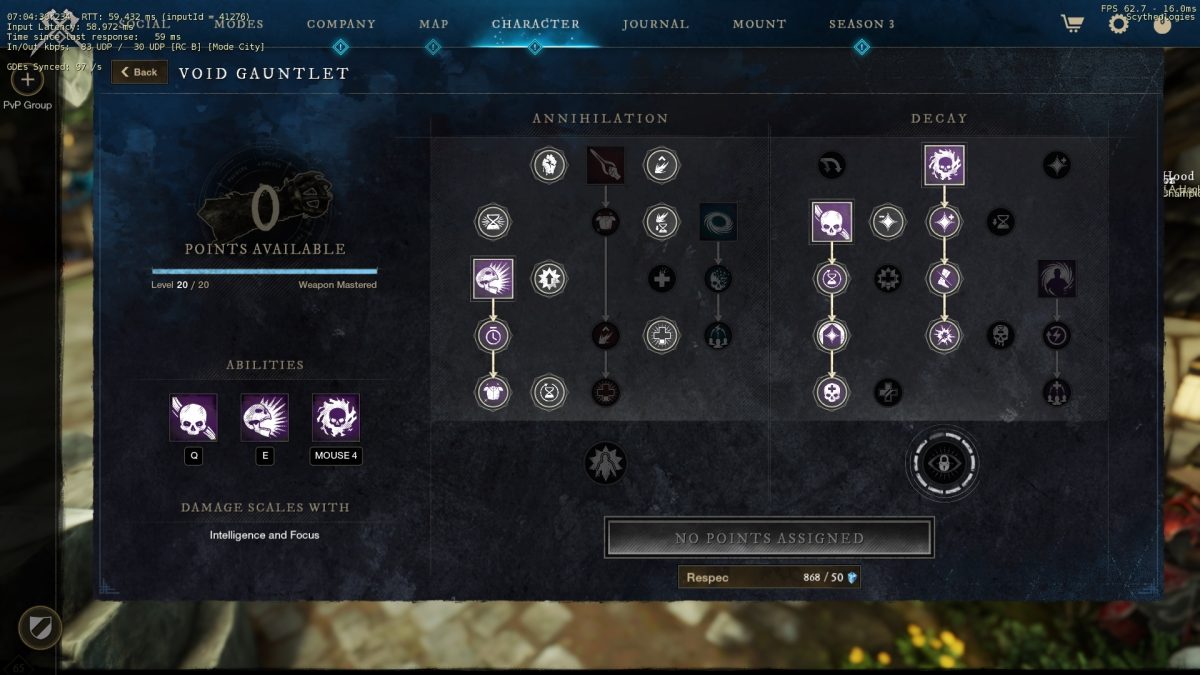
Baleful Tether Skill Tree
Ice Gauntlet Mastery Points
Active Abilities – Ice Storm, Ice Spike, Entombed
Ice Storm is a no-brainer ability in the Ice Gauntlet tree. The Ice Storm allows you to control space while dealing decent DoT damage.
Ice Spike currently takes the place of Ice Shower, due to the raw synergy and damage output you can have as a support. This is mainly achieved through the use of the Empowered Ice Spike gear perk.
Entombed is the final active ability in the Ice Gauntlet Mastery tree. It is a Utility spell that can help you survive the pressure and minimize damage taken if used correctly.
Below is how you’ll invest the rest of your Ice Gauntlet Mastery Points
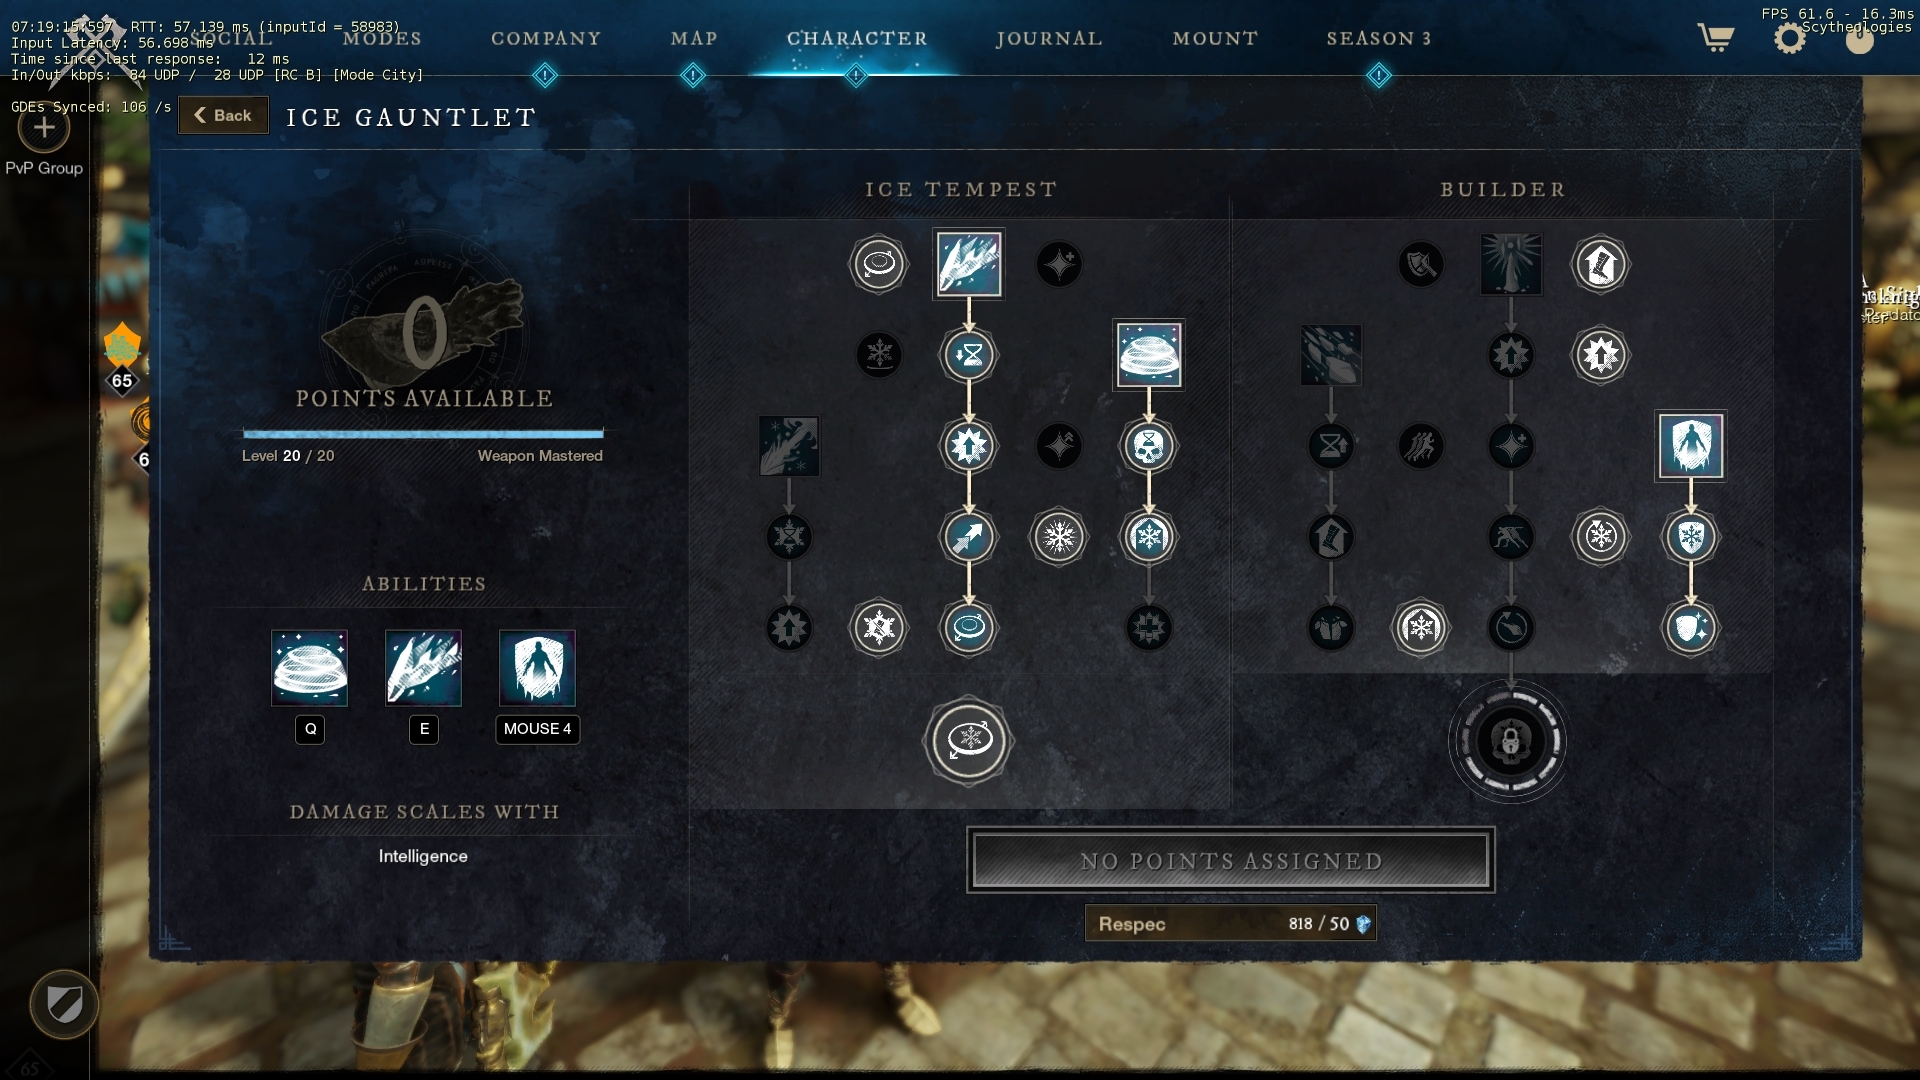
Ice Gauntlet Ice Spike Tree
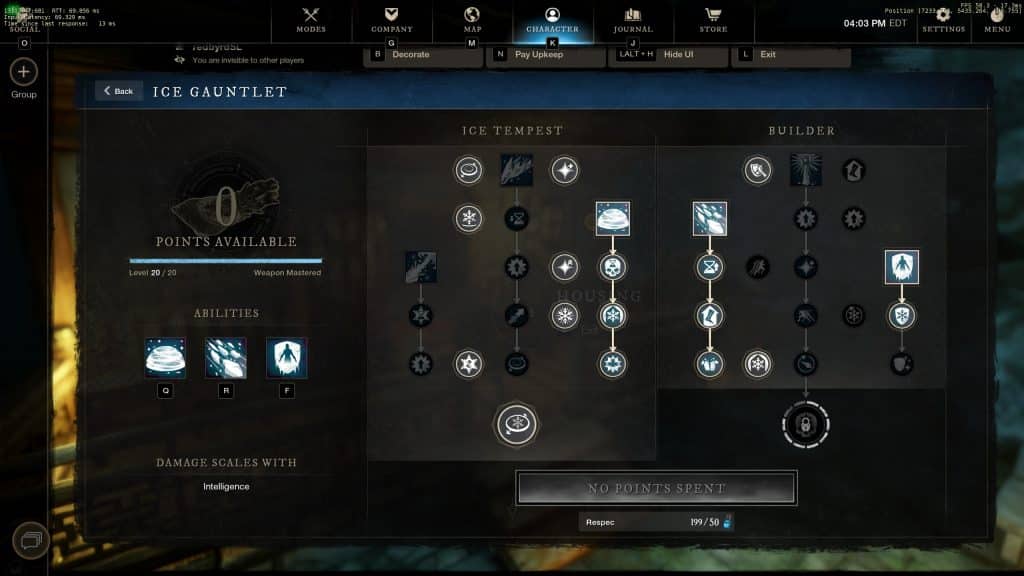
Traditional Ice Gauntlet Tree
Attributes
The attribute split for the Support Mage build is 350 INT, 100 FOC, 150 CON
The purpose of this build is to support your group and set up kills. However, you can provide your own burst of damage through Ice Spike. You will be getting into the fray and setting up kills in melee range for your team. 150 CON will give you a decent health pool and tons of perks that will help you survive in group fights. You can move up to 200 CON if you struggle to survive, lowering 50 FOC.
350 INT 100 FOC still provides good damage while getting access to key INT perks such as 15% more elemental damage and 10% ability damage.
Equipment
For the Support Mage build, you will be in the Medium Equip Load. Next, There are two ways to obtain this equip load, while maximizing your resistance
- HEAVY CHEST, LIGHT PANTS, any combo of 1 HEAVY and 2 MEDIUM for your Helm, gloves, and boots
- HEAVY CHEST, HEAVY LEGS, any combination of 2 LIGHT and 1 MEDIUM for your Helm, gloves, and boots.
Armor
Artifact Armor
For this build, we currently recommend using the Tumbler Feetwraps Artifact Boots. These boots provide incredible buffs on dodge. This includes Fortify, Empower and Healing on dodge.
All of the Armor you will want for this build will be custom-made through crafting or bought from the Auction house. Below is the ideal perk spread you will want across all of your armor pieces. They are listed in order of importance from top to bottom. Start with armor with 2 perks on it and work your way up to three!
- Unending Thaw
- Nullifying Oblivion
- Empowered Ice Spikes
- Refreshing (4)
- Elemental Aversion (5)
- Freedom or Health
Weapons
Your Weapons for this build will need to be crafted. The Perks listed are in order of importance from left to right. The MOST important perk on these weapons are the ability perks (Putrefying Scream and Deadly Frost) so make sure that your gauntlets have these perks on them at a minimum. Having these perks on your weapons as opposed to your armor gives them increased effectiveness.
Void Gauntlet – Putrefying Scream, Attunement, Keen Speed
Ice Gauntlet – Empowered Ice Spike or Deadly Frost, Keenly Jagged, Keen
Artifact Weapon
The Artifact weapon of choice for this build is Lifetaker. Lifetaker provides the fantastic ability to apply Disintegrate to opponents with ranged attacks. This allows you to apply another debuff as a support player, which is always a benefit. Finally, you can also upgrade the final perk of Lifetaker to Putrefying Scream.
Jewelry
All of your jewelry will need to be custom-crafted. The perks for each piece are in order of importance from right to left so you can prioritize obtaining them
Amulet – Champions Amulet or Health, Shirking Empower, Divine. The Artifact of choice that is a must-have in this build is Ankh.
Ring – Invigorated Punishment, Keen Awareness, Refreshing Ward or Champions Ring
Earring – Refreshing Toast, Healthy Toast, Refreshing Ward
Gems
The Meta and your resistance division will determine what gems you use in your armor. Runeglass of Frozen Malachites or Runeglass of Frozen Diamonds is the recommended gems to balance your armor as these provide the most amount of resistance possible.
In your weapons, you’ll want to use the following gems:
- Void Gauntlet – Runeglass of Frozen Aquamarine
- Ice Gauntlet – Runeglass of Frozen Opal
Heartgem Rune
The Recommended Heartgem for this build is the Brutal Heartgem of Grasping Vines. This gives you another Root and allows you to apply Weaken to targets. The Brutal version of Grasping Vines also applies a 20% rend to targets as well. You need to be aware this also reduces your stamina regeneration for 5 seconds.
Consumables
Potion
Consumables on this build are pretty straight forward. You will want one of each type of Infused potion on your bar (Health, Mana, and Regeneration Serum) and a Stack of Hearty Meals.
Food and Utility
You will use food to balance out your gear to your desired Attribute Thresholds. The cheapest food available with the appropriate stats is most likely:
- Pork Belly Fried Rice
- Roasted Rabbit with Seasoned Vegetables
- Fruit Salad
Tier V Honing Stones and Incense can also be used In Wars or other PVP situations. You can also use GemStone Dust to avoid spike damage when in bad situations.
How to use the New World Support Mage Build
The Support Mage Role is to set up kills for your teams. First, you will use Petrifying scream to root the target in place. Next, Drop Oblivion and Weapon Swap to your Ice Gauntlet to apply Ice Shower or land Ice Spike. At this point, your target should have the following debuffs:
- 40% Disease (Healing Received reductions)
- 50% Slow
- X% of Weaken (5% per hit while in oblivion)
Not only will you be debuffing your enemy, but Diminishing Orb and Oblivion will be Stripping the Buffs that your enemy has on them as well. If you are running Tether, you’ll provide the team with an extra burst of damage with Ice Spike on top of the debuffs. Remember to never use Ice Spike without rooting first to gain the full benefits of Empowered Ice Spike.
The Strength of the Support Mage lies in how quickly they can create this “kill” window. With access to Refreshing Move, Deadly Frost, Void Gauntlet Passives, and the cooldown reduction from your gear (refreshing) you’ll be setting up your team’s next kill in no time!
New World Support Mage Conclusion
That’s it for our New World Support Mage Guide. For more New World Builds, check out our New World build sections!