
Introduction
The Lazarus Instrumentality is a Level 66 Expedition located in the heart of Reek Water. In this Lazarus Instrumentality Expedition Guide, we will walk you through the drops you can earn, the bosses you’ll fight, and more!
The Lazarus Instrumentality Drops
There’s many unique drops to obtain from the Lazarus Instrumentality Expedition. The following are the named drops and how to get them. Please keep in mind that some of the drops require the Rise of the Angry Earth Expansion, while others do not.
Lazarus Instrumentality Weapons
The following drops require the Rise of the Angry Earth Expansion
The following drops DO NOT require the Rise of the Angry Earth Expansion
| Weapon | Where it Drops | Difficulty |
|---|---|---|
| Fury | Chardis | Normal |
| Inherent Truth | Chardis | Normal |
| Spellstaff of Fiery Intent | Chardis | Normal |
| Spear of the Outer Isles | Chardis | Normal |
| Parry | Chardis | Normal |
| Stonestrike | Chardis | Normal |
| Divine Devotion | Cilla | Normal |
| Lazarus Bow | Cilla | Normal |
| Ancient Intentions | Cilla | Normal |
| Weaponmaster’s Chosen | Cilla | Normal |
| Frostgrasp | Cilla | Normal |
| Curiosity, Greed | Expedition Wide | Normal |
| Sol | Expedition Wide | Normal |
| Will of the Ancients | Expedition Wide | Normal |
| Archaeologist’s Armored Flintlock | Expedition Wide | Normal |
| Final Respite | Expedition Wide | Normal |
| Cold Claw | Expedition Wide | Normal |
| Voidsword | Expedition Wide | Normal |
Lazarus Instrumentality Armor
The following drops require the Rise of the Angry Earth Expansion
| Armor | Where it Drops | Difficulty |
|---|---|---|
| Weathered Concrete | Expedition Wide | Normal+ |
| Reverent Earth | Expedition Wide | Normal+ |
| Ancient Anchor | Expedition Wide | Normal+ |
| Stonesole | Expedition Wide | Normal+ |
| Stonesoul | Expedition Wide | Normal+ |
| Forgotten Protector’s Set (Light) | Expedition Wide | Mutation 1+ |
| Forgotten Protector’s Set (Medium) | Expedition Wide | Mutation 1+ |
| Forgotten Protector’s Set (Heavy) | Expedition Wide | Mutation 1+ |
| Chardis Set (Heavy) | Chardis | Mutation 3 |
The following drops DO NOT require the Rise of the Angry Earth Expansion
| Armor | Where it Drops | Difficulty |
|---|---|---|
| Guardian’s Ire | Chardis | Normal |
| Chardis Set (Heavy) | Chardis | Normal |
| Deceit’s Design | Cilla | Normal |
Lazarus Instrumentality Jewelry
The following drops require the Rise of the Angry Earth Expansion
| Jewelry | Where it Drops | Difficulty |
|---|---|---|
| Passage of Time | Chardis | Normal+ |
| Hamstring | Chardis | Normal+ |
| Heavy Earring | Cilla | Normal+ |
| Hoop of The Cursed Son | Alcyon | Normal+ |
| Instrumentality’s Ring | Expedition Wide | Mutation 2+ |
| Instrumentality’s Earring | Expedition Wide | Mutation 2+ |
| Instrumentality’s Amulet | Expedition Wide | Mutation 2+ |
The following drops DO NOT require the Rise of the Angry Earth Expansion
| Jewelry | Where it Drops | Difficulty |
|---|---|---|
| Featherweight Ring | Chardis | Normal |
| Enchanted Earring | Chardis | Normal |
| Blackmetal Stud | Cilla | Normal |
| Smooth Bone Ring | Expedition Wide | Normal |
| The Chain of Zane | Khamruset Arcanist | Normal |
Heartgem Rune & Other Resources
| Item | Where it Drops | Difficulty |
|---|---|---|
| Powerful Magis Mount Charm | Expedition Wide | Mutation 1+ |
| Minor Heartrune of Stoneform | Chardis | Normal+ |
| Lazarus Materia | Chardis | Normal |
| Dense Lazarus Materia | Chardis | Normal+ |
| Spectral Dust | Expedition Wide | Normal+ |
| Metallic Boneweave | Cilla | Normal+ |
Lazarus Map
Location, Entrance, and General Information
The Lazarus Instrumentality is located North of Reekwater Settlement and is recommended for level 60+ players. This expedition can drop up to gear score 700 items (625 without the expansion) and is the only place you can obtain Metallic Boneweave, which a necessary ingredient in crafting the Lazarus Instrumentality Expedition Replicas.
Types of Enemies in The Lazarus Instrumentality and Optimal Damage Types
The Lazarus Instrumentality Expedition in New World Aeternum contains Ancient Enemies. They are weak to Strike, Void, and Lightning damage. You can check the full list of weaknesses for all enemy types by checking our Damage Type vs Mob Type quick chart. You can utilize weapons with Infused Ancient Coatings and Infused Ancient Ward Potions to dish out more damage and to mitigate additional damage from the Ancient enemies.
Additional options to help you maximize damage output would be utilizing an Ancient Combat Trophy, as well as using a Powerful Honing Stone.
How to Enter the Lazarus Instrumentality
In order to enter the Lazarus Instrumentality (like all New World Expeditions), someone in your party will need to be at the entrance to enter.
There is a limit on the number of expeditions you can run.
- 15 Normal Expedition runs per player per day or 105 per week, per player.
- 35 Mutated Expedition runs per week.
You can also utilize the dungeon expedition group finder to find a group and enter the expedition. The group finder can be accessed through the expedition entrance UI or from the map by clicking on the Expedition map icons.
You can browse listings created by other players, or post your own request to join other players on your server. This tool allows you to declare your preferred team role, such as DPS, tank, or healer. You can recruit based on those roles. You can also set recruiting requirements like minimum gear score and level, then inspect members to learn their average gear score, weapons, and mastery levels.
Repeatable Quests
There are no repeatable quests available for the Lazarus Instrumentality. However, once you reach level 58 you can begin to accept the Expedition faction missions from your Reekwater faction representative.
The Lazarus Instrumentality Walkthrough
First Encounter
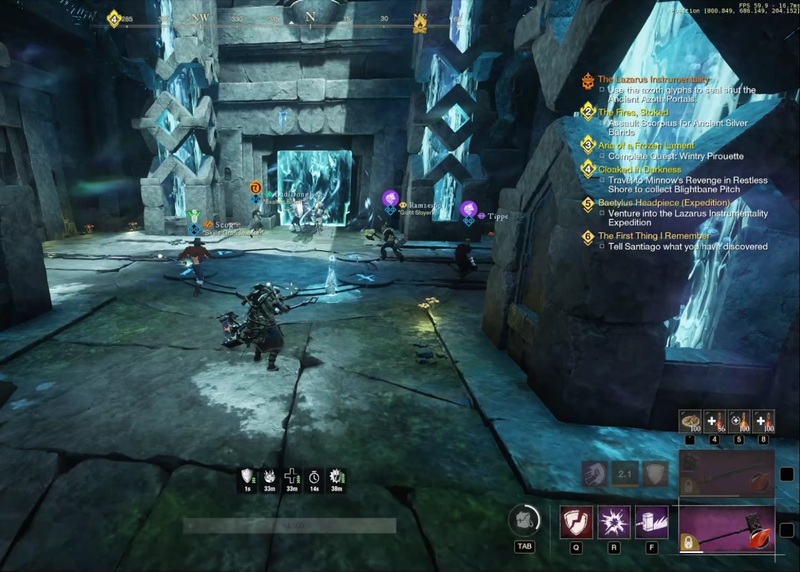
Your first encounter within the Expedition happens only a few steps from the entrance. You will encounter a mini boss named Damysys. He is a shield and spear user and has 2 adds with him. The 2 adds are called Lazarus Avengers, and are normal mobs that can be easily taken down.
Clear out the 2 ads and then lay down heavy attacks on the boss to break his stamina bar. He does not have a ton of health and can be taken down fairly quickly. One thing to be aware of in this encounter is the archer and ad set just behind the boss. You can pull them into the fight if you’re not careful. Just be aware that they are there.
The Ostium and Portal Glyph Puzzle
The next room you will move into is called the Ostium. You will see a portal straight ahead with several mobs standing in front of it and a puzzle platform in the center of the room.
Throughout this puzzle phase enemies will spawn from the portal and another portal located on the left wall. In order to complete the puzzle you will need to have one person match the glyph that is lit above the door to the glyph on the puzzle platform in the center of the room. As the person on the glyph stands for a few seconds you see an animation on the glyph that’s on the floor light up. Once it’s lit up and a second has passed this means you have locked in that choice.
If you have chosen correctly another wave of enemies will spawn and you will see a second glyph above the door light up (You will of course need to kill the enemies during each wave before making another selection). You will need to stand on the glyph that matches the one above the door once again and repeat the process. This will be done 3 times for the first door, and then the door on the left will open. You will need to do the same for that door and then the door on the right will open and you can proceed through the Expedition.
Choosing The Wrong Glyph
If you choose the wrong glyph then new enemies will spawn but you will not progress the glyphs. So, during the fight be careful not to stand on the glyphs too long or you will spawn in additional enemies. It is ok to run over them, but do not stand on the wrong one long enough to lock in that choice.
Make sure you look out for the crawlers. They have a long jump range and hit hard. They can be a problem if not kept under control. Make sure you clear them first.
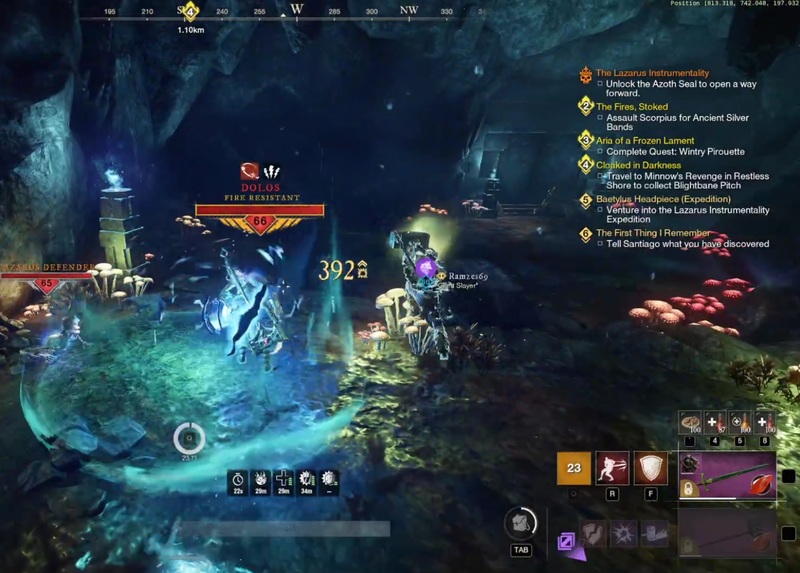
Dolos Encounter
After completing the puzzle, continue through the right door and unlock the respawn pilon. Shortly after you will encounter Dolos. Dolos is a Reaver boss and will dash through players and slow them. He isn’t very difficult and should be fairly easy to take down.
Along with Dolos there is also an Archer to the right that’s guarding an Orb. You must defeat the archer and interact with the orb in order to unlock the next door and proceed to the next area.
On the other side of the door is a set of 3 mobs that can be easily taken down.
You will then need to progress through the dungeon clearing trash mobs until you can talk to Cilla.
Alcyon Encounter
After talking to Cilla another set of mobs will spawn. You will need to kill them and work your way back up the path to Alcyon.
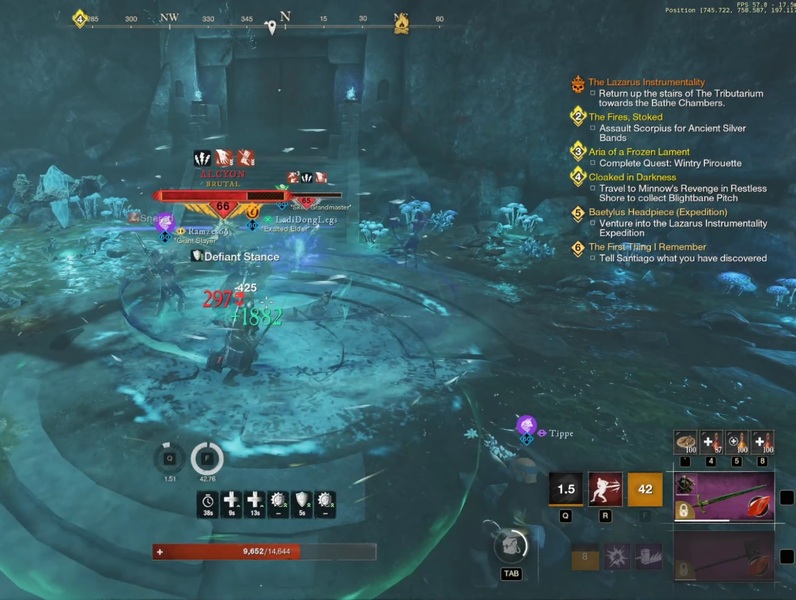
Make sure you deal with the archers in the back and watch out for the AOE nova ability from Alcyon. You can block and dodge out of the way of the AOE, but it can one shot you if you get stuck in the AOE.
You can see the AOE being triggered by the purple glow around Alcyon’s weapon. He will then slam the weapon on the ground causing the AOE.
Avoid the AOE, and kill the boss to proceed to the cleansing ritual.
The Cleansing Ritual
After defeating Alcyon continue into the next room. Clear the trash mobs and then everyone in the group MUST interact with the pillar in middle of the room to cleanse. If everyone does not do this you will not be able to talk to Cilla to trigger the boss encounter.
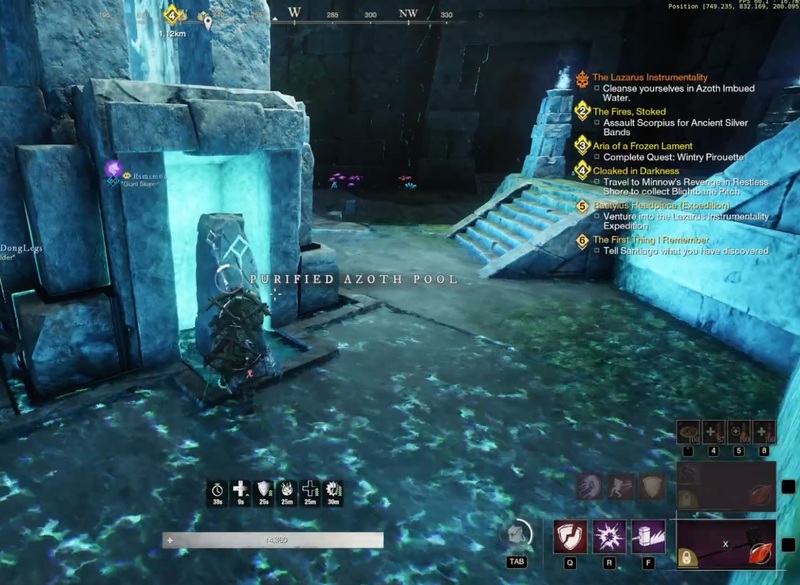
After everyone has cleansed another set of mobs will spawn in the room, including a named mini boss, Palas. He’s a spear user and can be locked down pretty easily with CC and can be defeated fairly easily.
Make sure you pick up the Respawn Pylon right outside of the room prior to beginning the fight with Cilla.
Cilla Boss Guide
You will need to talk to Cilla to trigger the encounter. Make sure everyone is across the bridge before starting the encounter because the bridge disappears once it has begun.
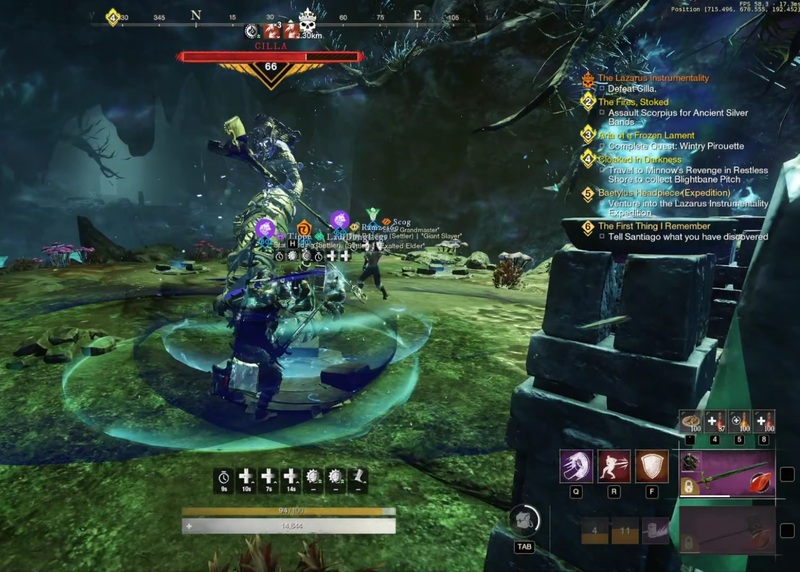
Cilla will perform spear jabs, throws and swipes. Make sure to block and dodge the spear abilities.
Over time Cilla will gain buff stacks. These stacks ramp up and make her damage increase very high. Once she reaches 10 stacks an orb will spawn at one of the platforms around the boss arena. Someone in the group will need to activate the orb in order to remove the buff stacks from Cilla.
Upon activating the orb Cilla will move to that location, and the player who activated the orb will receive a debuff, increasing the amount of arcane damage they take. This debuff will stack up. You can cleanse the debuff with a cleansing touch or ice block so you can negate the mechanic.
Once Cilla has moved to the location of the dropped orb she will begin stacking buffs again and you will repeat this process.
After a certain amount of time has passed and a certain amount of orbs have been activated Cilla will then enter into phase 2. She will then start casting an AOE wipe mechanic.
Phase 2
She will spawn purple orbs on all the party members. You will need to ALL stack up on the boss until these orbs disappear. Once the orbs disappear a large purple AOE will appear on the ground. You must run out of the area into a safe space to avoid death.
The AOE drops at a radius around each player. Therefore, if you do not stack up the AOE will cover the entire arena and you will not be able to find safe ground to run to which will then wipe your group.
During this phase she will also drop purple balls on the ground that will root you in place. You will need to avoid these or you could get hit with one of her spear or void attacks.
She will also cast a cone AOE in front of her as well. You can see the cone being cast when she swipes her spear horizontally. You can dodge through the ability or get of range of the ability to avoid damage.
In summary, Cilla stacks 10x buffs, drop the ball to remove buffs, stack up on boss when you see purple orbs on players, run out of AOE, and avoid other damage.
The Last Walk
After defeating Cilla you will teleport into the Last Walk room. You will notice 3 pressure plates on the ground.
You can split this in 1 of two ways. 1 tank in the front, dps in the back, and the other 3 in the middle. You could also go 1 tank in the front, 2 in the middle and 2 in the back.
Once you have everyone in position you will need to activate all the pressure plates. Enemies will spawn in all 3 rooms. The middle room spawns the most enemies so you may need 3 people in this room. If you choose the 1, 2, 2 split the 2 on the bottom can burn down their spawns quickly and then proceed to help the middle room.
Each room will spawn waves of enemies. As you kill the enemies in the top and bottom portions the middle room will open and players can go into the middle room to finish cleaning up the remaining waves. After all waves are complete the gate will unlock and you can proceed through the expedition.
After the Last Walk Room you can proceed through the remainder of the Expedition clearing the ads and other mini bosses along the way. Most of these enemies are trash mobs and easily defeated. The remaining mini bosses do not have many mechanics and can be taken down fairly easily. Once you have cleared all these enemies you will find yourself in the last boss room.
Chardis Boss Guide
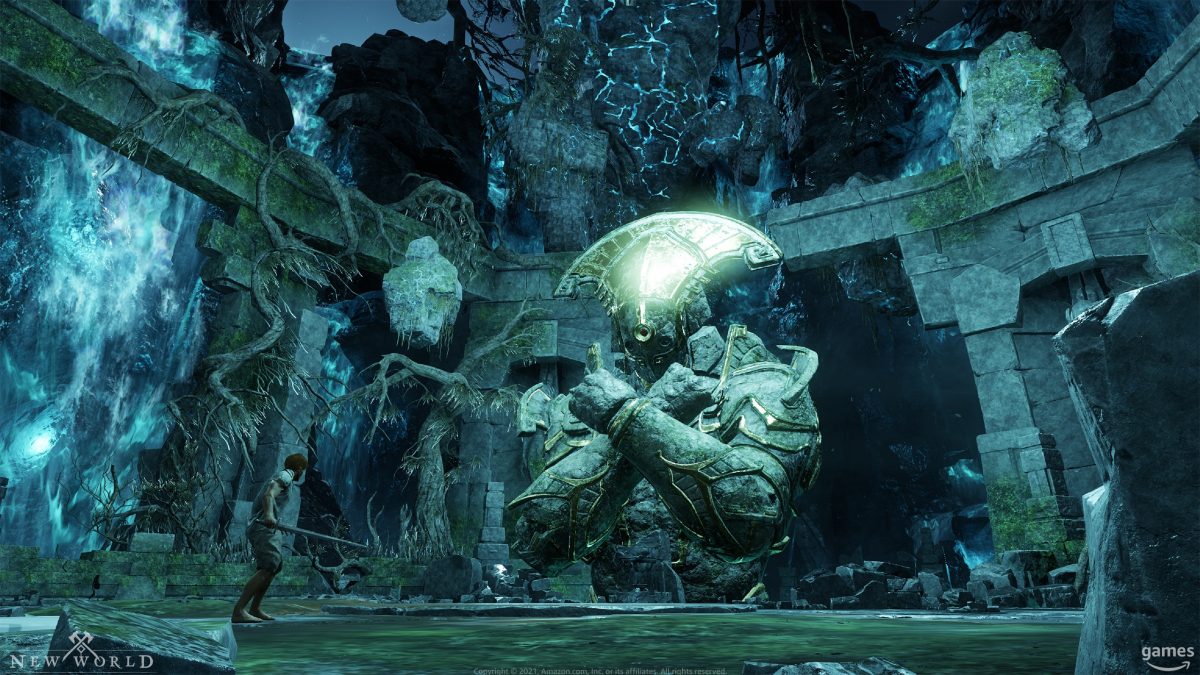
Charids is the final boss of the Lazaraus Instrumentality Expedition in New World. Chardis is a unique boss.
Your DPS will want to stand just in front of Chardis for the entire fight, and ranged players will want to stand just behind the right glowing circle on the ground against the wall for the duration of the fight.
After you initiate the fight you will see two orbs that are both surrounded by energy shields on either side of the boss. One DPS needs to go to the orb on the right, destroy the shield by attacking it, and then roll the orb over to the glowing circle on the ground. This will then activate a cleansing area. Then go to the left side and do the same. (For High DPS groups you can skip the left side)
After activating the cleansing areas the DPS should then go back to their respective spot and continue to DPS the boss.
As you are DPSing the boss he will slam his hands down and roll his arms over the players. Just continue to stand in your respective positions as these attacks to not do a whole lot of damage and can be easily taken. Your healer can heal you back up to full health as the fight progresses.
Damage Phase
Eventually, Chardis will target a player with a laser. That player will need to move over to where your team has placed a floating orb to cleanse the laser. Once the orb is down Chardis will then fall to the ground and take significantly more damage.
When Chardis reaches around 65-75% remaining health, the boss will layer the left side (when facing them) of the area preventing access to the left orb. If you happen to run into the mist, you will rapidly start taking damage and you will be unable to use abilities due to silence. The same thing occurs around 40-50% health remaining, but the harmful layer will occur on the righthand side.
After both of the orbs have been used if the boss isn’t defeated he will target someone in the group with the laser. The laser will persist on that player until they are dead or until Chardis is defeated. Your healer can keep you up during the perpetual laser cycle.
Once Chardis is defeated you can make your way through the teleported to claim your final chest and exit the Expedition.
Lazarus Instrumentality Expedition Guide Conclusion
That concludes our Lazarus Instrumentality Expedition Guide. For more on another end-game expedition, check out our Tempest Hear Guide. For more New World Aeternum guides be sure to check our comprehensive guide library!