Introduction

Welcome to our Staff Wand Support Build guide for Throne and Liberty. Learn everything you need to know about the powerful mix between supportive healing and AoE damage dealing.

Skills & Passives

Below are the Active, Passive, and Defensive Skills for the Staff Wand Support Build. For insight on which order to level these Skills up, Check our Skill Upgrade Progression Section below. It’s important to note that there is a few good options and paths you can take with the build. As a result, the freedom truly is yours to explore past our own recommendations.

Active Skills

Inferno MeteorChain Lightning
Blessed BarrierSerial Fire Bombs
Clay’s SalvationInferno Wave
Swift HealingJudgment Lightning
Fountain of LifeIce Spear
Salvation ChainHigh Locus

Passives

Mana AmpDevotion and Emptiness
Flame CondensationNobel Revival
Forbidden SanctuaryFull of Corruption
Asceticism Frost Master

Defensive Skill

Mystic Shield and the Wand block tend to feel fairly similar in use cases. However, we recommend using Mystic Shield in this particular support build of Staff and Wand. Not only does the Mystic Shield deal some damage if you manage to perfect block a Fury Attack, it also has several effects:

  • For Lightning spells, after blocking a Fury Attack – increase Critical Hit Chance by 20% for each stack of “Flowing Mana”
  • For Fire spells, after blocking a Fury Attack – add an additional stack of Burning and decrease the Mana Cost of other skills by 6%

Flowing Mana is a stacking buff obtained through blocking Fury Attacks. The activation window of the Mystic Shield and the uptime it has is fairly long and forgiving. However, keep in mind that if you get silenced by an enemy player you CANNOT use Mystic Shield as it is a magic skill.

Skill Upgrade Progression

Next, Let’s look at the order to prioritize upgrading your skills. We’ve focused on the most important skills to help guide you through skill progression to help get you started. It’s important to note that you will upgrade all skills to max eventually and that some Skills start at Rare or Epic Quality. However, some Active and Passive Skill are far more vital to push.

  • Staff- Serial Fire Bombs (Uncommon to Rare)
  • Staff- Chain Lightning (Uncommon to Rare)
  • Wand- Swift Healing (Uncommon to Rare)
  • Staff- Serial Fire Bombs (Rare to Epic)
  • Staff- Chain Lightning (Rare to Epic)
  • Wand- Swift Healing (Rare to Epic)
  • Staff- Inferno Wave (Rare to Epic)
  • Staff- Mystic Shield (Uncommon to Epic)

PASSIVE SKILL UPGRADE ORDER

  • Staff- Mana Amp (Rare to Epic)
  • Staff- Asceticism (Uncommon to Epic)
  • Staff- Flame Condensation (Rare to Epic)
  • Wand- Full of Corruption (Uncommon to Epic)
  • Wand- Devotion and Happiness (Uncommon to Epic)

The Active & Passive Skills with the Staff and Wand build when gearing toward the support role can be quite flexible. However, for the sake of this guide we’ve put together the framework above to ensure you have a solid start! As a result, feel free to experiment after!

Attributes, Weapon Mastery, and Guardians

Attributes

In this section, we will go over recommended Attribute allocation, as well as the Weapon Mastery and Guardian usage for the build.

For this build, the main attribute actually split between Wisdom and Dexterity. However, Perception can play a crucial role in the build too, if you have enough stat points from gear. Dexterity is important due to the increased Maximum damage threshold, Critical Hit Chance, Evasion and Attack Speed it provides. Wisdom similarly plays an important role, boosting Maximum damage dealt while providing Mana, Cooldown Reduction for more healing output and more. Perception, while the least important of the 3 stats can prove powerful when stacked. High Perception allows you to hit targets with higher levels of Evasion. Most importantly, however, is the increased range bonus provided upon reaching 50 Perception.

It is incredibly important to keep in mind with healing that your Maximum Damage in your base damage numbers highly influences the amount of healing output you have! As a result, Maximum Damage, Critical Hit Chance, Skill Heal % and Heavy Attack Chance all contribute to increasing your support capabilities and damage ceiling.

Starting out, however, we recommend the following:

NOTE: This Information does not include gear Bonuses

  • STRENGTH – 10
  • DEXTERITY – 30
  • WISDOM – 30
  • PERCEPTION – 19

Weapon Mastery

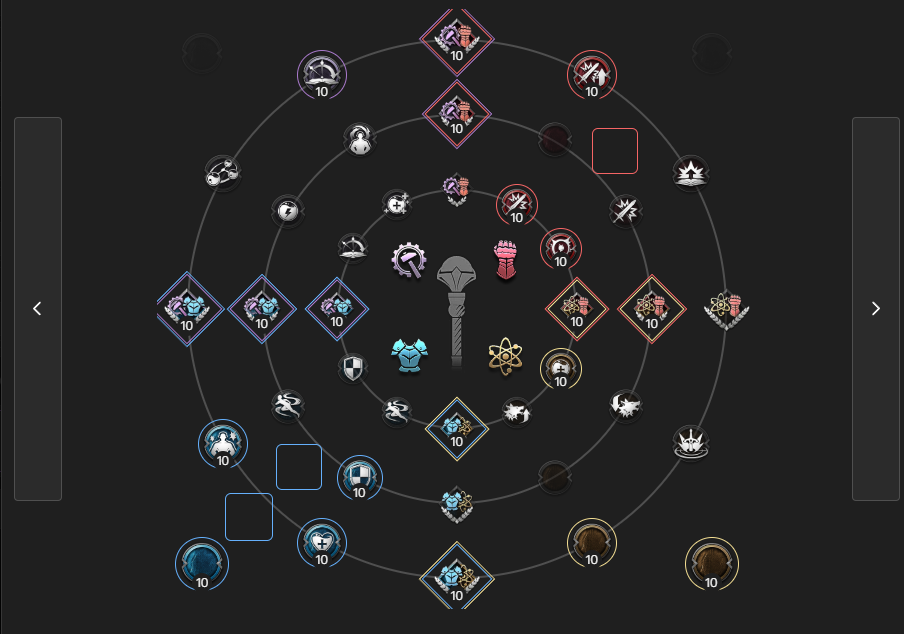
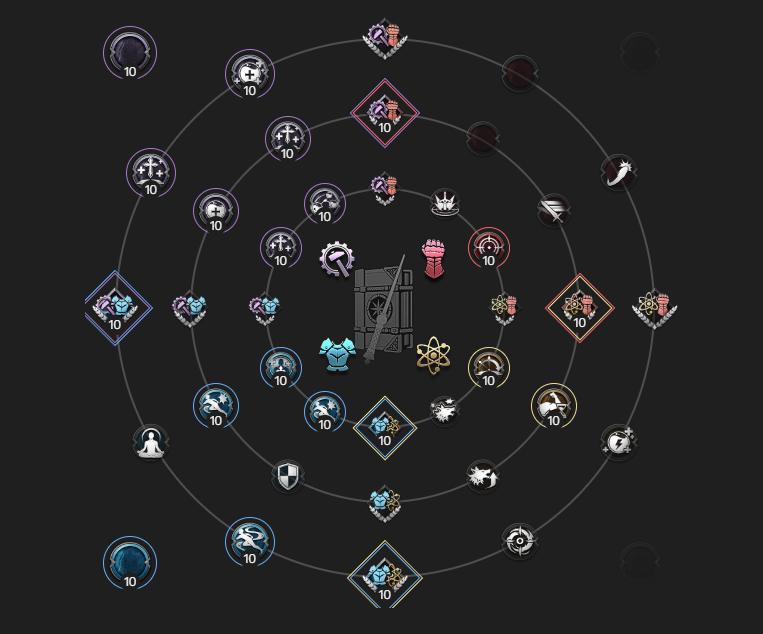
You can level up your Weapon Mastery naturally by just playing the game and using the weapon(s). The Weapon Mastery Trees for each weapon are as follows:

NOTE – Your first Weapon Mastery Point will be used to select the opening Node in each weapon.

staff wand support build mastery image

Staff

  • Destroy – 7 points
  • Attribute – 5 points

Wand

  • Damage – 2 points
  • Recovery – 9 points
  • Weaken – 1 point

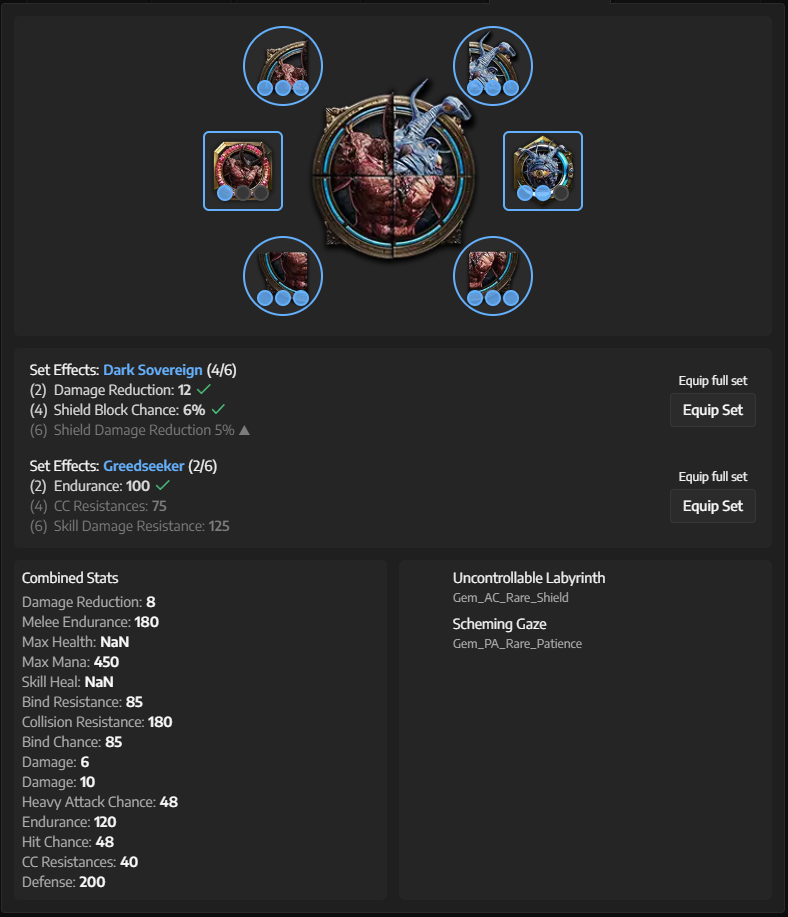
Guardian – Lady Knight Kamarshea

Lady Knight Kamarshea is the perfect Guardian for a ranged DPS or support player. This is due to the huge shield and cooldown speed the Kamarshea provides. However, with a Staff, this effect becomes even more powerful as a result of the shield scaling with your Maximum Mana. Kamarshea gives you the opportunity to play more aggressively without worrying about assassins diving you. As a support player, you can use the Guardian not only to protect yourself from harm, but to also increase your healing output due to the cooldown speed. Alternatively, in PvE, Shade Revenant Stheno is a great choice too for raw damage output versus bosses.

Gear

NOTE – Most Elite Resistance gear ALSO has a chance to drop from Precious Blessing Pouches that can be purchased daily from your Contract Vendor and the completion of some level 50 Contracts.

Weapons

IMPORTANT – You will want to level up RARE gear to 9+ before transferring progress to EPIC quality Gear.

Level 1-50+

NameTrait 1Trait 2Trait 3How to Acquire
Main HandElite Resistance StaffHeavy Attack ChanceHit Critical HitCrafted – Lithograph from Various Sources & MSQ Reward
Off-HandElite Resistance WandHeavy Attack ChanceHitCritical HItCrafted – Lithograph from Various Sources & MSQ Reward

End Game (BIS)

Name Trait 1 Trait 2Trait 3 How to Acquire
Main HandToublek’s Thunderous SoulHeavy Attack ChanceHitMana Cost EfficiencyPaola’s Dimension Chest (Drops in all 50+ Dungeons or can be purchased with Dimensional Crystals)
Off-HandLequirus’s GripHeavy Attack ChanceHit Critical HitPaola’s Dimension Chest (Drops in all 50+ Dungeons or can be purchased with Dimensional Crystals)

NOTE – you can also use Queen Bellandir’s Domination Wand in the Staff slot. The item is difficult to acquire/Trait, but due to the Weapon Skill it is far superior to Toublek’s Thunderous Soul. This drops from the World Boss Worm – Queen Bellandir.

Armor

IMPORTANT – You will want to level up RARE gear to 9+ before transferring progress to EPIC quality Gear.

Level 1-50+

NameTrait 1Trait 2Trait 3How to Acquire
HelmElite Resistance VisorMax HealthRanged EvasionMelee EvasionCrafter – Lithograph drops from Various location
CloakElite Assassin’s CloakMax HealthSkill Damage ResistanceBind ResistanceCrafter – Lithograph drops from Orc Spearmaster and Executioners (Akidu Valley)
ChestElite Resistance Plate ArmorMax HealthMelee EvasionRanged EvasionCrafted – Lithographs Drop from Ruins of Turayne Zone from Gallu Mobs
GlovesBlessings of Mother Nature ClothMax HealthMelee EvasionMagic EvasionCrafted – Lithograph Drops from Cave of Destruction
PantsElite Resistance Leather PantsMax HealthRanged EvasionMagic EvasionCrafted – Lithograph drops from Mitran or Pirate King’s Chest Crab
BootsElite Resistance Plate BootsRanged EvasionMelee EvasionMove SpeedCrafted – Lithograph drops from Grayclaw Butcher

End Game (BIS)

NameTrait 1 Trait 2Trait 3How to Acquire
HelmTranscendental Clairvoyance Melee EvasionMagic EvasionMax ManaDungeon Drop – Death’s Abyss
CloakArchpriest’s DevotionMax ManaSkill Damage ResistanceStun ResistanceDungeon Drop – Cave of Destruction
ChestTranscendental Saint RaimentMax HealthMelee EvasionMagic EvasionDrops from Precious Blessing Pouch and Avolos Geomancer
GlovesTranscendental Mystery GlovesMagic EvasionMelee EvasionAttack SpeedWorld/Archboss – Tevent
PantsTranscendental Salvation PantsMagic EnduranceMelee EvasionMagic EvasionDungeon Drop – Tyrant’s Isle
BootsHeavenly Arbiter ShoesMagic EvasionMelee EvasionMove Speed World/Guild Raid Boss – Nirma

The support build heavily leans into the Transcendental 4-set bonus. Reaching the 4-set bonus provides you with the 2-set bonus of Cooldown Speed and the 4-set bonus of Skill Heal +25%.

Accessories

IMPORTANT – You will want to level up RARE gear to 9+ before transferring progress to EPIC quality Gear.

Level 1-50+

NameTrait 1Trait 2Trait 3How to Acquire
NecklaceShock Trooper’s Resistance NecklaceMax HealthSkill Damage BoostBuff DurationDrops From Skeleton Lancer (Ruins of Turayne Zone)
BraceletWild Resistance BraceletMax HealthSkill Damage ReductionStun ResistanceDungeons – Roaring Temple and Cursed Wasteland
RingLethal Fortune RingMax HealthSkill Damage BoostBuff DurationCrafted – Lithograph Recipe obtained from Lithograph Book
RingCrude Wind BandMax HealthSkill Damage BoostN/AUncommon Accessory Chest
BeltCrude Vigor BeltBind ResistanceSkill Damage ResistanceN/AUncommon Accessory Chest

End Game (BIS)

NameTrait 1Trait 2Trait 3How to Acquire
NecklaceShock Trooper’s Resistance NecklaceMax HealthSkill Damage BoostBuff DurationLithograph Book and Drops from Skeleton Lancer
BraceletWild Resistance BraceletMax HealthSkill Damage ReductionStun ResistanceDungeons – Roaring Temple and Cursed Wasteland
RingAbyssal Crystal RingMax ManaSkill Damage BoostBuff DurationDungeon Drop – Death’s Abyss
Ring Transcendent Magic RingWeaken ChanceSkill Damage BoostBuff DurationCrafted – Lithograph from Morokai (Raid Boss)
BeltSkull’s Spectral BeltMax ManaSkill Damage Resistance Stun ResistanceWorld/Guild Raid Boss – Malakar

Tier 2 Gearing

Tier 2 Epic gear is a step up from the Tier 1 Epics you’ll find early on in Throne and Liberty. After obtaining your Tier 1 BIS gear, you’ll need to work towards your Tier 2 gear grind. Most Tier 2 gear comes as a reward from the new Tier 2 Dungeons, along with a Tier 2 specific upgrade material – Precious Growth Schema’s. There is a lot of powerful Tier 2 gear options, with powerful 2-set or 4-set bonuses. In terms of weapons, there is also game-changing options available to most weapon types. Below is our recommended Tier 2 pieces to target farm for the Staff and Wand:

Weapons

NameTrait 1Trait 2Trait 3How to Acquire
Main HandBlack Gale Witch’s Frost SoulHeavy Attack Chance HitCritical HitTier 2 Dungeons or Crafted via Soul Shards
Off-HandOverture of Soul SalvationHeavy Attack ChanceHitCritical HItTier 2 Dungeons or Crafted via Soul Shards

Black Gale Witch’s Frost Soul is an interesting addition from the Tier 2 arsenal. Not only does the Black Gale provide higher base damage, it also provides an AoE root passive on your Smokescreening Frost. However, Toublek’s Thunderous Soul is still a fantastic weapon and highly recommended. Overture of Soul Salvation is the perfect supplementary Tier 2 Wand for this build. This Tier 2 Wand’s passive adds a Heal-over-Time to Clay’s Salvation – the burst AoE party heal. As a result, it is a no brainer to include more healing diversity in your build as a support.

Armor

NameTrait 1Trait 2Trait 3How to Acquire
Tier 2 Piece (Helmet)World Tree’s Mysterious Wreath Cooldown SpeedMagic EvasionMelee EvasionTier 2 Dungeons or Crafted via Soul Shards
Tier 2 Piece (Boots)World Tree’s Winged BootsMove SpeedMagic EvasionMelee EvasionTier 2 Dungeons or Crafted via Soul Shards

World Tree’s 2-set bonus provides a boon to your mana pool and Wisdom which is always nice. However, the main allure of at least the Helmet is the additional Heavy Attack Chance. Although, depending on how you can set-up your Reaper 2-set bonus across your gear, it can also be worth running the World Tree’s Mysterious Wreath along with the Abyss Slayer’s Rake Gloves. Both of these pieces do not synergize in terms of 2-set bonus, however, the mix of increased Heavy Attack Chance, Range and Stats in general is well worth it.

How to Play the Staff Wand Support Build

This support build has Top Tier healing and utility capabilities making it a must-have in both PVE and PVP. Below, we’ll break down the basics of PvE and PvP gameplay approaches with the build.

PVE

This build is focused on dealing as much healing and support as possible throughout dungeons and the open world while dealing acceptable damage. The build excels in both single-target and multi-target combat. When dealing with multiple enemies, group them up with your party and follow a rotation similar to below:

  • Serial Fire Bombs (x3)
  • Inferno Wave
  • Ice Spear
  • Chain Lightning
  • Judgment Lightning
  • Inferno Meteor

The Ice Spear activates the Frost Master passive which modifies Chain Lightning and Judgment Lightning into AoE skills. The Serial Fire Bombs also increase most of your damage due to the Staff kit revolving around damage increases based on burn stacks.

For single-target fights, we recommend switching out Ice Spear and Inferno Meteor for Touch of Despair and Curse Explosion. This change is especially helpful against bosses because you can focus all of your skills into one target. Build up stacks of Despair until you reach 3 stacks and pop the stacks with Curse Explosion for additional damage.

For Survivability, you have multiple healing spells and Blessed Barrier at your disposal. Focus on keeping your tank or mechanic-takers alive by casting Blessed Barrier first and then using heals such as Swift Healing right after. If done correctly, you’ll heal for 3x the amount.

Skills such as Salvation Chain can be used to not only pull teammates out of damage areas or mechanics, but also pull them into a better position for an upcoming mechanic. As a result, keep this in mind while playing and positioning during dungeons.

PVP

For PVP, this build is used to deal damage through bursting enemy backlines, melting frontlines and “nuking” clumps of enemies while supporting your teammates with single-target, AoE and HoT healing abilities.

As a Staff Wand Support build, you have a couple of important roles to play. The first and foremost as expected, is to keep your team alive where possible. This is achieved through looking for several scenarios in large-scale fighting:

  • When a teammate is being singled out by an Assassin, a single cast of Blessed Barrier into Swift Healing should keep them tanky and sustained.
  • If both the allied and enemy frontlines clash, dropping Fountain of Life on the clash line while utilizing Clay’s Salvation can keep your frontline and party topped up and sustain the initial engage.
  • Using Blessed Barrier on your tank players increases their defensive capabilities massively, making your job as a healer much easier.
  • If your squishy teammates get pulled in or caught by enemy tanks & crowd control, make use of Salvation Chain to pull party members back towards you. As a healer you should be the furthest back where possible which allows for this skill to thrive.

As a support, your Staff deals significant damage still, utilizing Fire skills and Lightning skills to splash, burn and burst players while healing your own. However, the Staff in the support build still allows you to assist the “Bomb Squads” with your own Inferno Meteor.

Meteor Nuking

Most large-scale compositions play with 1-2 “Bomb Squads” in Throne and Liberty. Your task as a Staff user is to time your Meteor cast with your other Staff players on an engage. The most important aspect here is to wait for your tank(s) to call their Green Ranger Guardian activation (which is an AoE Root) and then react to it immediately. As a Staff Wand player, you can do the following for maximum nuke output:

  • High Locus
  • Channel Meteor on the correct location
  • Consume an Attack Remedy mid-channel

Ice Spear is a very flexible spell in PVP too. Using Ice Spear both offensively and defensively has its benefits. As a result of slowing in AoE, you can use Ice Spear to disengage AND engage into a clump. Additionally, Ice Spear triggers Frost Master in your Staff passives, allowing for Chain Lightning and Judgment Lightning to deal AoE damage.

Utility such as High Locus should be used before you cast any of your rotation to ensure your cooldowns are reduced.

Conclusion

That Concludes our Staff Wand Support Build! For more Throne and Liberty content, news and guides, be sure to check out our Throne and Liberty Home Page