")
Introduction
The Amrine Excavation is a 5-man instanced PvE activity in New World Aeternum, designed for explorers who have reached level 25. However, it’s optimal to begin this expedition at level 23. In our Amrine Excavation Expedition Guide we’ll cover the enemies you’ll face, Drops you’ll Earn, and more!
Amrine Expedition Drops
Weapon Drops
| Weapon | Where it Drops |
|---|---|
| Amrine’s Forgotten Axe | Expedition Wide |
| Darkness Defined | Expedition Wide |
| The Space Between | Expedition Wide |
| Crusher’s Craze | Expedition Wide |
| Lost Faith | Expedition Wide |
| Cavern Lurker’s Defense | Foreman Nakashima |
| Frozen Mire | Foreman Nakashima |
| Flare Spark | Foreman Nakashima |
| Tomb Raider’s Rifle | Simon Grey |
| Burial Spear | Simon Grey |
| Simon Grey’s Toothpick | Simon Grey |
Armor Drops
| Armor | Where it Drops |
|---|---|
| Excavator’s Safety Helmet | Simon Grey |
Jewelry Drops
| Jewelry | Where it Drops |
|---|---|
| Amrine Excavator’s Amulet | Expedition Wide |
| Simon’s Hacksilver Ring | Simon Grey |
| Prosperous Promise | Simon Grey |
| Nakashima’s Keepsake | Foreman Nakashima |
Resources
Coagulated Blood
Vial Of Ectoplasmic Mutagen
Amrine Expedition General Information
Durability Loss
While in an expedition you will not receive durability damage to your gear.
Types of Enemies in the Amrine Expedition
The Amrine Excavation Expedition contains only Lost mobs. They are weak to strike, ice, and nature damage. You can check the full list of weaknesses for all enemy types by checking our Damage Type vs Mob Type quick chart. Therefore, in order to push out maximum DPS it is recommended that you utilize weapons with strike, ice, and or nature damage. You can also use Lost Coatings and Lost Ward Potions to dish out more damage and to mitigate additional damage from the Lost enemies.
Additional options to help you maximize damage output would be utilizing an Lost Combat Trophy, Coatings, and Ward Potions, Trophies, and Perks. These are not vital to completing the dungeon but are options to help you min/max your DPS and resistances while in the Amrine Excavation Expedition.
How to Enter The Amrine Excavation
In order to enter the Amrine Excavation (like all New World Expeditions), someone in your party will need to be at the entrance to enter, or you can utilize the group finder option. The group finder can be accessed through the expedition entrance UI or from the map by clicking on the Expedition map icons. You can also utilize the Activities option to queue with a random group.
There is a limit on the number of expeditions you can run.
- 15 Normal Expedition runs per player per day or 105 per week, per player.
- 35 Mutated Expedition runs per week.
You can browse listings created by other players, or post your own request to join other players on your server. This tool allows you to declare your preferred team role, such as DPS, tank, or healer. You can recruit based on those roles. You can also set recruiting requirements like minimum gear score and level, then inspect members to learn their average gear score, weapons, and mastery levels.
Amrine Excavation Repeatable Quests
There is one repeatable quest for the Amrine Expedition called Bones for Barkimedes. You must be level 23 in order to accept the quest. You can obtain the quest from Barkimedes who sits just outside of the Amrine Entrance. The quest will have you collect 5 bones while in the Expedition. The bones come from Ravagers within the dungeon (mini-bosses) so make sure you pick them all up as you kill that enemy type.
You will also be able to obtain PvE faction missions from Windsward for this Expedition after reaching level 23.
Amrine Map
Walkthrough
Once inside, clear the Lost and work your way out of a mine shaft. Here, you will drop down off a ledge. Head to the right and take down the Withered Nest at the back right of the room. It will continue to spawn lost until you do. Next, Clear the room after a couple waves of Lost mobs and open the door in the center of the room.
The Grand Traverse
Once through the door, clear the mobs to the lower left platform including a Lost Ravager. Then head up the wooden ramp. Note the elevated stone platforms on the lower and upper platforms, you will use these later. Clear the Lost mobs on the upper platform (grab the lore page near the ramp that you came up on) then jump off the ledge ahead of you. There you will clear more Lost mobs, including another Lost Ravager. Down here, is the final (third) platform. Head through the doorway in front of you.
Excavated Caverns
While running through the next hallway you will spot a stone with Azoth Script located on it. Behind this is another Withered Nest. Destroy the spawner then use the Azoth Staff to translate this stone to get the expedition quest update.
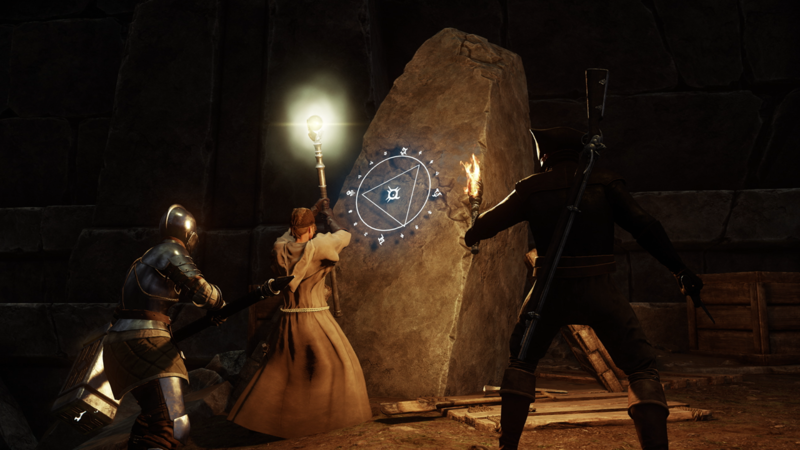
You will then continue to head down the pathway towards Broken Vestibule, where you will see another Withered Nest. Destroy it and clear the rest of the Lost, then head into the next room where you will find a sphere statue with an Ancient Azoth Seal.
Clear the room then use the Azoth Staff to break the seal. This will open the exit to the room and spawn in some Poltergeist, lost mobs, and two Withered nests. Clear the Poltergeist and the nest, then any remaining mobs, then head back to the puzzle room. In the next hallway, you will reach your first respawn point.
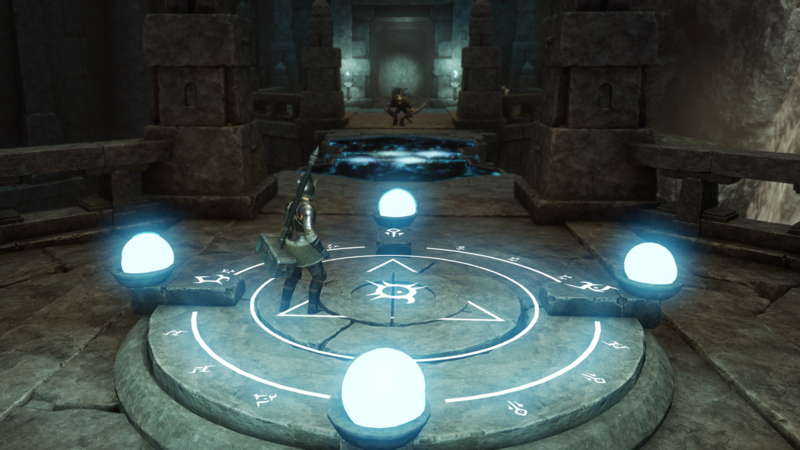
The Grand Traverse – Platform Puzzle
Here is where the platform you saw before come into play. Three group members will need to each stand on a platform. This action forms the bridge to the next room and will spawn in more lost mobs including a Ravager and a Plaguegeist. Once cleared, head across the bridge to fight another Ravager and a few Lost.
Star Shrine
In the hallway make sure to stop at Foreman Nakashimas toolbox and pick up the Hollowed Candle, you will need it to summon the first boss! Then head into the next room and start clearing the Lost mobs including a Plaguegeist and yet another Ravager. You are now ready to begin the First boss Fight. Place the Hallowed Candle on the Spectral Shrine to summon Foreman Nakshima.
Foreman Nakashima Boss Guide
Foreman Nakashima has two main mechanics players need to be aware of.
Spectral Waves – Nakashima spawns Walls of Spectral images with gaps in them, players must be outside the waves or dodge into gaps to avoid damage.
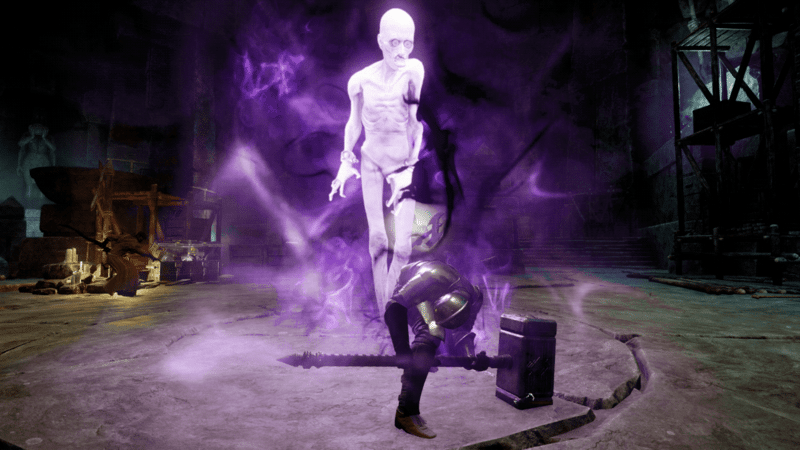
Slow Circle – Nakashima targets a random player with a purple AOE that causes reduction in movement speed, leaving players vulnerable to Spectral Waves. If the player tries to leave the circle and touches the white edge, they will be stunned.
These two mechanics can combine for some deadly damage. Make sure you are aware of your positioning and if targeted, stay inside the circle and try to avoid the Spectral Waves. You can try to jump or dodge out of the circle but this will most likely lead to you being stunned, so it’s easier to try to survive inside.
Once Nakashima is dead, collect your loot (and the lore page behind you) and head to the hallway to your right. There you will find – you guessed it – more Lost and another Withered Nest. Clear the room and move to the next respawn point and open the door (using the Azoth staff) to reach the final room in the expedition.
Simon Gray Boss Guide
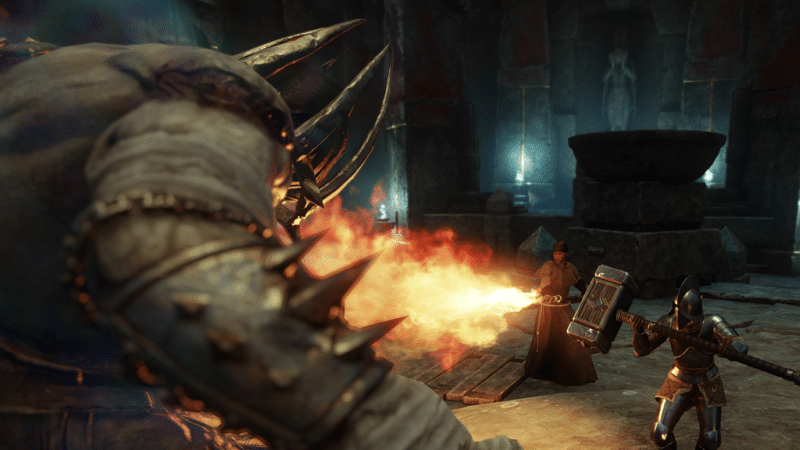
Simone Grey will use the following abilities:
Corrupted Vomit – Boss vomits AOE poison onto nearby players
Charge – Simon Charges a nearby player knocking them down
Simon Grey also continues to spawn in waves of three Lost Excavation workers. These Workers can drink the Vomit of Simon Grey and become corrupted.
In order to defeat Simon Grey, the ads that he spawns should be taunted by tank, or burned down as quickly as possible by your DPS in order to prevent your healer from taking aggro. Once the ads are taken care of you should then focus all of the damage back on the boss. Continue this pattern until Simon Grey is defeated. Once defeated make sure you grab the chest next to the portal. The Expedition is then complete, and can then exit the Expedition via the portal.
New World Amrine Excavation Expedition Guide
That does it for Amrine Excavation Expedition Guide. For more on how to complete the mutated version of the Amrine Excavation Expedition Guide, check out our Expedition Mutation Guide. For more New World Aeternum guides be sure to check our comprehensive guide library!