
Welcome to our Underground Cave of Destruction Guide for Throne and Liberty. In this guide, we’ll cover the key sections of this particular Paola’s Dimension Dungeon – including bosses and their mechanics.
Drops


Other Drops (Materials)
- Precious Rubrix, Stalon, Emeret, Marind, Ore
- Precious Polished Crystal
- Rare Polished Stone
- Ant Wings and Mana Blood
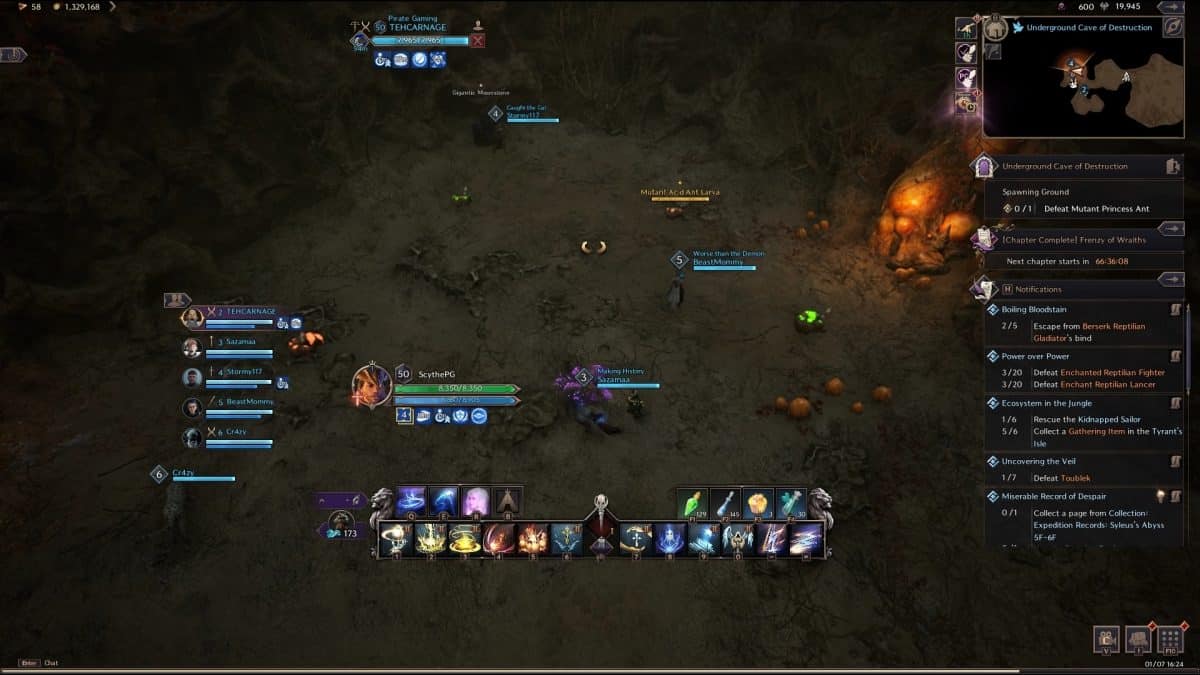
First Room
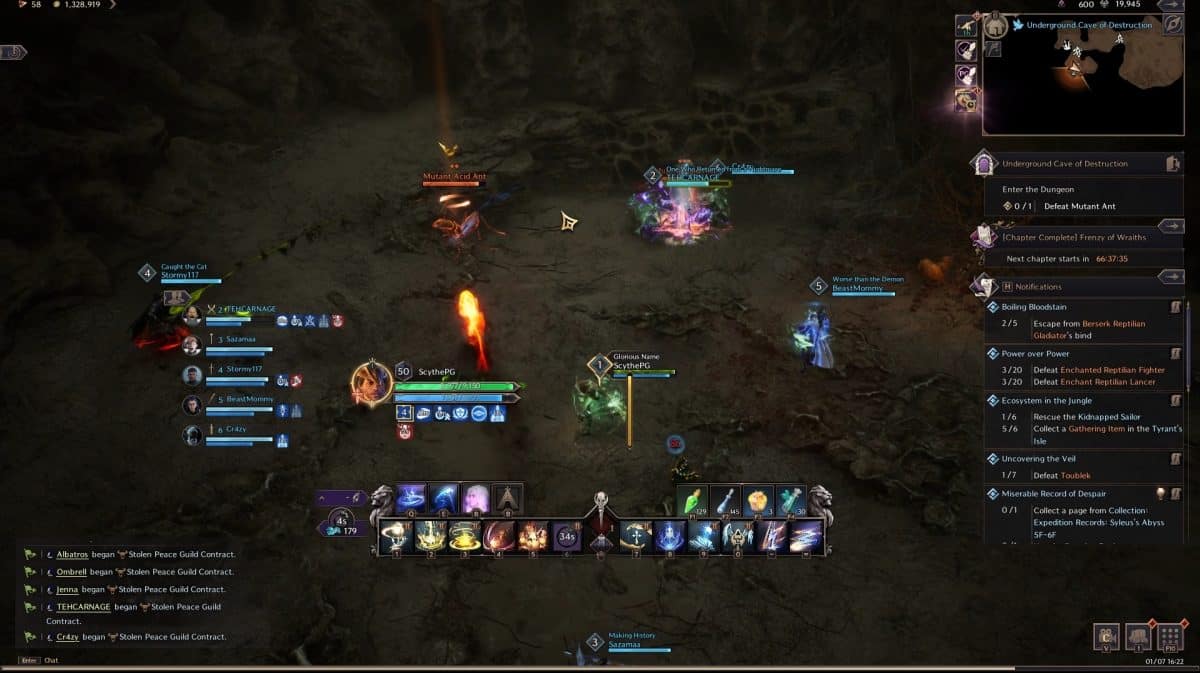
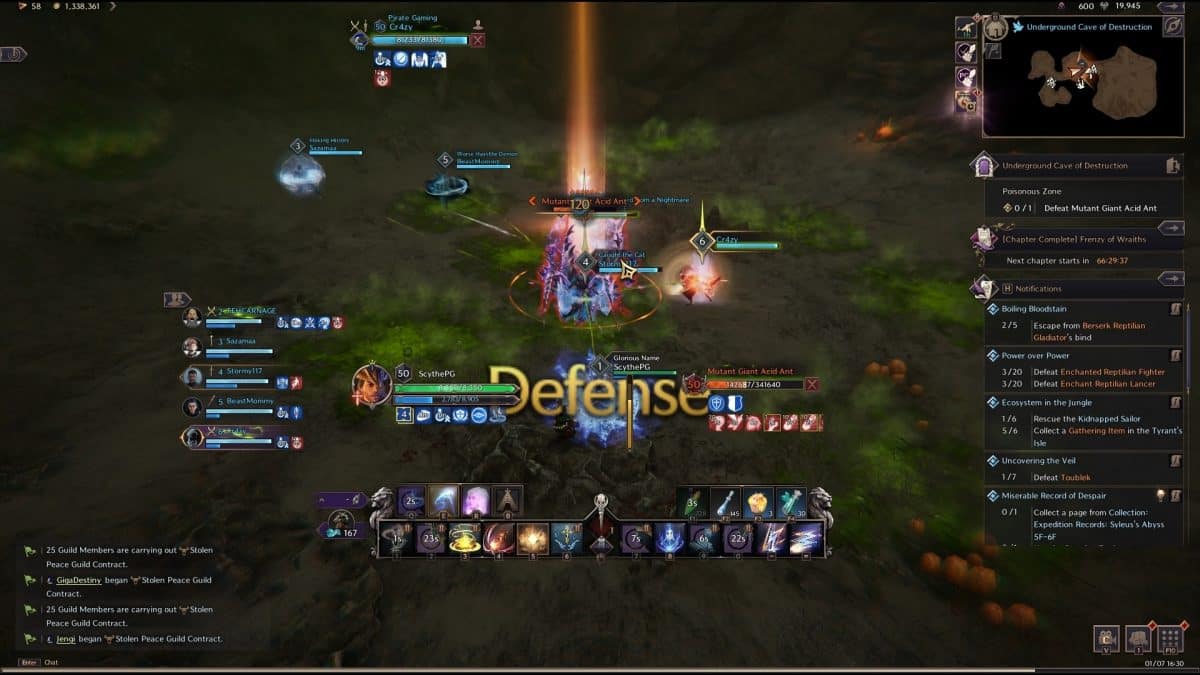
The first room of the dungeon contains nothing too special. As you portal into the room, you’ll be met with a few Acid Ants. As a result, clear the Ants and each new wave that spawns in. One key monster to watch out for throughout this dungeon is a huge green Ant that runs at you, it’ll explode so make sure to hold the block button!
Mini-boss 1: The Princess Ant
After clearing the first room, there is a camp fire you can use to replenish lost health and mana. Just before the first mini-boss of the dungeon, you’ll be met with several Larva to kill. However, the Larva after taking damage start a timer that hatches them at the end. As a result, it is a good idea to focus on the Acid Ant Larva, Charging Ant and Solider Ant Larva. Once a few waves have been cleared, the Mutant Ant Princess spawns.
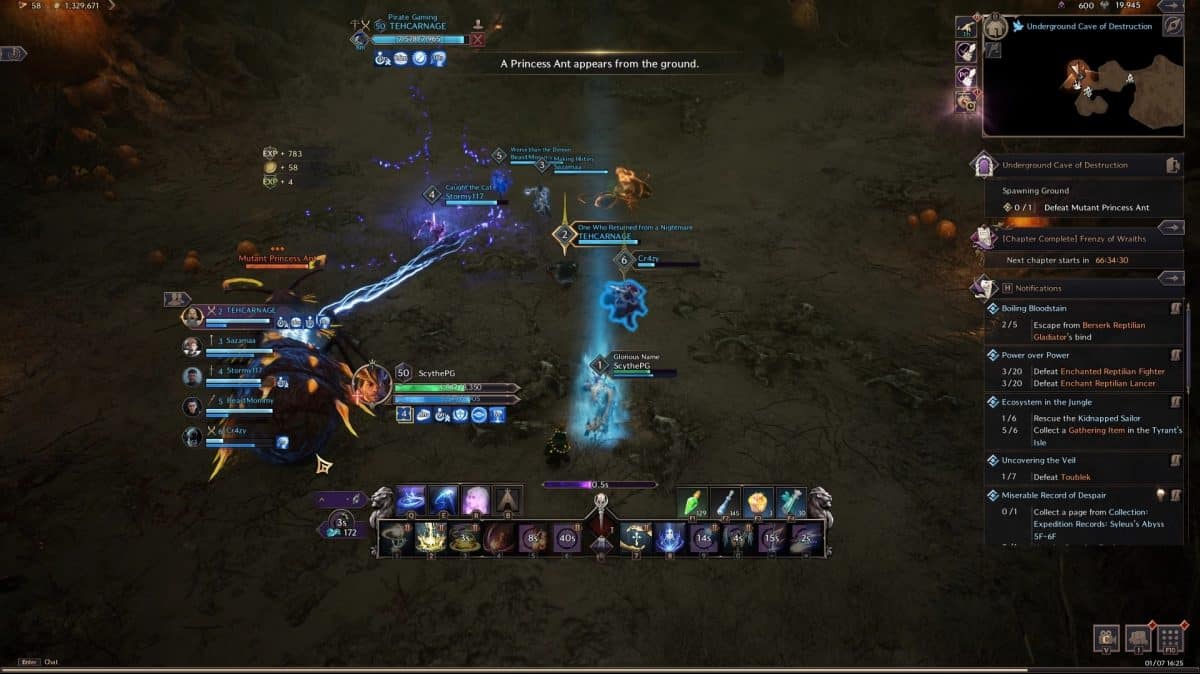
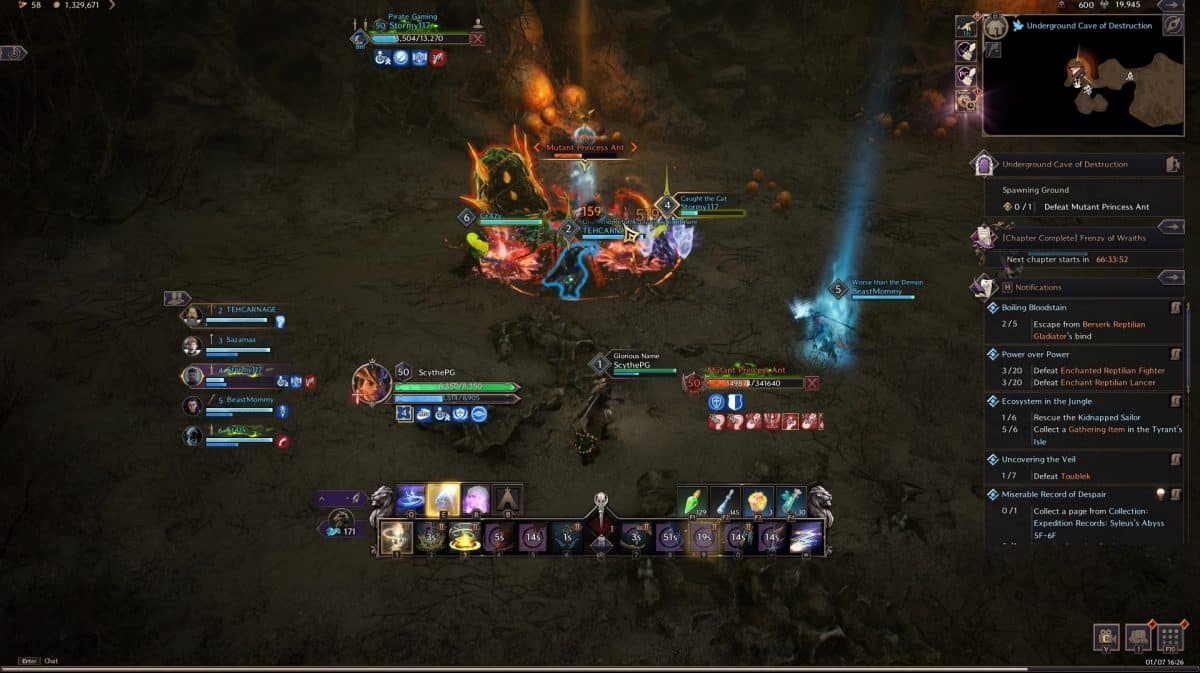
The Princess Ant itself doesn’t have too many attacks to be afraid of. The Tank of your party is required to block Fury Attacks (indicated by the purple circles) and also needs to watch out for moments the Ant cries out. If the Ant Princess cries out, it means it is about to summon some Larvae. Stunning the Princess prevents this mechanic from happening – so stay sharp! Once the Princess is below 50% HP, players will receive an explosive Larva that attaches to them. Over time, this Larva explodes dealing significant damage and paralyzes the player(s). However, teammates can run toward each other and “exchange” Larva, turning them bright blue. If this is done correctly, players will not longer be affected by this mechanic.
Second Room
After the Ant Princess is defeated, head through to the next room after healing up. This room has several small phases, followed by the second mini-boss of the dungeon. For this room, you’ll encounter the following:
- A few poison sacs, that when destroyed activate the room
- Throughout this entire room, periodic waves of Explosive Ants will spawn, be aware!
- Once the first few Ants are cleared, a Giant Acid Ant Egg spawns in the center of the room
- Attached to the Giant Acid Ant Egg is three Poisonous Worker Ants, all three Ants must be killed before you can proceed (whichever player has aggro MUST block – the damage output is very high)
- After killing the Worker Ants, destroy the Giant Acid Ant Egg and begin the second mini-boss.
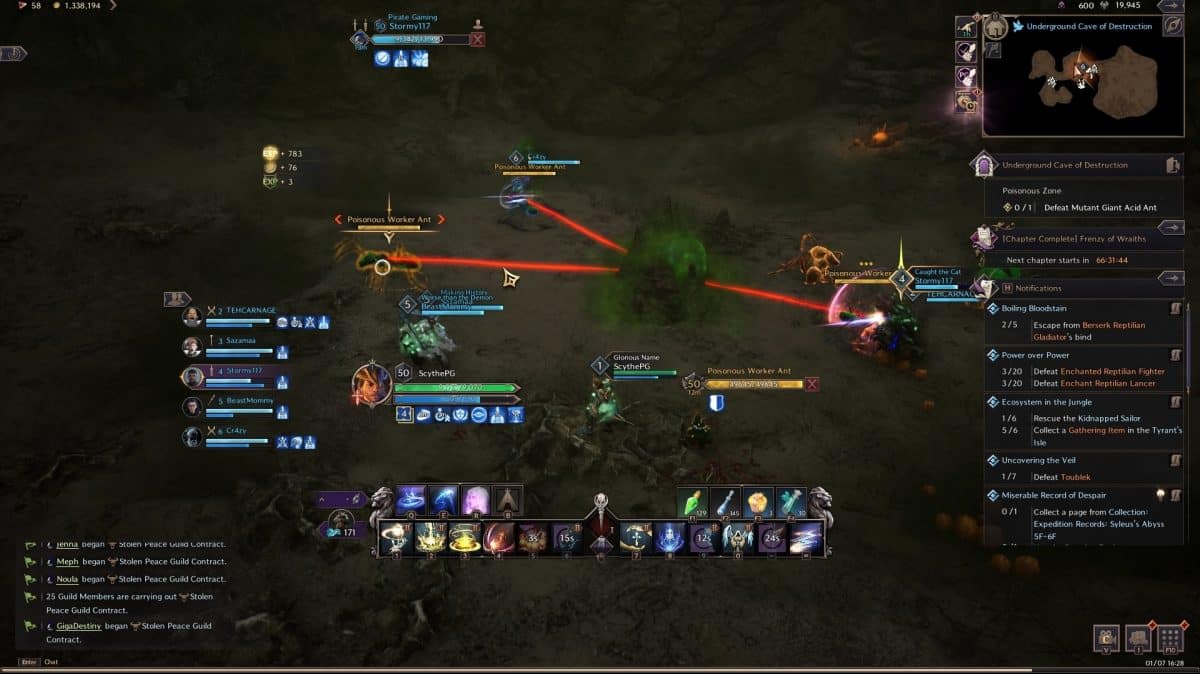
Mini-Boss 2: Giant Acid Ant
Much like other rooms, every player still has to remain aware of the Explosive Ants that spawn. The Giant Acid Ant spews poison to both ranged and melee range players. As a result, it is sometimes better to move the boss out of the poison zones where possible. The Boss is fairly easy to damage and tank with a couple of blockable skills. Its main mechanic is shown when the Giant Acid Ant screams out. After one more standard attack, the Ant will charge a Fury Attack (indicated by the purple circle) – this must be blocked. If you fail to block this attack, a vine will grip you and pull you into the boss and poison zones surrounding it.
Now that the Giant Acid Ant is dead, head over to the final camp fire to heal up and proceed into the final boss room.
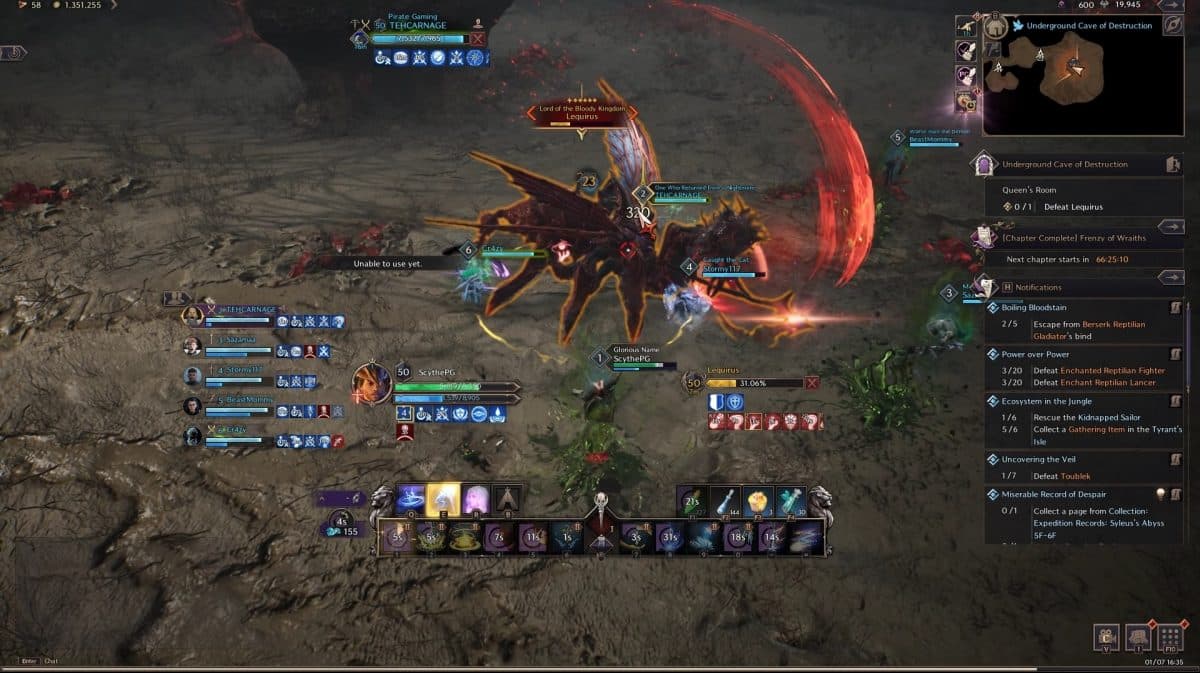
Final Boss: Lequirus
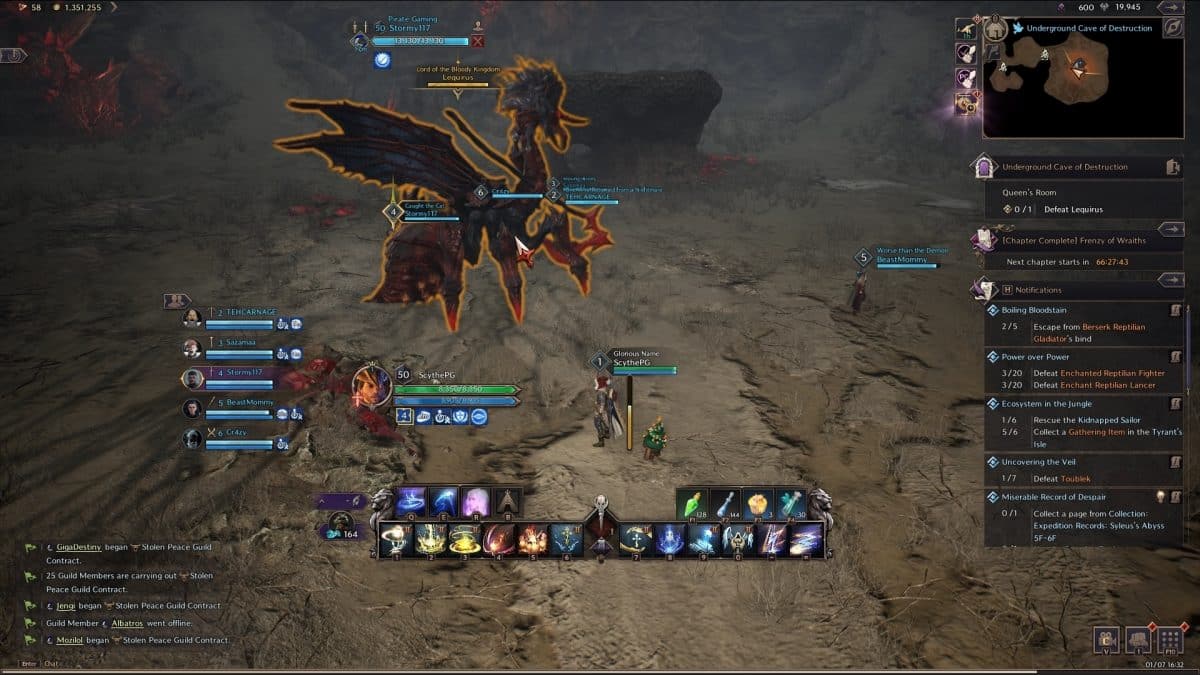
To start this encounter, you’ll see three raised platforms. Each platform has its own Poison Sac at the top that needs to be popped. Once this is done, Lequirus descends and the fight starts!
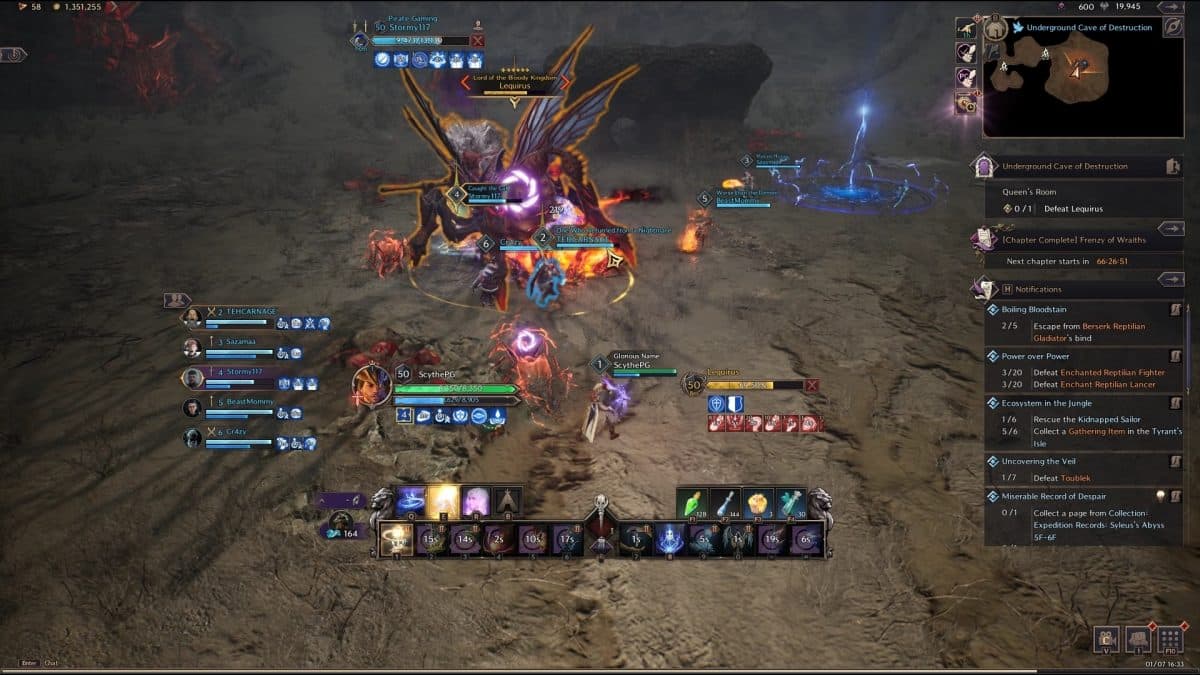
During Lequirus’s normal phase, most players will not take much, if any damage. However, there is a couple of things to be aware of:
- When Lequirus’s axe glows red, this means a tank-buster combo is coming. For Wand players, this is important to keep note of so you know when to heal your tank up. As for the tank players, being aware and throwing up any potions you can helps. It should be noted that the tank-buster attack always deals a % of maximum health, making it always a serious threat.
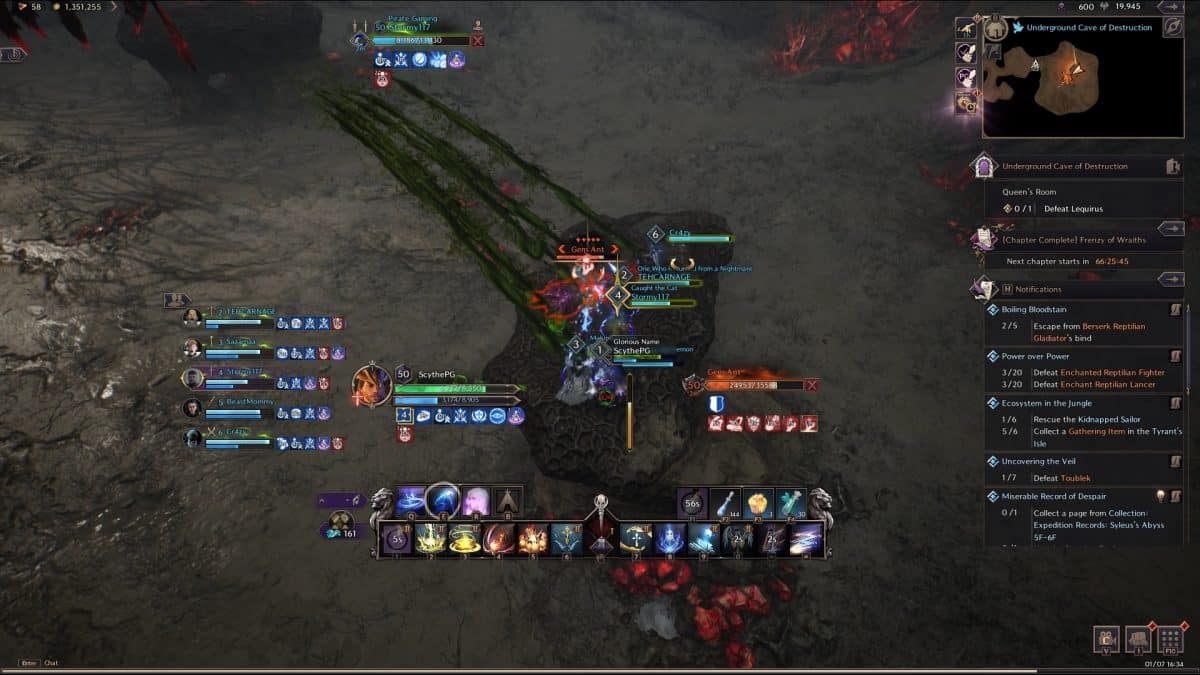
- A Magic Circle will appear mid-way through the phase, either colored blue or red. With this circle, color-coded Ants spawn too in two waves.
- During the second wave of color-coded Ants spawning, select and kill an Ant that matches the color of the Magic Circle next to your tank
- The dead Ant drops a buff on the ground in a circle, everyone inside the circle will receive the buff
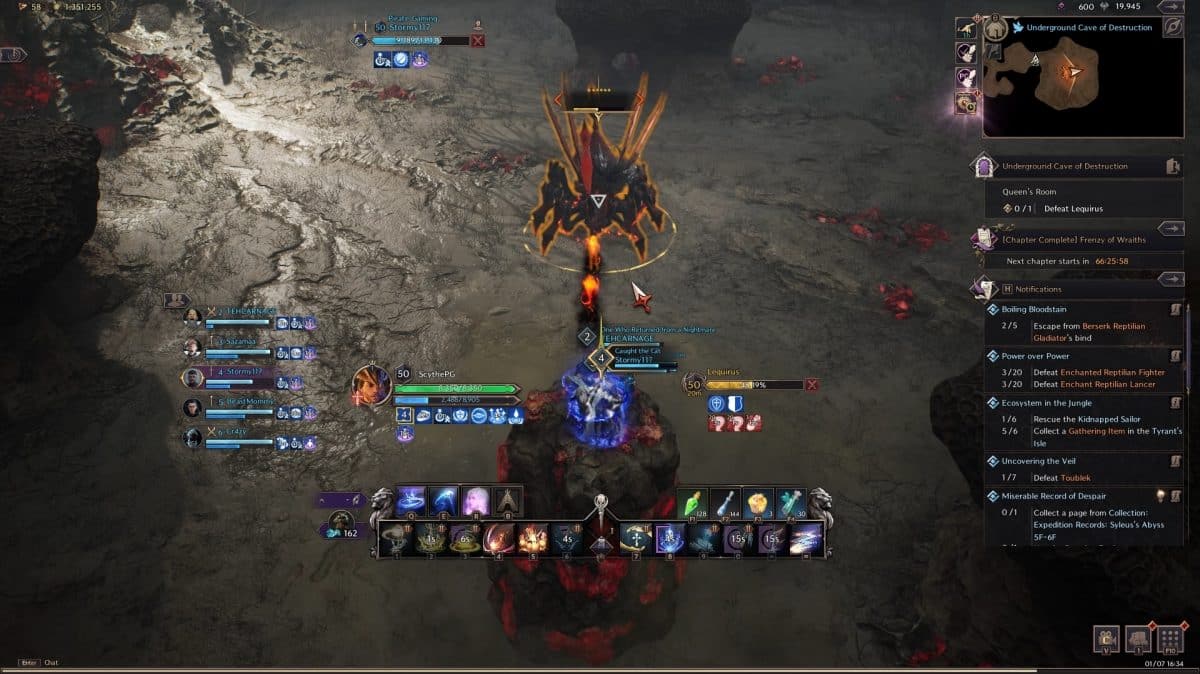
- Once Lequirus uses their tank-buster one more time, it yells out in anger. This is the queue for everyone to run into the Magic Circle
- The Magic Circle summons a Crystal Pillar that brings the party up above the boss
- If you do not reach this pillar or one of the three platforms in time, you will die instantly to a wipe mechanic
Phase 2
If you have a high enough range, you can also continue firing attacks from the pillar. This pillar if successfully used, grants the party a 35% damage buff for 90 seconds.
After the pillar stops rising, the boss uses the wipe mechanic and the pillar breaks. During this time, a Gem Ant spawns in one of the three platforms in the arena. The next objective is to have the entire party fly towards the Ant to kill it as quickly as possible. It is incredibly important for the tanking player to block the Ant to minimize poison stacks dealt. Kill the Ant and jump back down to where the boss is going to land and repeat.
Below 50%
The moment Lequirus drops below 50% HP it’ll introduce another mechanic – similar to the Larva mechanic earlier in the dungeon. All 6 players have the task of trading Larva with each other to prevent being airborne due to the mechanic. Between the 50% HP mechanic and the original phase, rinse and repeat until Lequirus is down!
Challenge Mode
In Throne and Liberty’s Tier 1 Dungeons, you have access to two modes. The first mode is your “Basic” level of dungeon difficulty. However, an additional mode can be accessed – this is the Challenge mode difficulty.
Challenge mode in Tier 1 Dungeons act as a slight difficulty modifier that tasks you with completing a tougher dungeon, but with slightly better reward. For example, currently in the Challenge Mode dungeons, the only change to the Underground Cave of Destruction dungeon is an increase in mob health and an increase in damage taken. As a result of these minor changes, however, it means you have to be careful of your mechanical failures and the fight durations themselves.
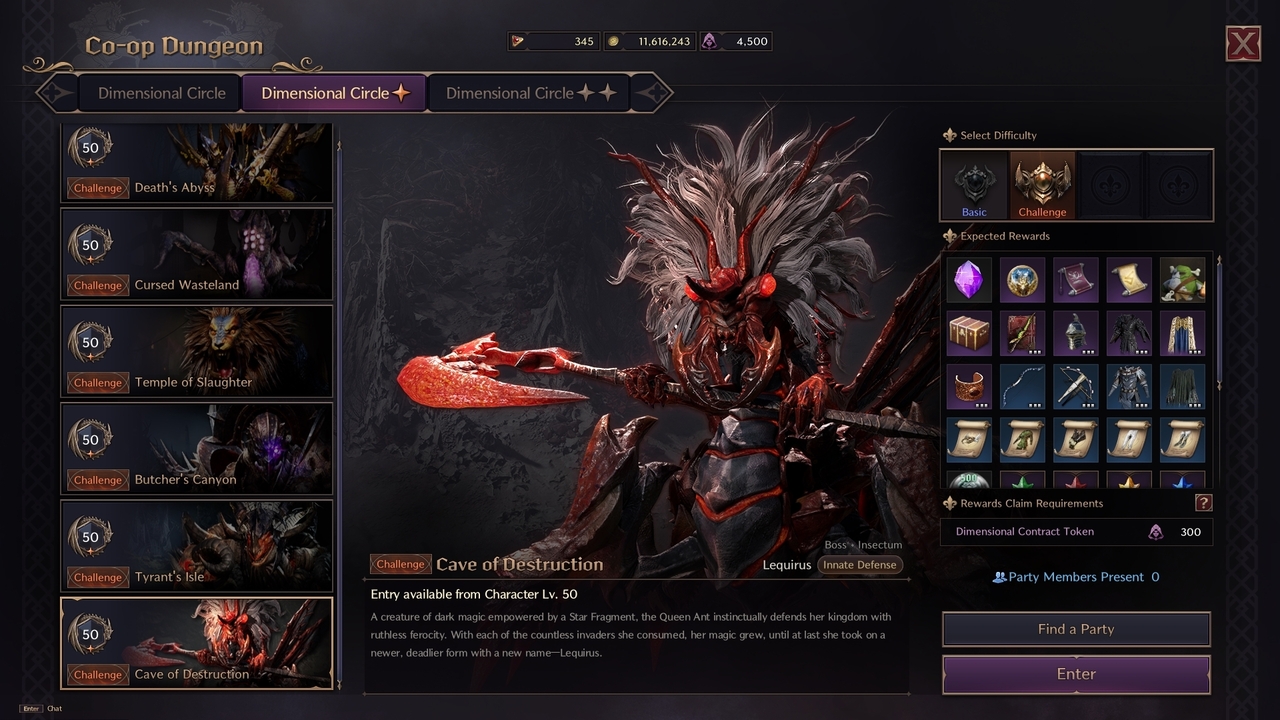
At the end of each Challenge mode Tier 1 Dungeon, on top of the usual reward you’ll have a chance of looting from the chest, you’ll gain a certain amount of “Almighty Parchment”. Almighty Parchment in Throne and Liberty is used to create Omnipotence Skill Books. The Omnipotence Skill Books serve two purposes:
- Used to grow and upgrade your Resistance Skill (for example, the Staff’s Inferno Meteor)
- Usable in any Epic-grade Skill growth
As a result, eventually switching up to Challenge difficulty is 100% worth it to gain the parchment to max out your skills. It is also worth noting you also gain a small amount of progress towards earning a piece of Tier 2 gear over time, too.
Throne and Liberty Underground Cave of Destruction Guide Conclusion
That concludes our Underground Cave of Destruction Guide for Throne and Liberty. For more information on Throne and Liberty, check out our official Home page!