
Welcome to our Temple of Slaughter guide for Throne and Liberty. In this guide, we’ll take you through everything you need to know to successfully run this difficult dungeon. This dungeon requires level 50 and a very coordinated party!
Drops


Other Drops (Materials)
- Precious Rubrix, Stalon, Emeret, Marind, Ore
- Precious Polished Crystal
- Rare Polished Stone
- Beasts Fang and Mana Blood
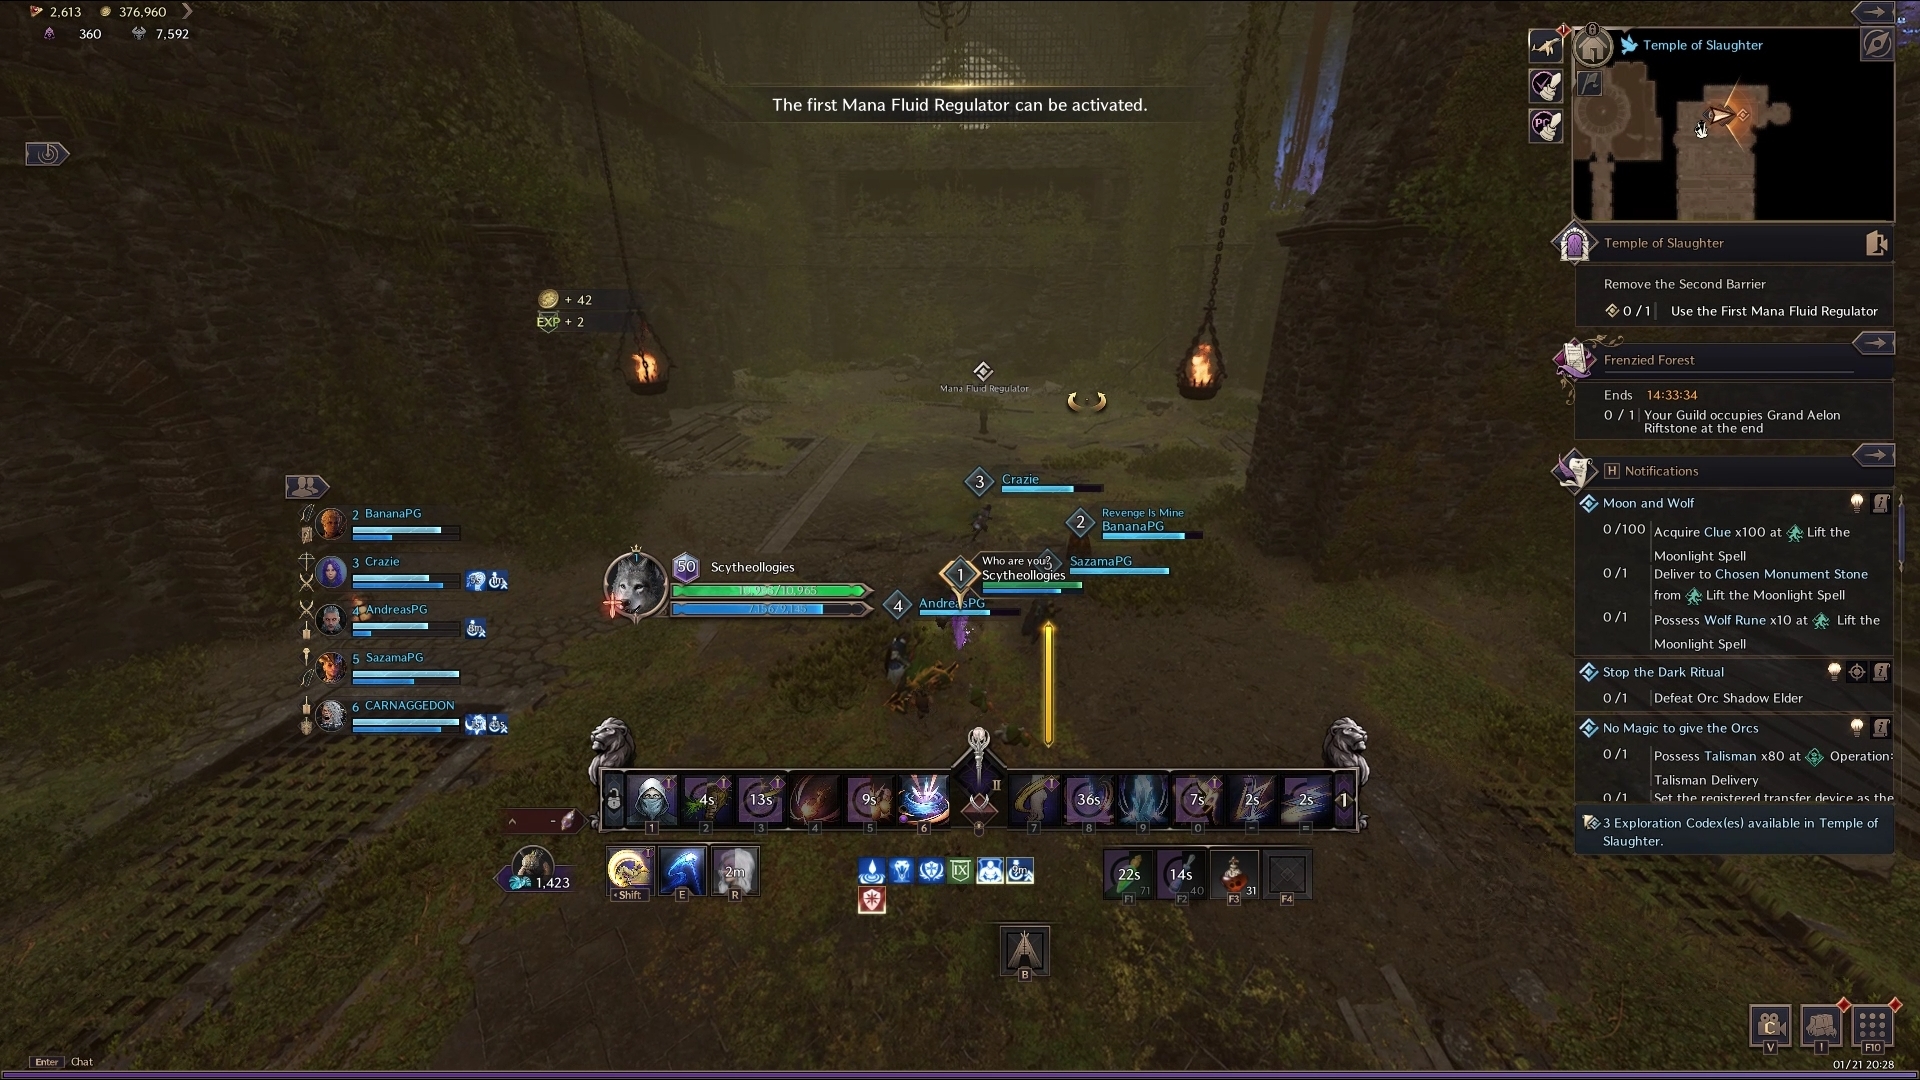
First Section & Mini-Boss
The first section is simple, push through the dungeon and kill every mob in each lower section to unlock the Mana Fluid Regulator. The Mana Fluid Regulator raises the water level of each section so you can reach the next. Repeat this until you meet the first mini-boss – Dark Enforcer.
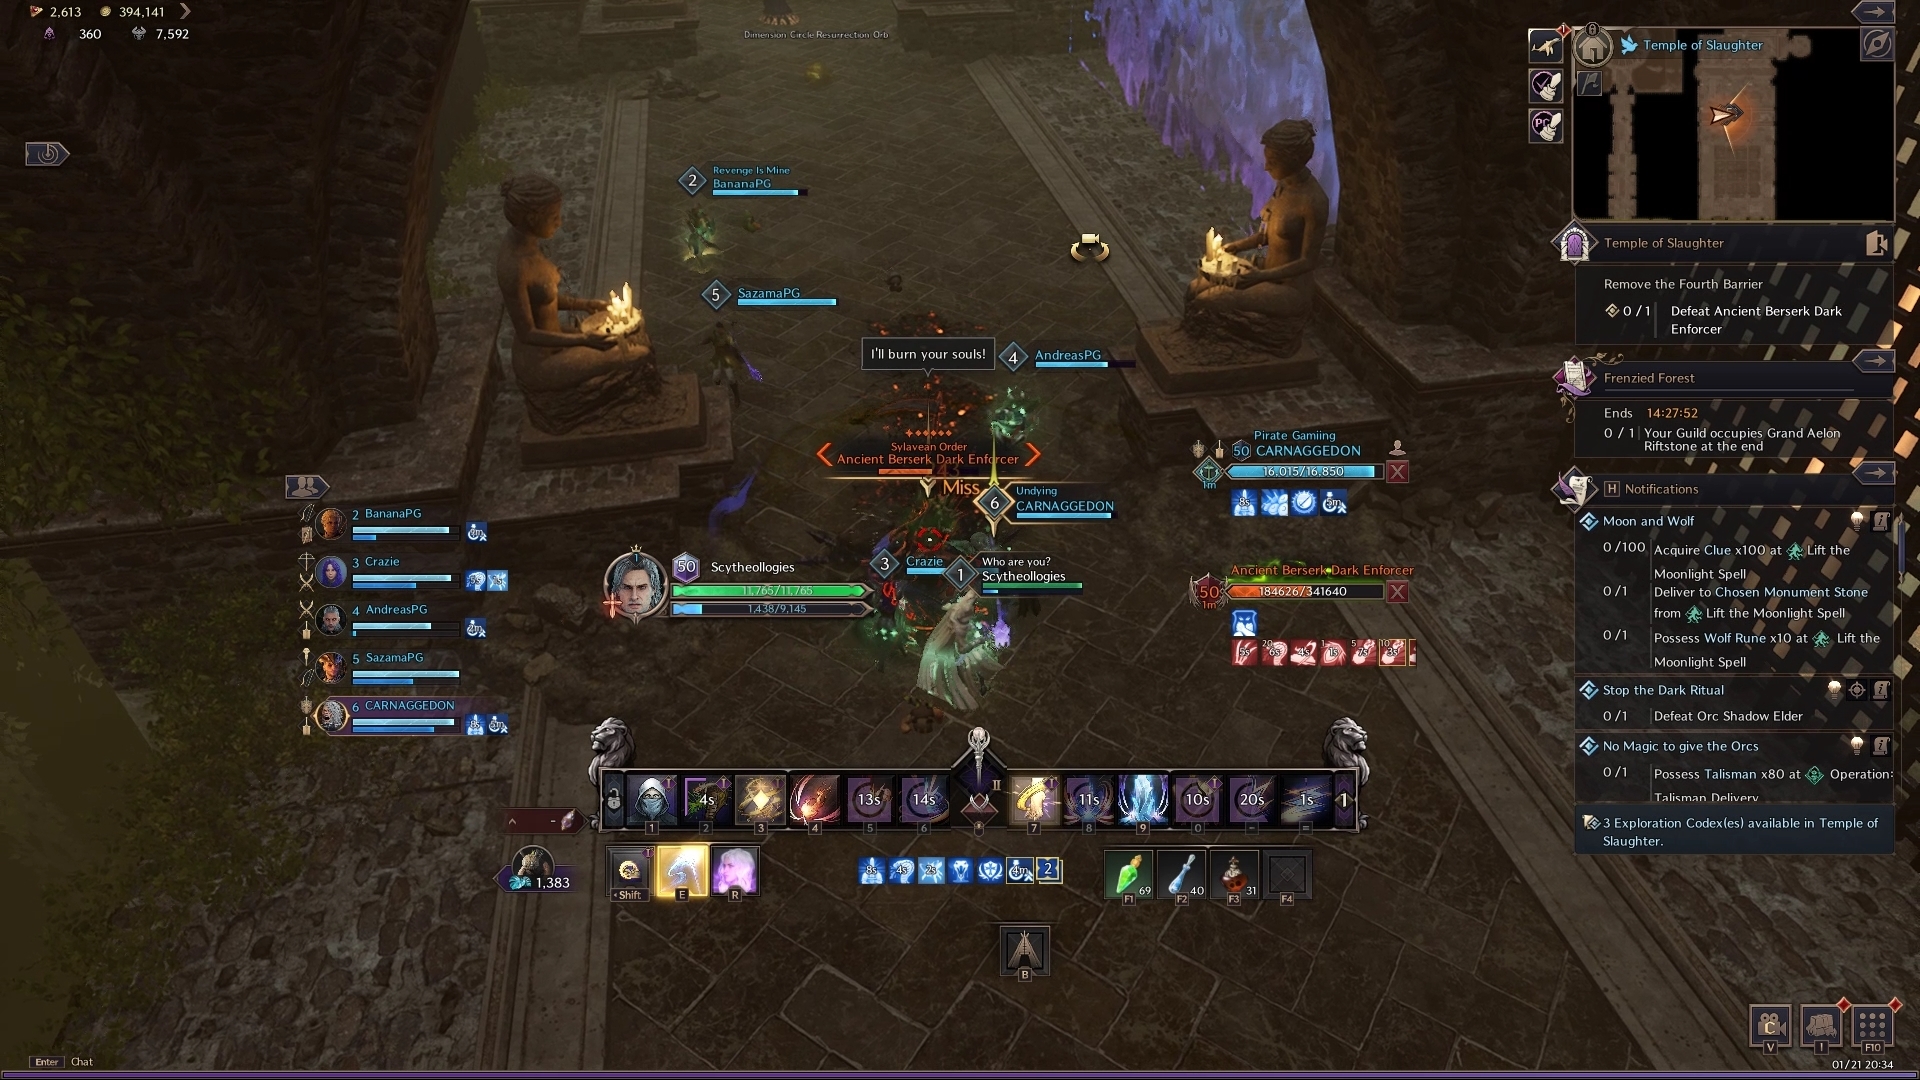
Berserk Dark Enforcer
The Dark Enforcer acts essentially the same as the easier counterpart of the dungeon, Temple of Roar. The boss does standard attacks much like you’d expect from any boss, followed by a large flame AoE that applies burn stacks. To lower the burn stacks, jump into the water nearby! After the boss is dead, move onto the next section and mini-boss.
Section 2 and Mini-boss 2
The majority of this section is just large corridors full of mobs, most of which can be avoided by hugging the outer walls. Continue all the way through until you meet the final mini-boss before the main boss of the dungeon.
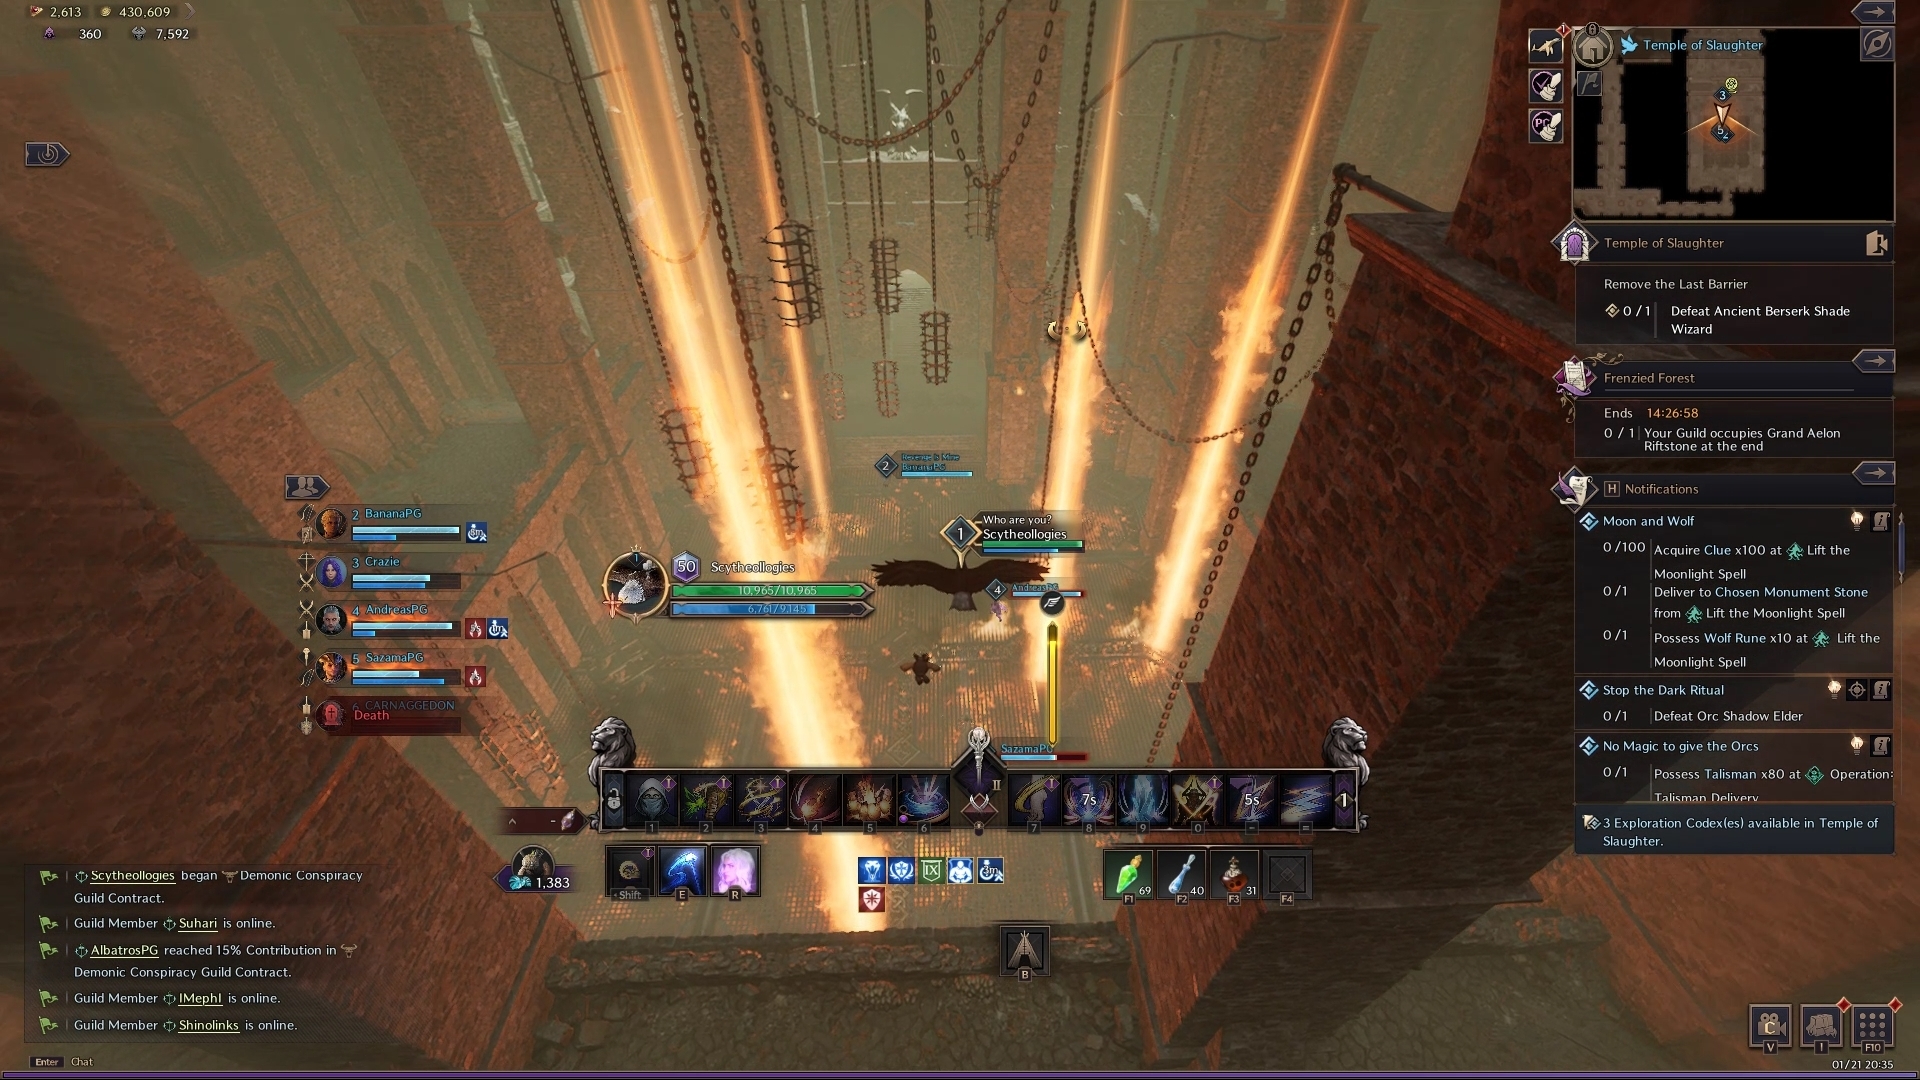
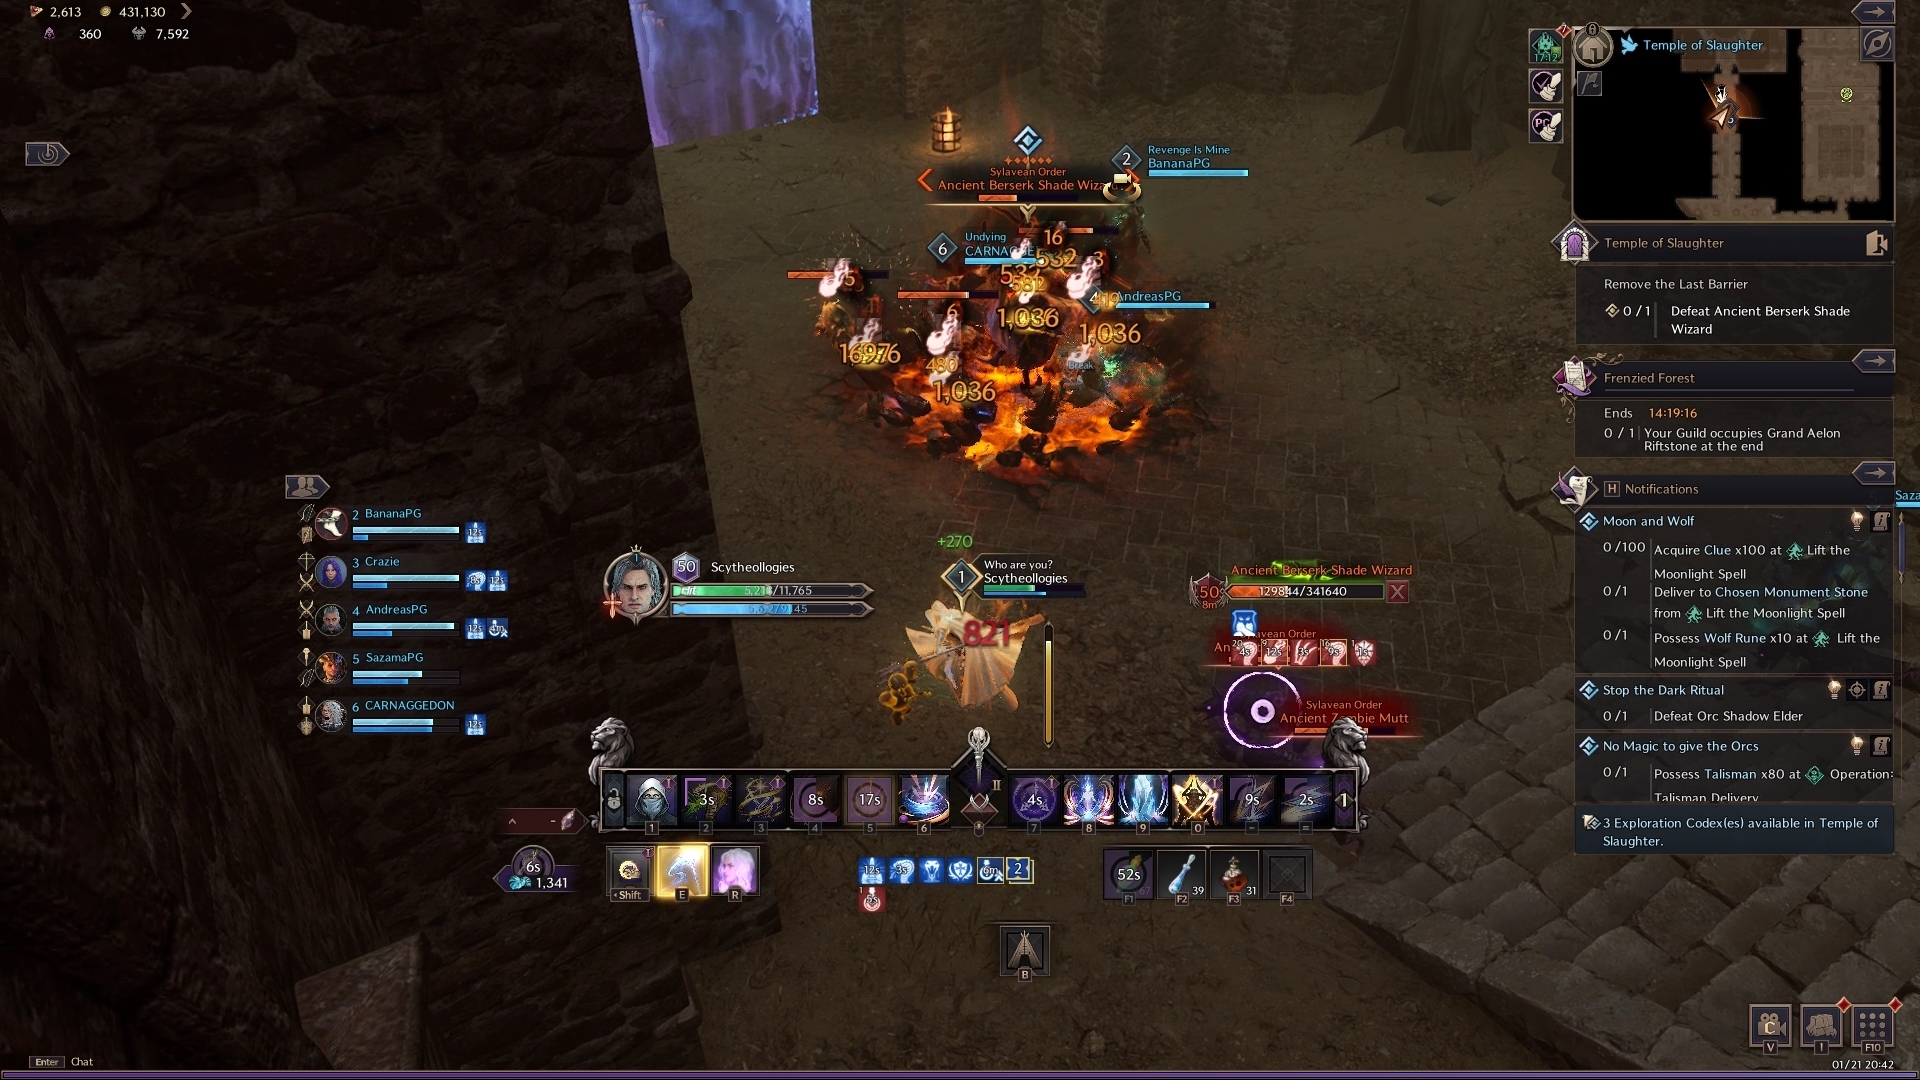
Mini-Boss 2: Berserk Shade Wizard
The Shade Wizard acts pretty much the same as the Temple of Slaughter version of the mini-boss. However, the Wizard summons a lot more Mutts than the easier counterpart which means more explosions! As a result, be careful and remember to kite the Mutts! After the boss is dead, move onto the final boss of the dungeon.
Final Boss
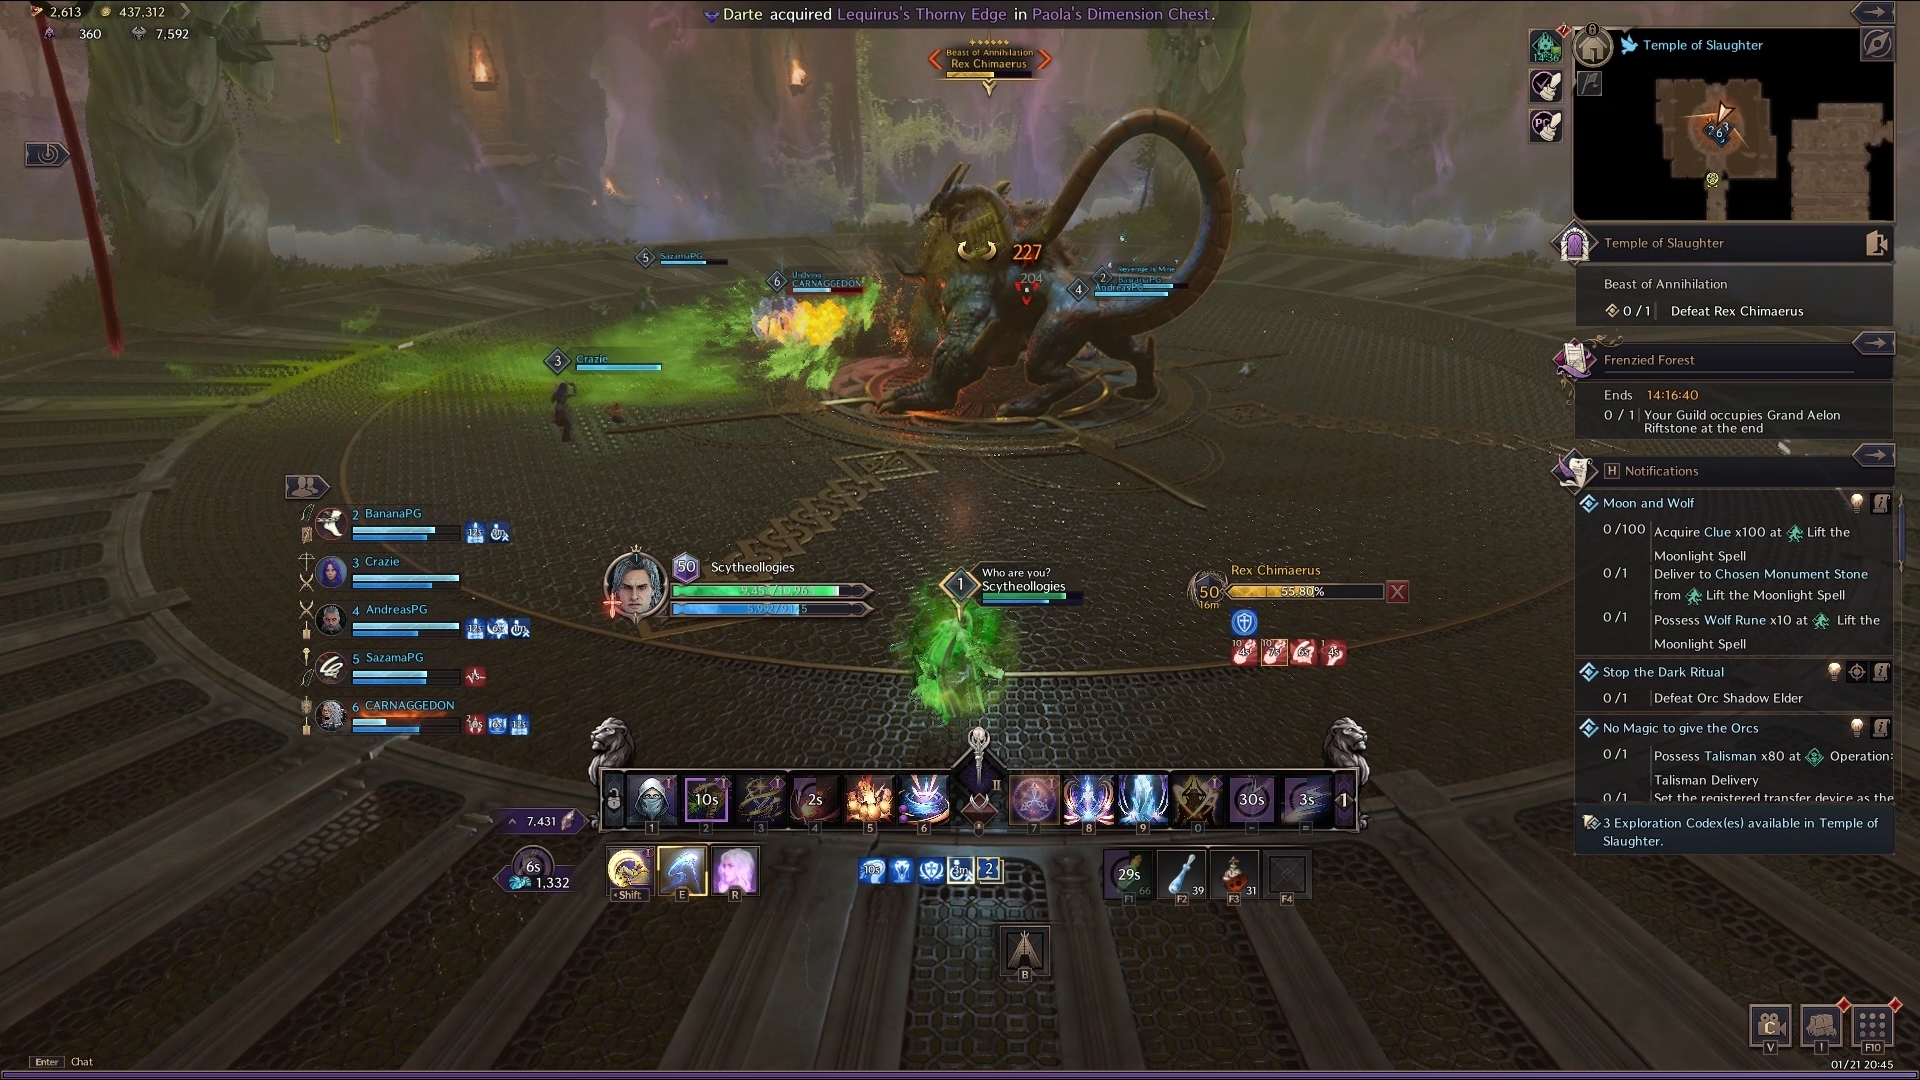
The final boss of Temple of Slaughter is the Rex Chimaerus.
Throughout the standard damage phase of the boss, there is a couple of attacks to watch out for:
- A jumping swipe attack on the player with highest threat
- Ranged poison spits that leave a puddle on the floor
- A tail-swipe if you stand behind it
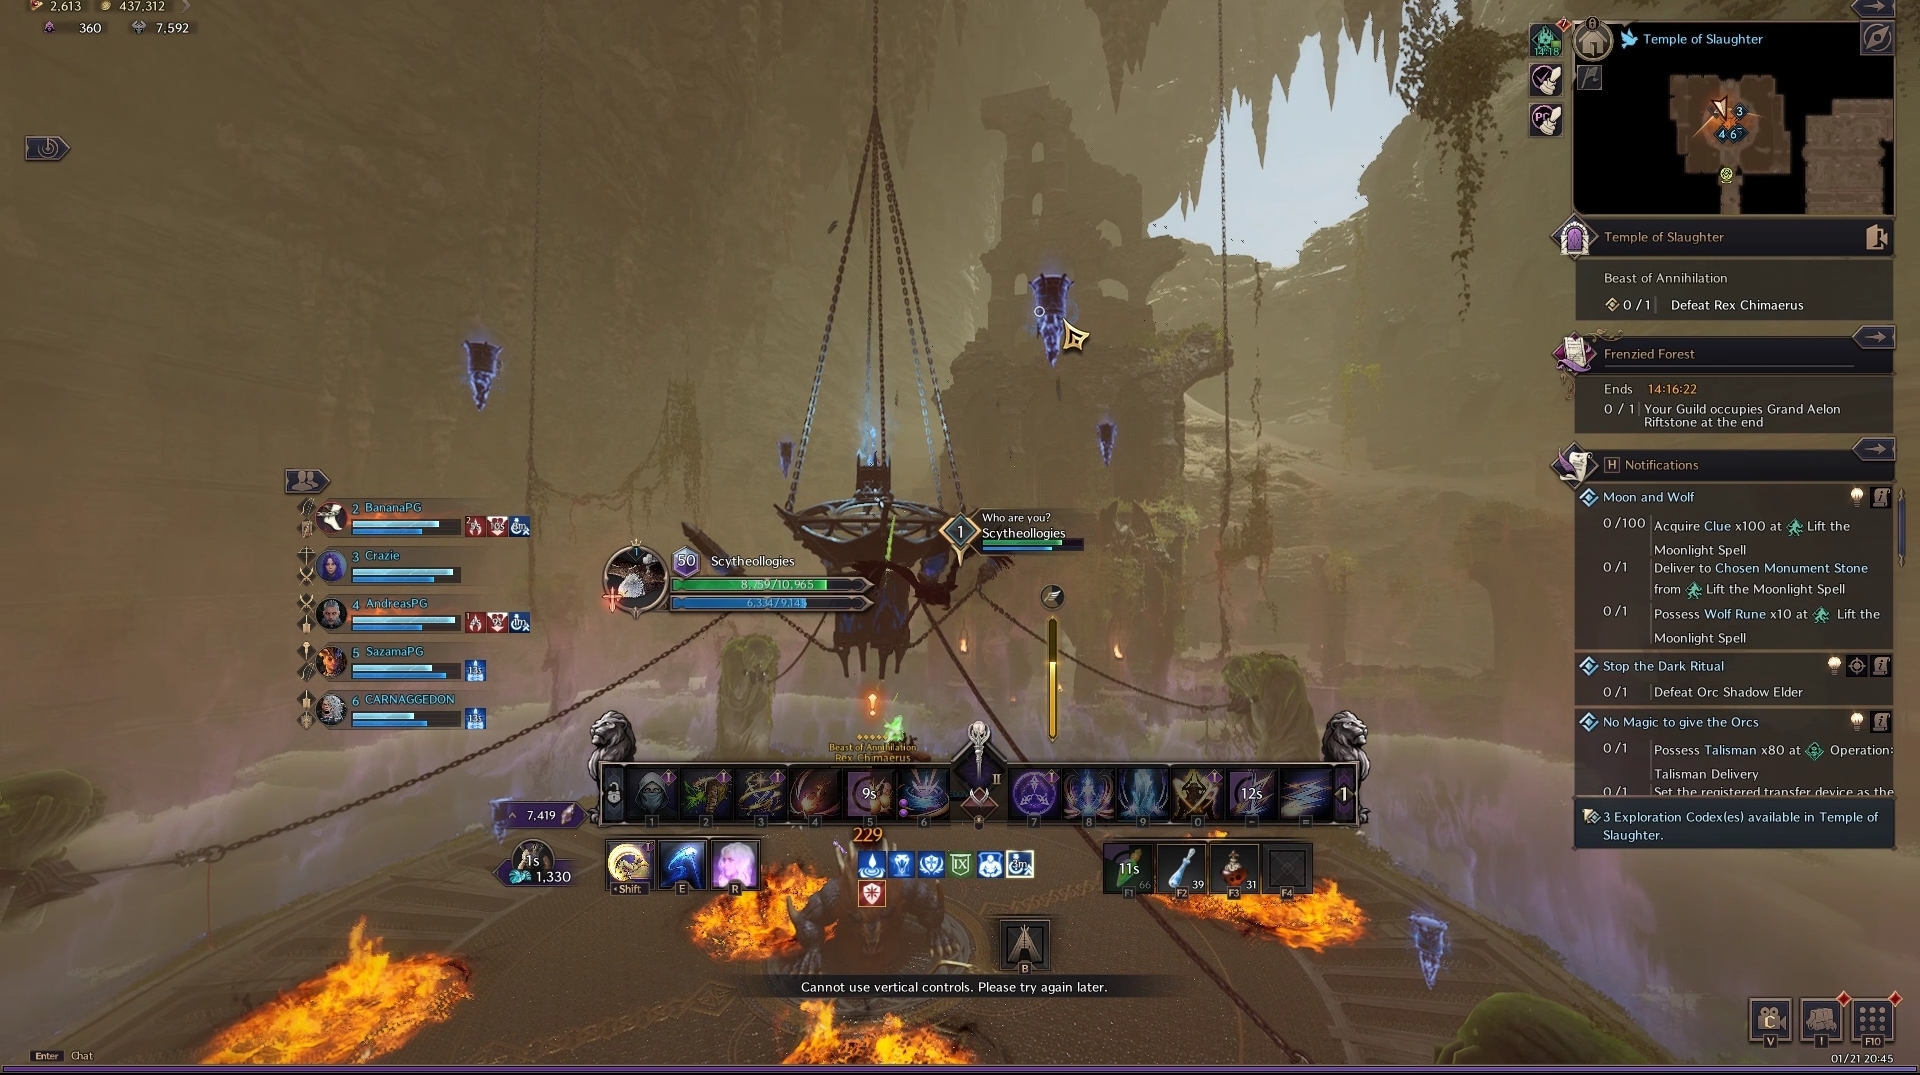
After some time within the phase, Rex Chimaerus selects a target to inject paralyzing venom into. That player has to run as far from the boss as possible and have the tank position in-between the target and the boss. King Chimaerus then unleashes three huge fireballs towards the paralyzed target alongside a huge poison spray to the right of the boss. If done correctly, the tank soaks up the damage of two fireballs with a third player intercepting the third fireball. Then the next part of the phase switch begins.
Unlike the Temple of Roar, Rex spawns in two layers of Air Pitons around the arena. One player has to use the Pitons to grapple themselves high enough to land on the platform above Rex. Once the player above has interacted with the top platform, the four chains surrounding Rex will unlock, and have your team pull the chains at the same time. As a result of pulling the chain, water douses Rex and the fight resets back to the standard phase.
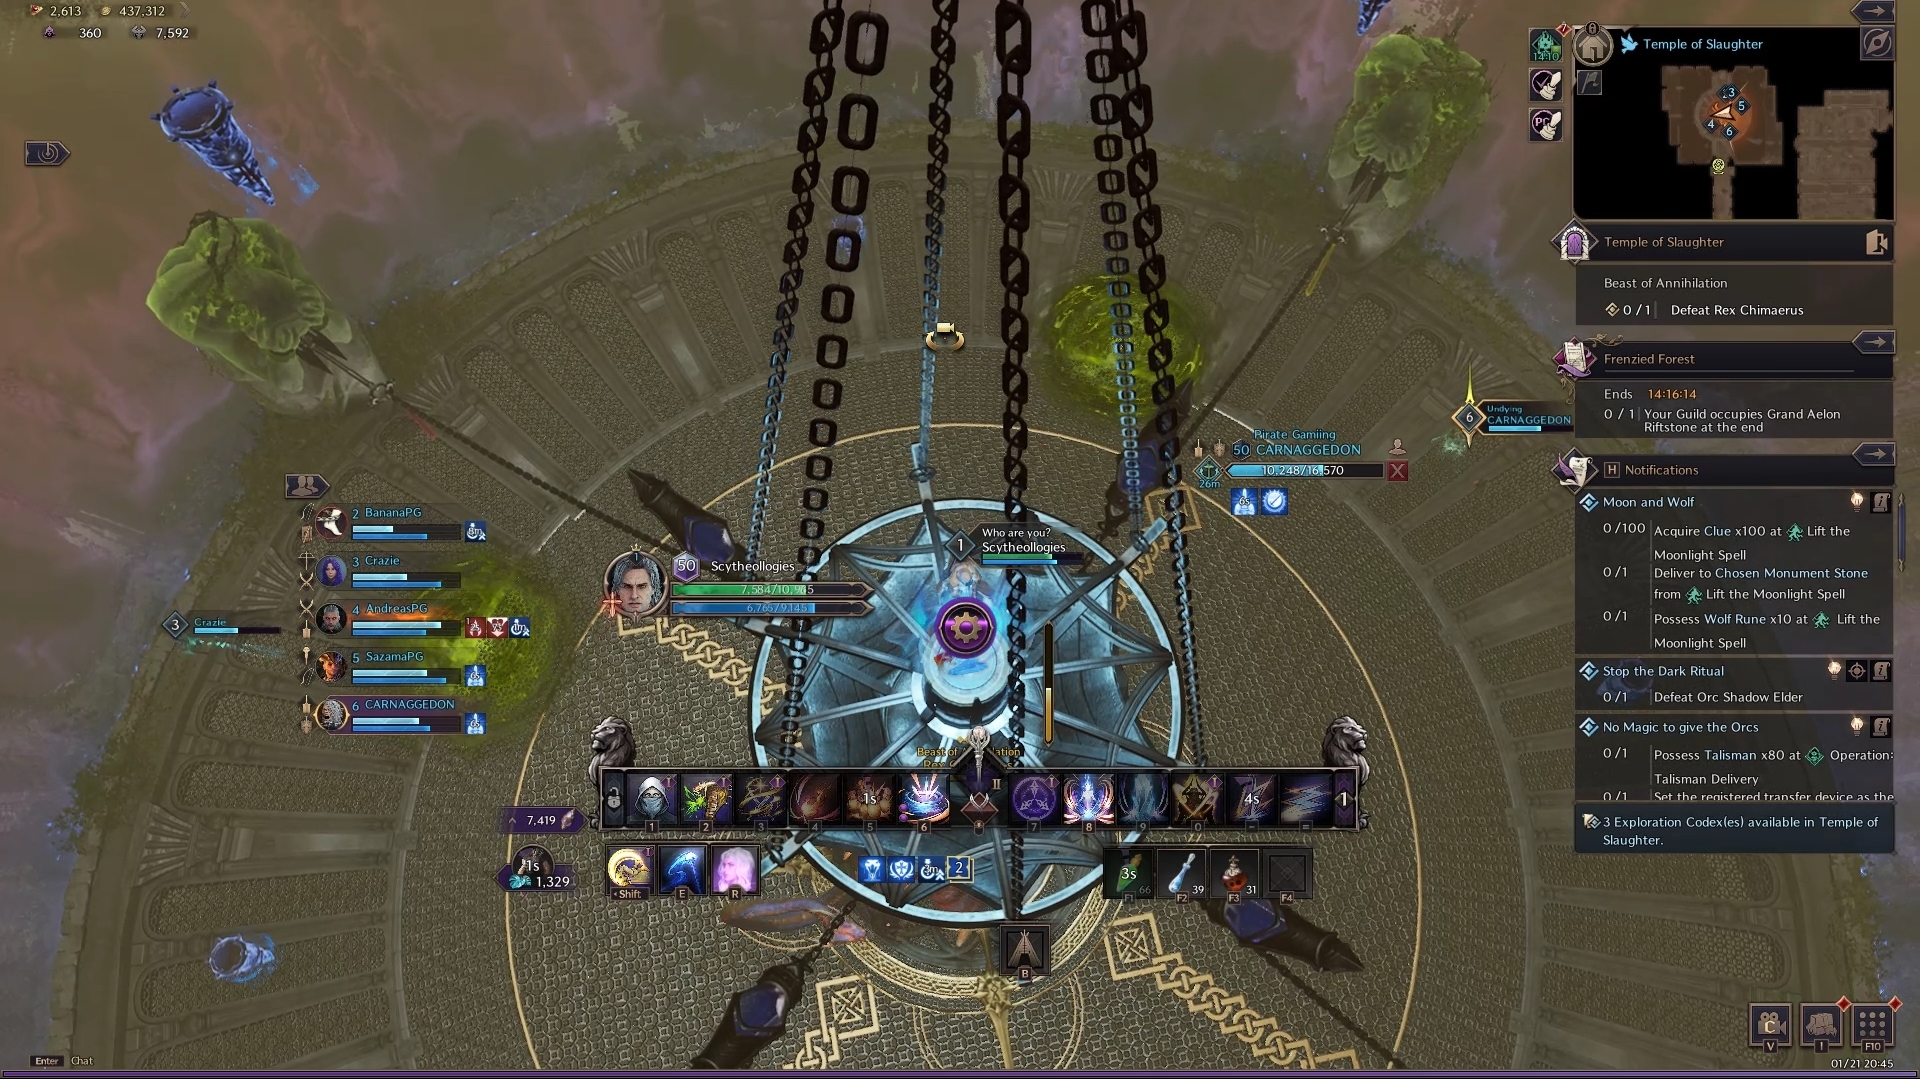
After you douse the boss, a short intermission where you can deal damage freely occurs and then the normal phases repeat until the boss is dead!
Challenge Mode
In Throne and Liberty’s Tier 1 Dungeons, you have access to two modes. The first mode is your “Basic” level of dungeon difficulty. However, an additional mode can be accessed – this is the Challenge mode difficulty.
Challenge mode in Tier 1 Dungeons act as a slight difficulty modifier that tasks you with completing a tougher dungeon, but with slightly better reward. For example, currently in the Challenge Mode dungeons, the only change to the Temple of Slaughter dungeon is an increase in mob health and an increase in damage taken. As a result of these minor changes, however, it means you have to be careful of your mechanical failures and the fight durations themselves.
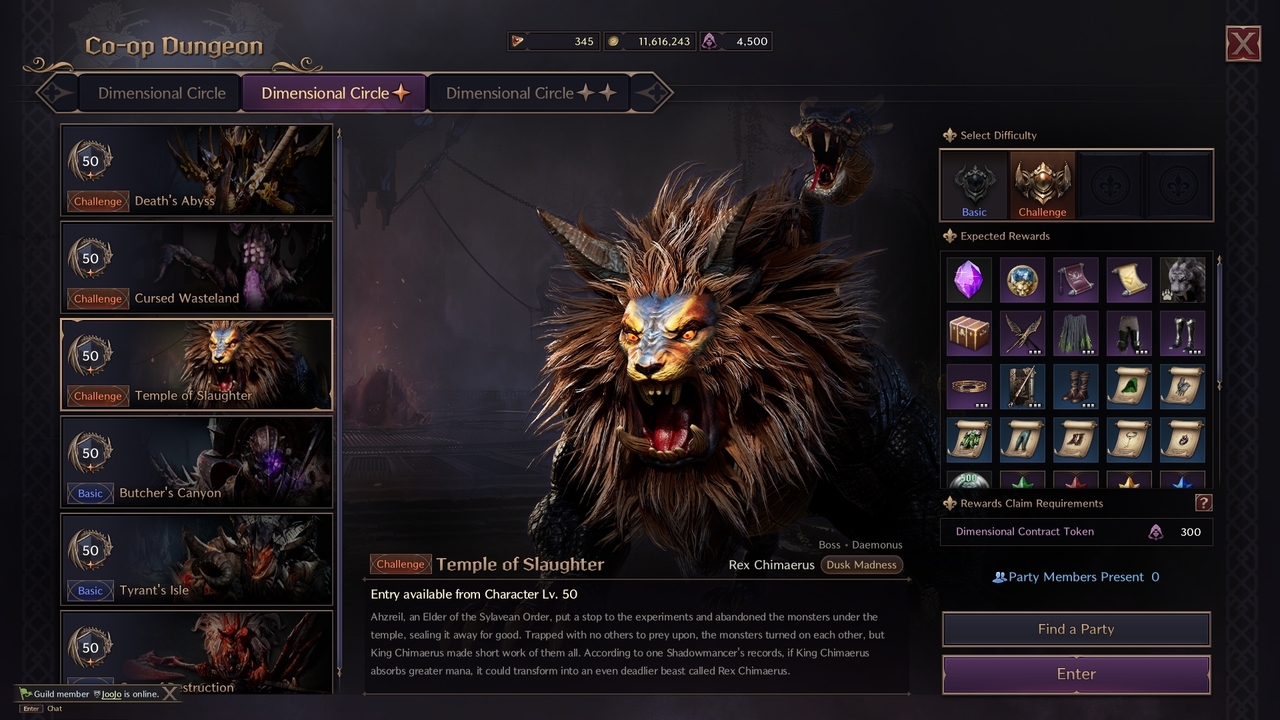
At the end of each Challenge mode Tier 1 Dungeon, on top of the usual reward you’ll have a chance of looting from the chest, you’ll gain a certain amount of “Almighty Parchment”. Almighty Parchment in Throne and Liberty is used to create Omnipotence Skill Books. The Omnipotence Skill Books serve two purposes:
- Used to grow and upgrade your Resistance Skill (for example, the Staff’s Inferno Meteor)
- Usable in any Epic-grade Skill growth
As a result, eventually switching up to Challenge difficulty is 100% worth it to gain the parchment to max out your skills. It is also worth noting you also gain a small amount of progress towards earning a piece of Tier 2 gear over time, too.
Temple of Slaughter Guide Conclusion
That concludes our Temple of Slaughter guide for Throne and Liberty. For more information on Throne and Liberty, check out our official Home page!